> ## Documentation Index
> Fetch the complete documentation index at: https://docs.nemu.com.br/llms.txt
> Use this file to discover all available pages before exploring further.
# How to migrate my ecommerce to Shopify?
> Learn how to migrate your ecommerce to Shopify ensuring that Nemu's Pixel continues to work correctly.
## Changing Nemu's Pixel for Shopify
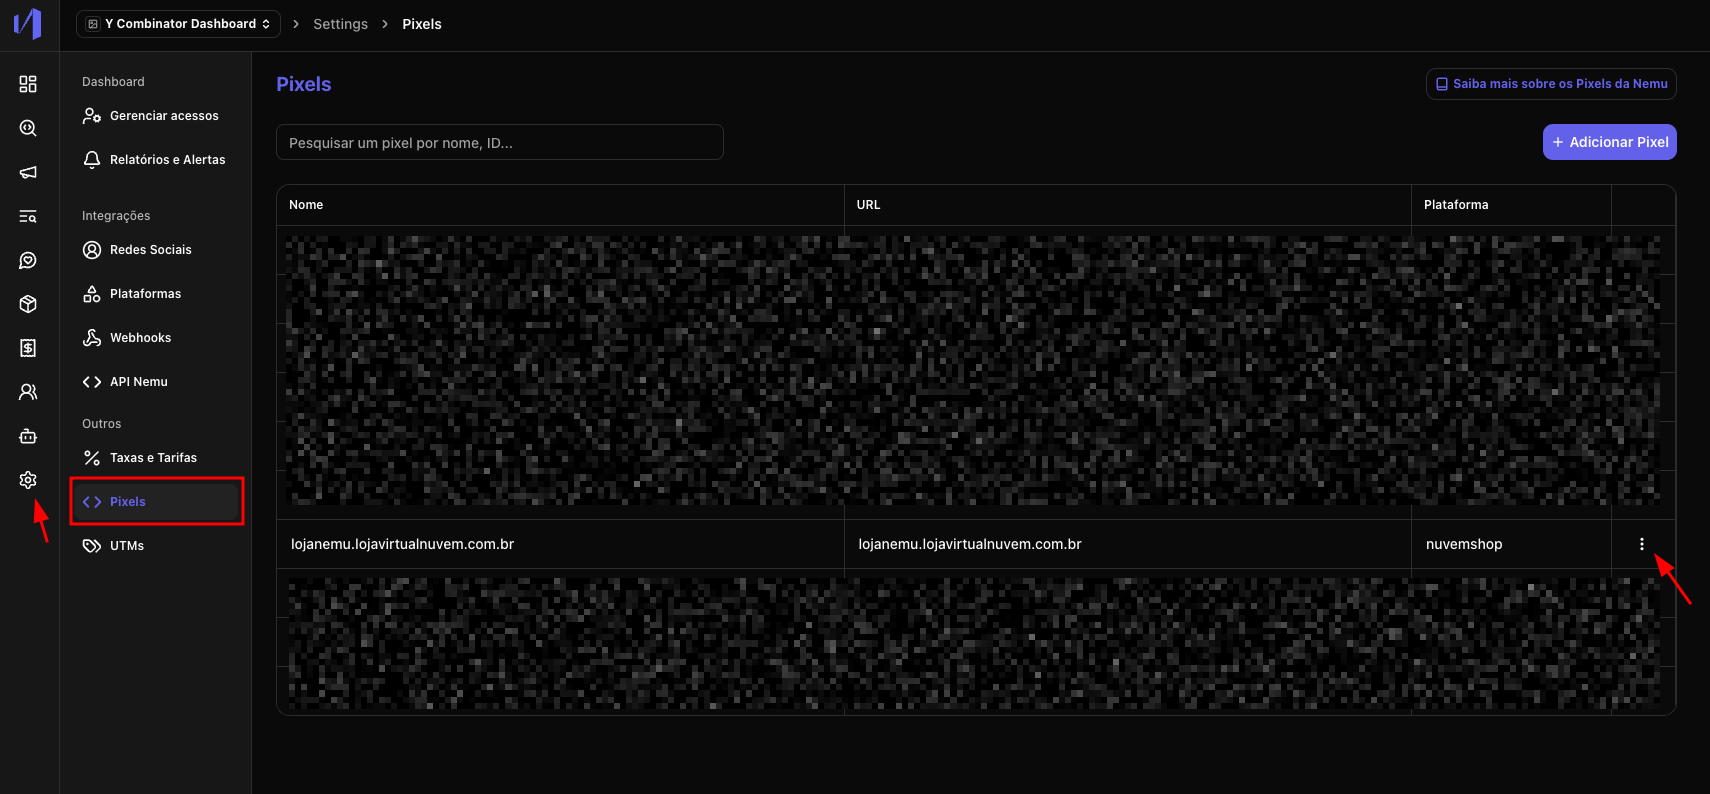
1. Access the Nemu dashboard and go to **Settings** -> **Pixel**
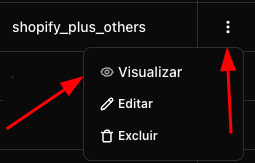
2. Click on the action button in the table to edit Nemu's Pixel.
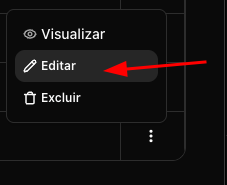
 3. Click on **Edit**
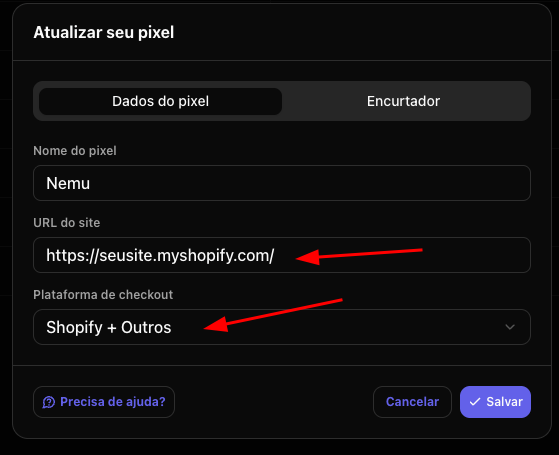
 4. Update the **Site URL** and **Checkout Platform** fields
* Example of Site URL: `https://yoursite.myshopify.com` or your current domain already migrated to Shopify.
* Checkout Platform: **Shopify + Others**
4. Update the **Site URL** and **Checkout Platform** fields
* Example of Site URL: `https://yoursite.myshopify.com` or your current domain already migrated to Shopify.
* Checkout Platform: **Shopify + Others**
 5. Save the changes
6. Click on the action button again and then on **Preview**
5. Save the changes
6. Click on the action button again and then on **Preview**
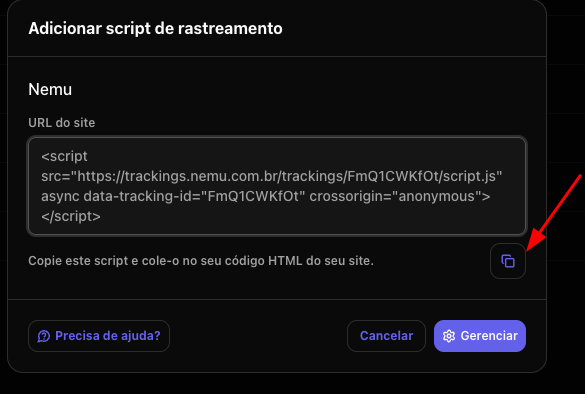
 7. Click on the button to copy Nemu's Pixel code, it will be needed in the next steps.
 ## Important information before starting
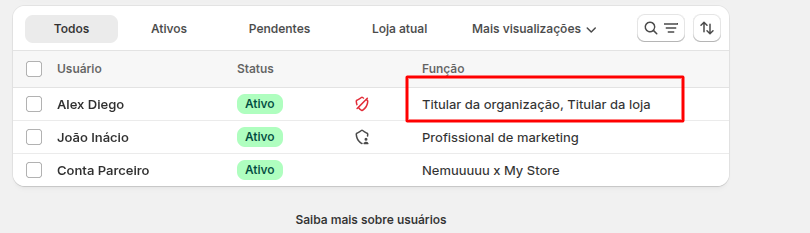
* If a **Shopify Partner (Agency)** is managing your store, you will need to ask the **Organization Owner / Store Owner** to follow the steps in this guide.
* Check your permissions on Shopify. You will need to have **Owner** access to be able to follow all the steps in this guide. [Learn more about user management on Shopify](https://help.shopify.com/pt-BR/manual/your-account/users/manage-users#consideracoes-sobre-o-gerenciamento-de-usuarios).
## Important information before starting
* If a **Shopify Partner (Agency)** is managing your store, you will need to ask the **Organization Owner / Store Owner** to follow the steps in this guide.
* Check your permissions on Shopify. You will need to have **Owner** access to be able to follow all the steps in this guide. [Learn more about user management on Shopify](https://help.shopify.com/pt-BR/manual/your-account/users/manage-users#consideracoes-sobre-o-gerenciamento-de-usuarios).
 ## Integrating Nemu's Pixel on Shopify
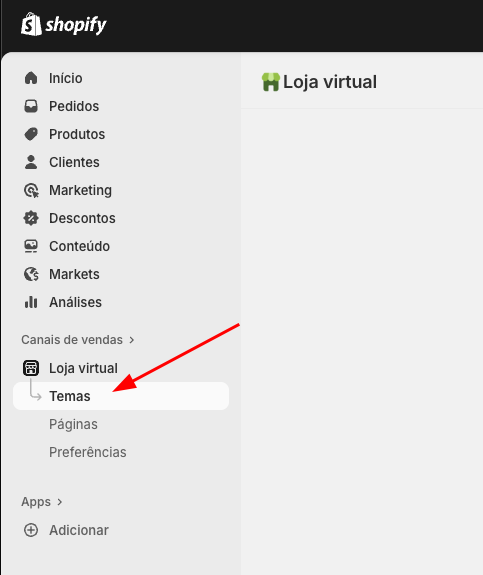
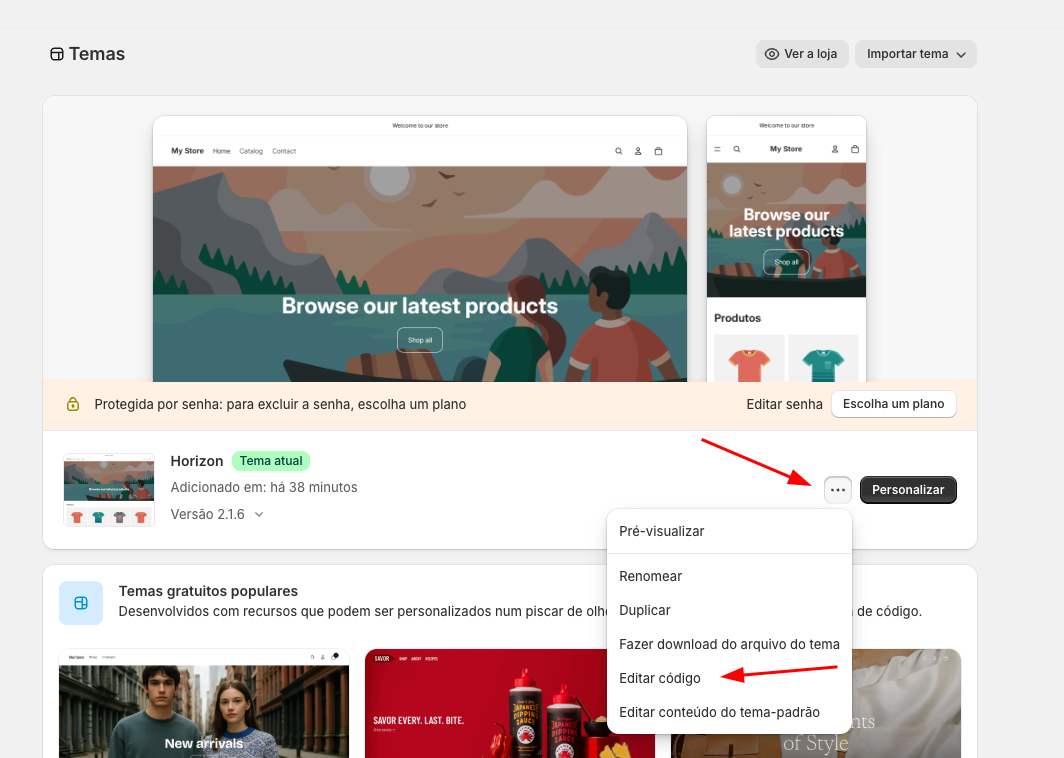
1. In the Shopify dashboard, click on **Sales channels** in the sidebar and then on **Themes**
## Integrating Nemu's Pixel on Shopify
1. In the Shopify dashboard, click on **Sales channels** in the sidebar and then on **Themes**
 2. In your **Current Theme**, click on the button and then on **Edit code**
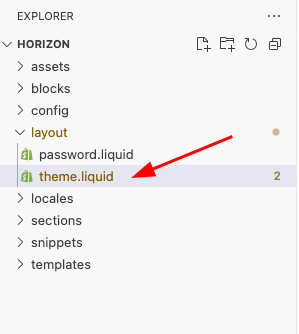
 3. Open the **layout** folder and select the **theme.liquid** file
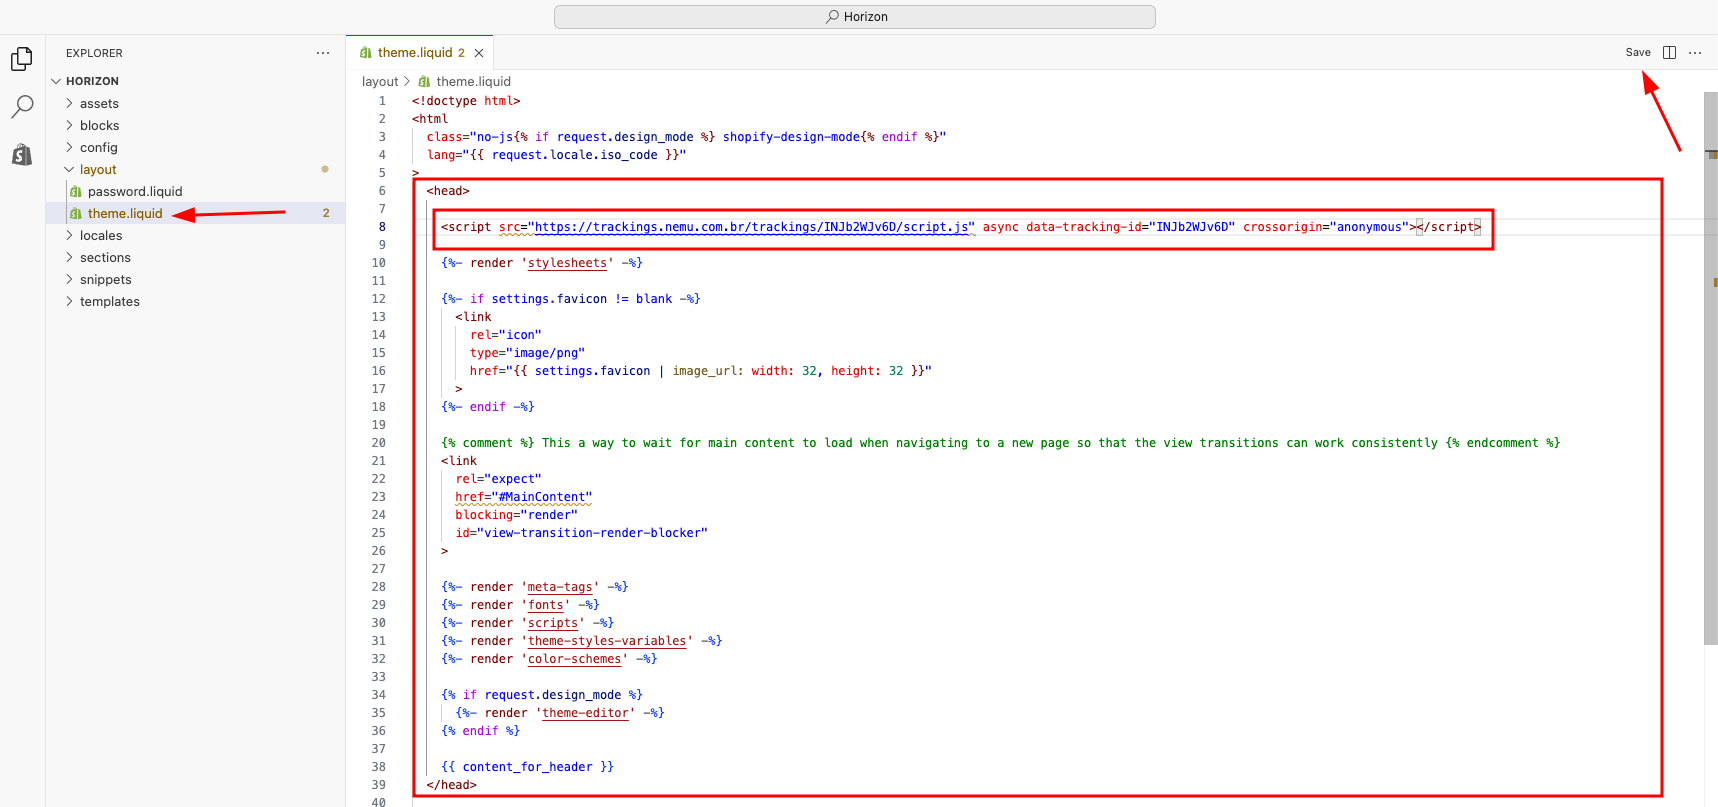
 4. Paste the code copied in the [previous step of onboarding](/en/FAQ/shopify-migration#alterando-o-pixel-da-nemu-para-shopify) inside the `` tag and click on **Save**
 ## Configuring Webhooks on Shopify
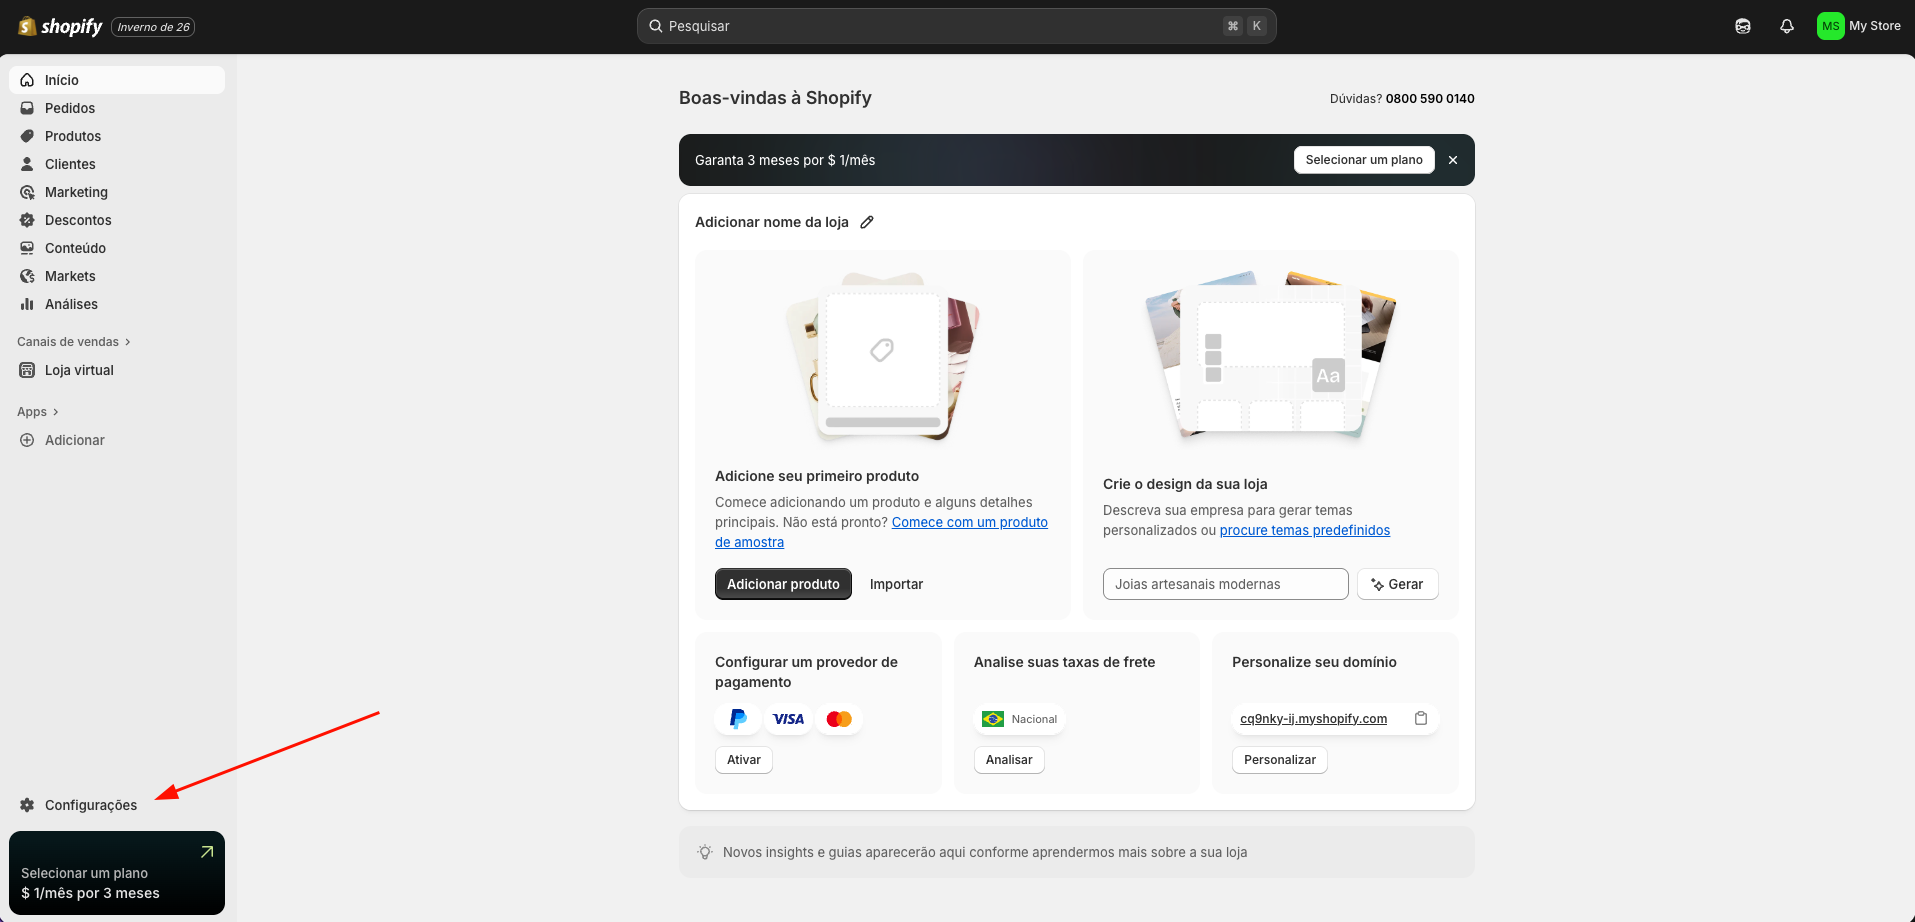
1. In the Shopify dashboard, click on **Settings** in the sidebar
## Configuring Webhooks on Shopify
1. In the Shopify dashboard, click on **Settings** in the sidebar
 2. In the sidebar, click on **Apps**
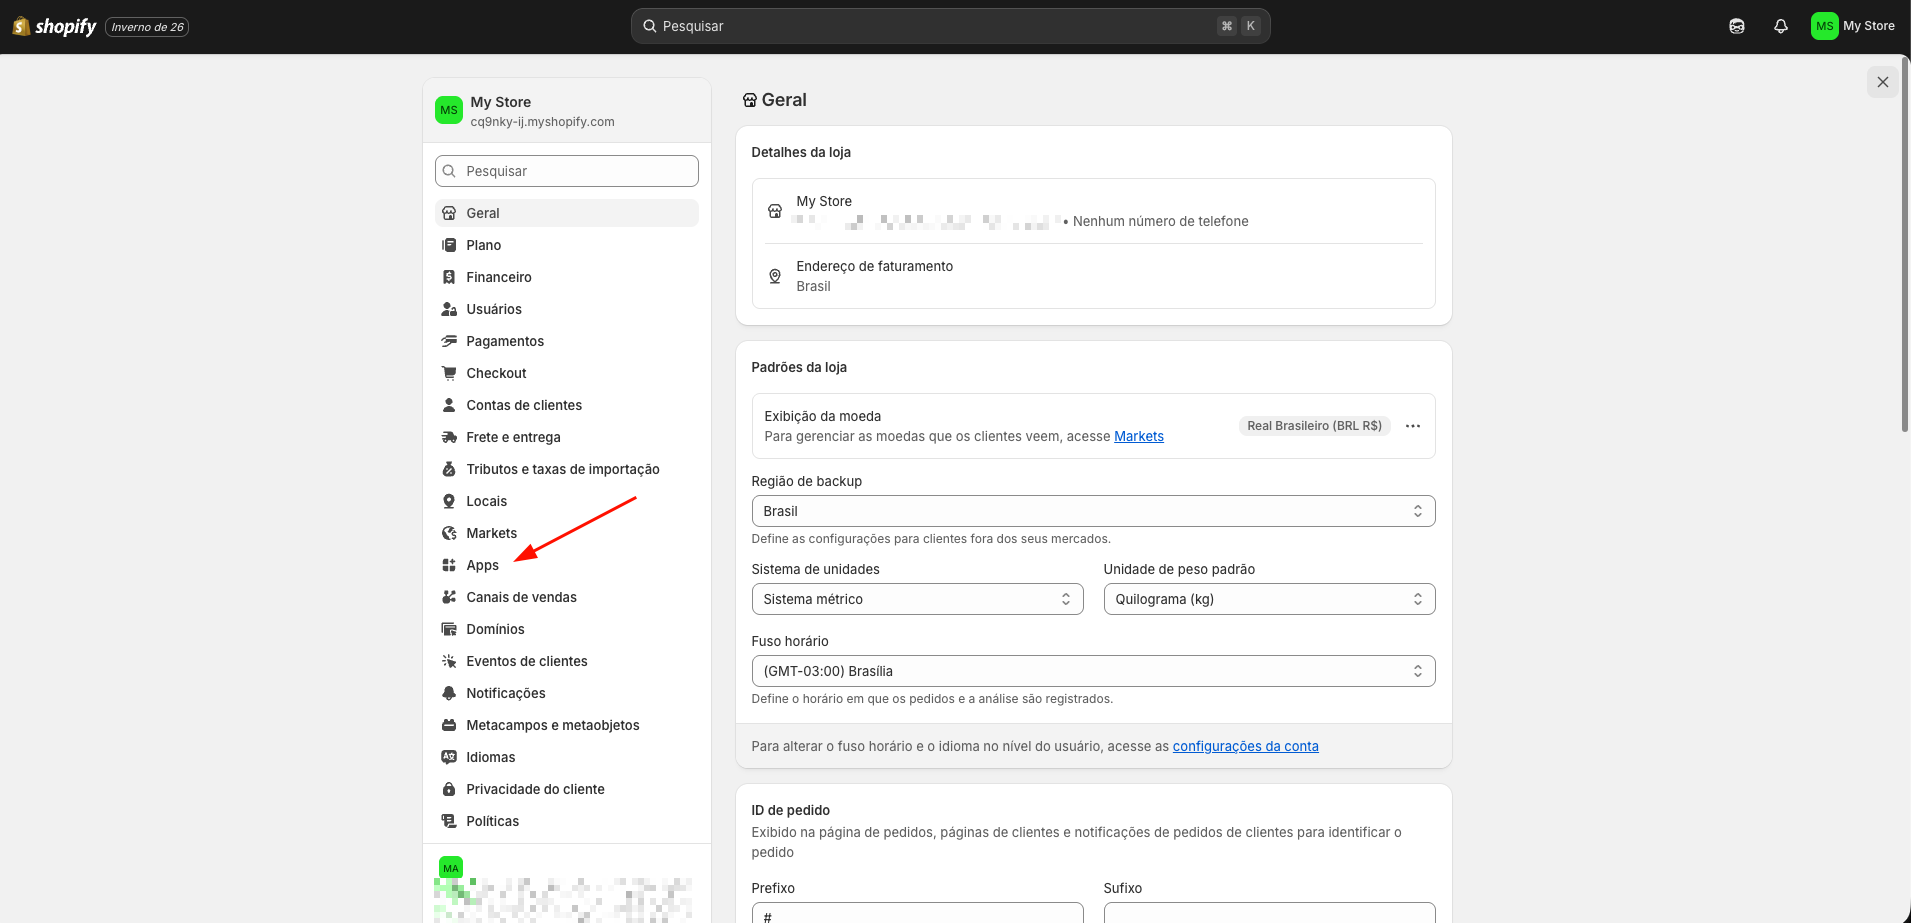 3. Click on **Develop apps**
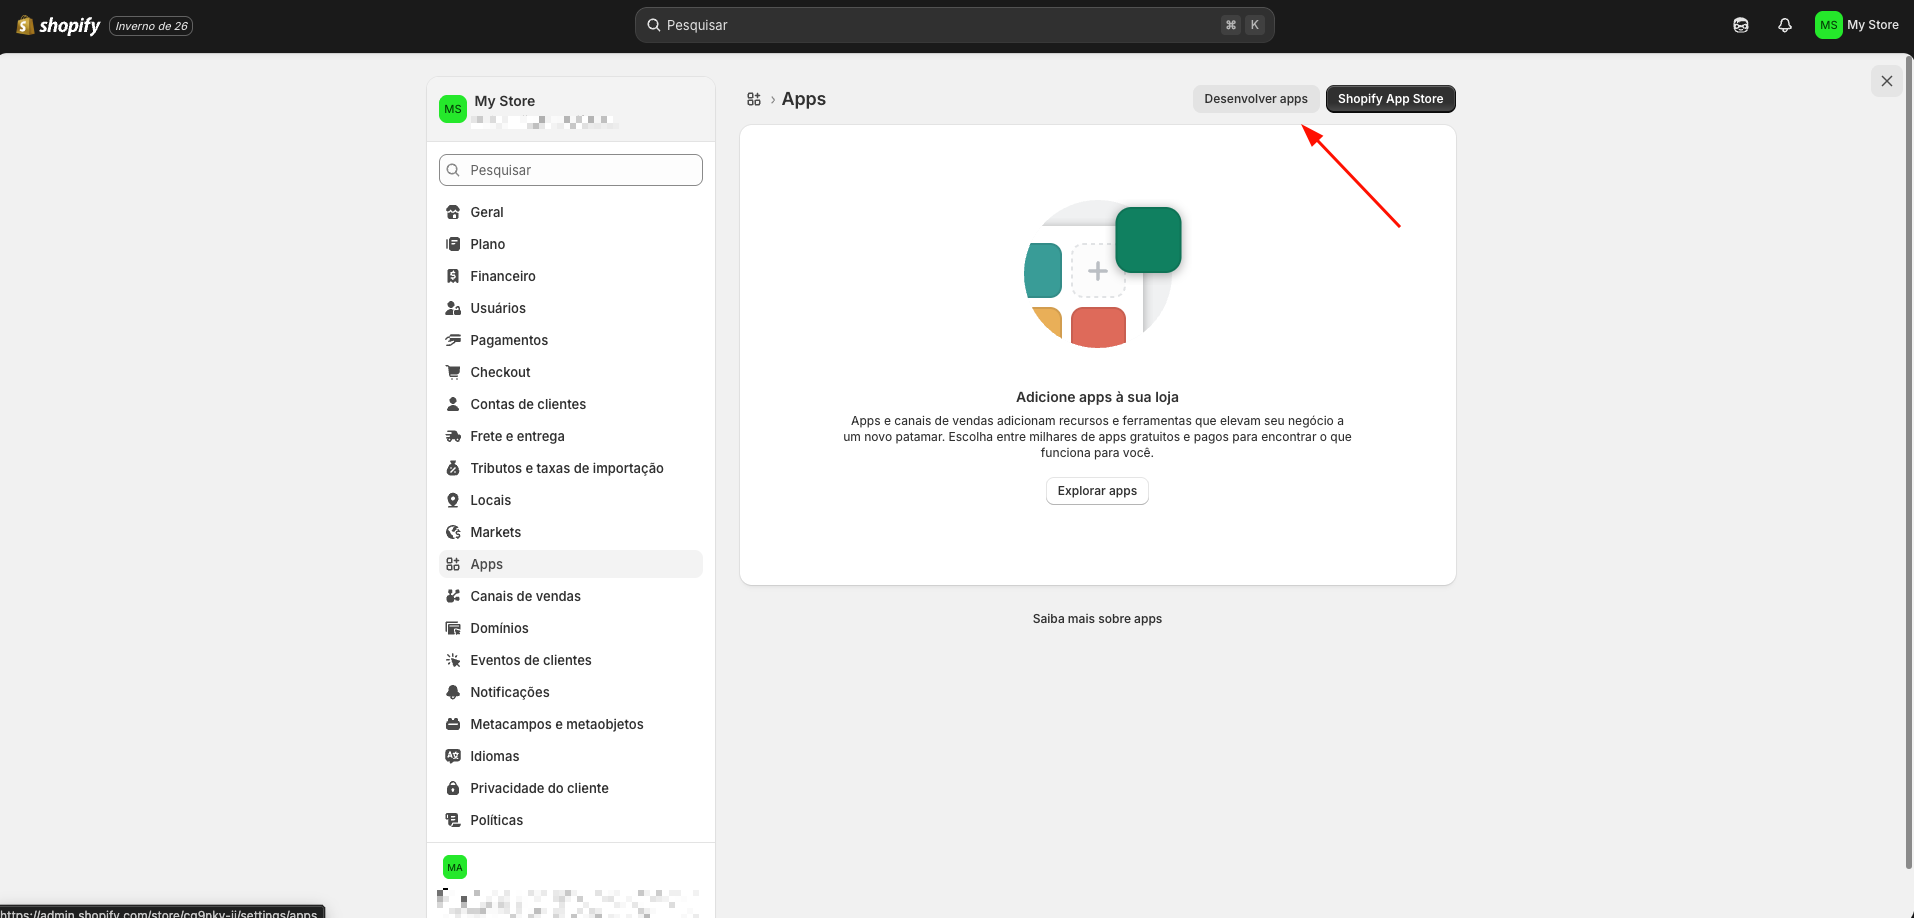 4. Click on **Develop apps in Dev Dashboard**
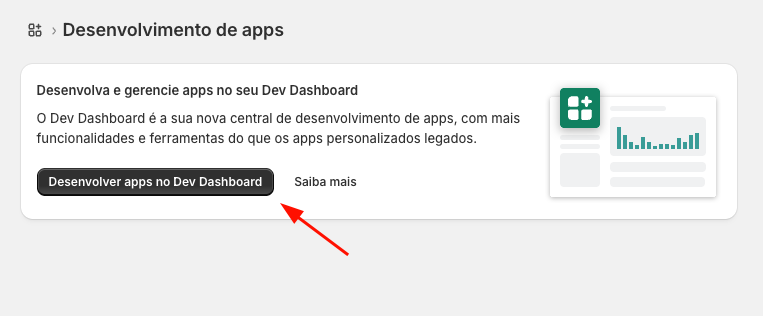 5. You will be redirected to the app development screen, click on **Create app**
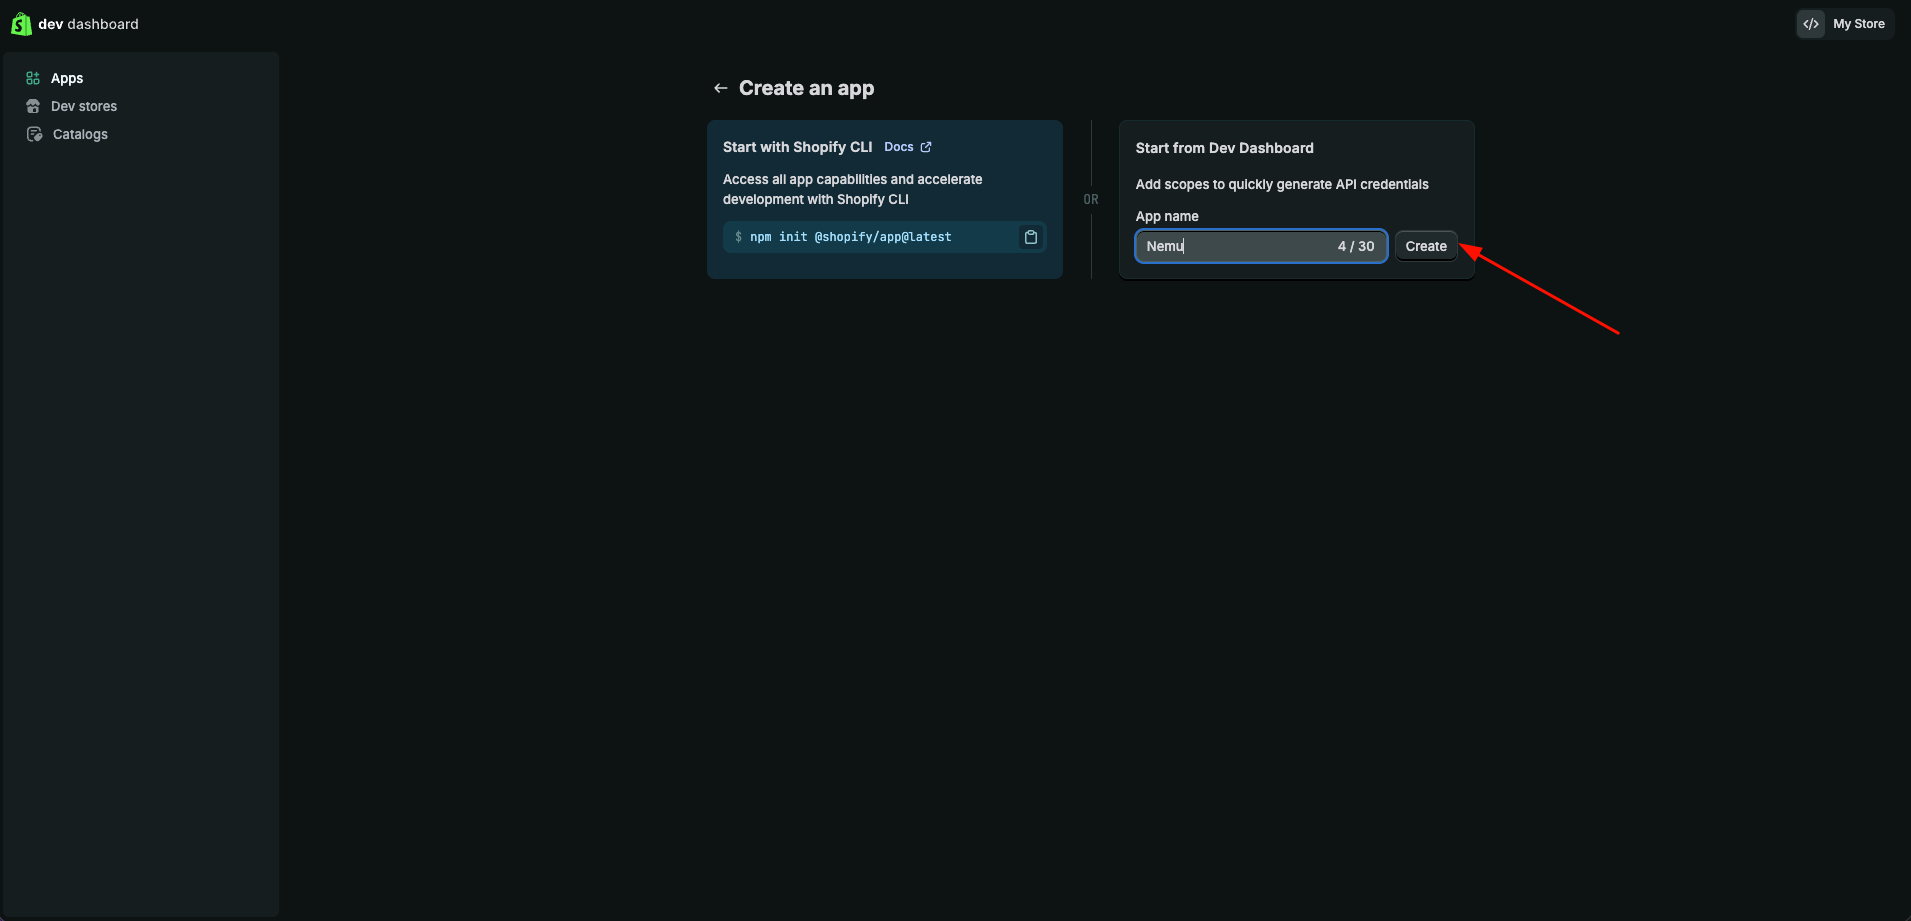
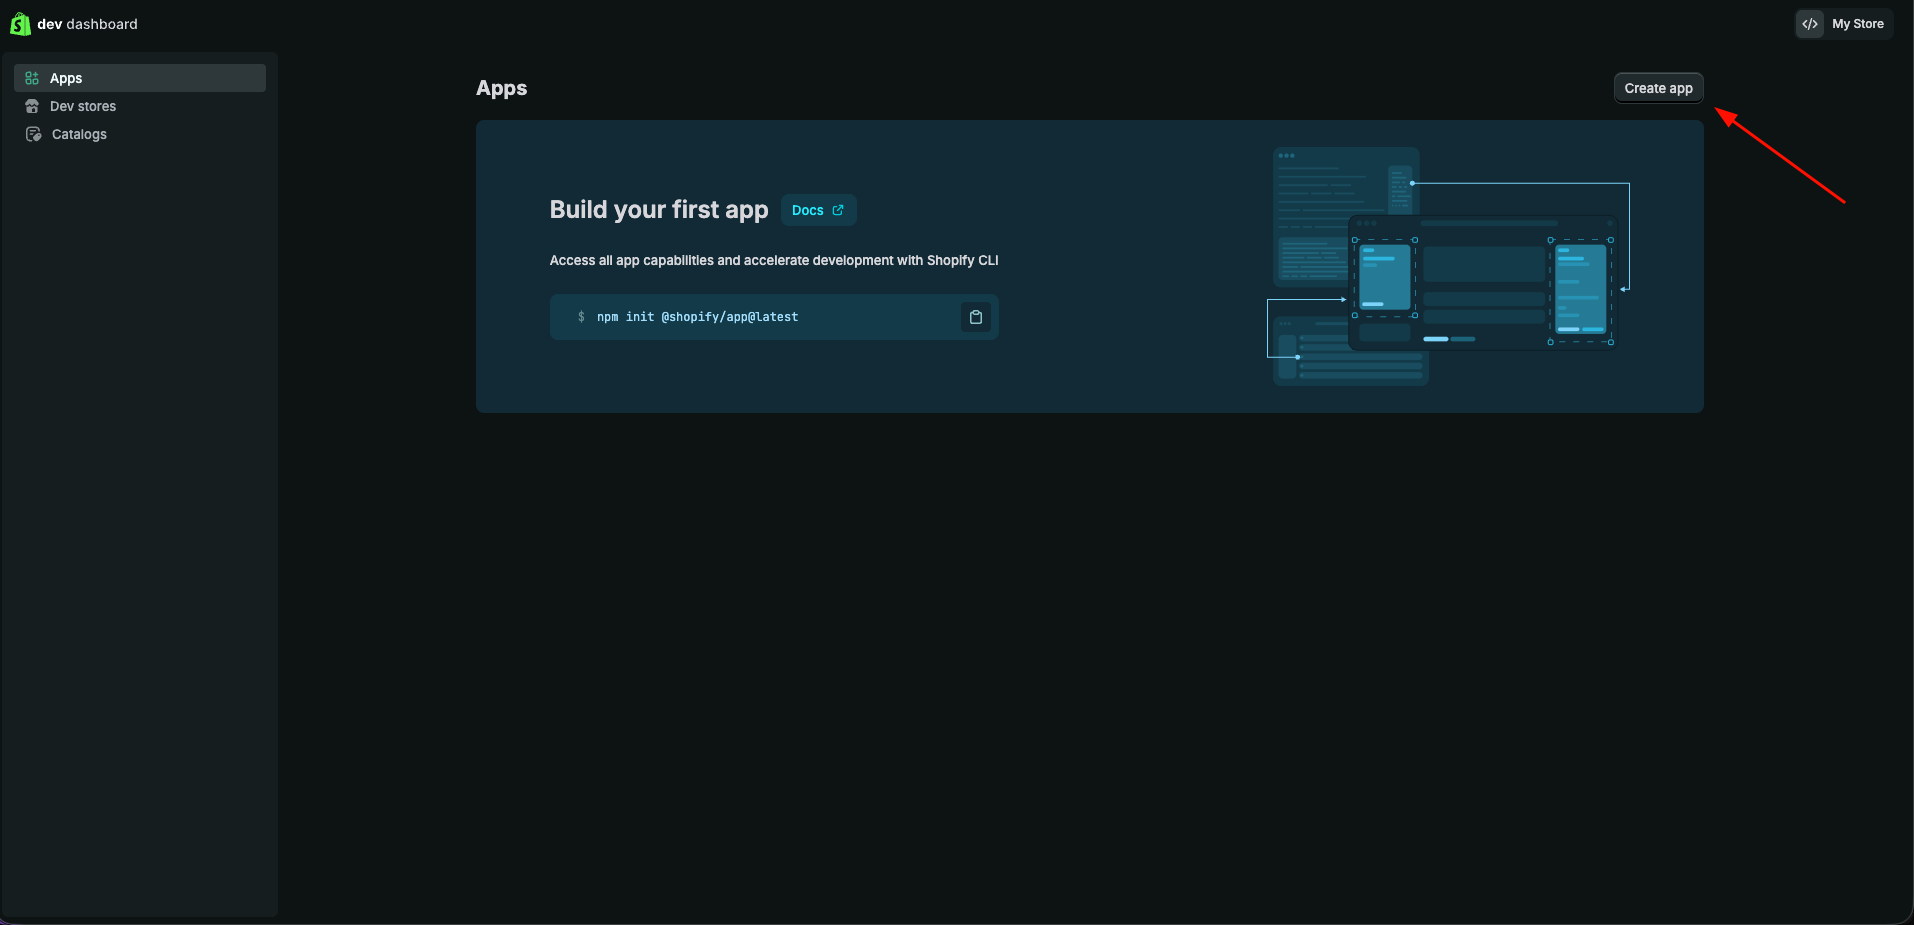 6. Define a name for your app and click on **Create**
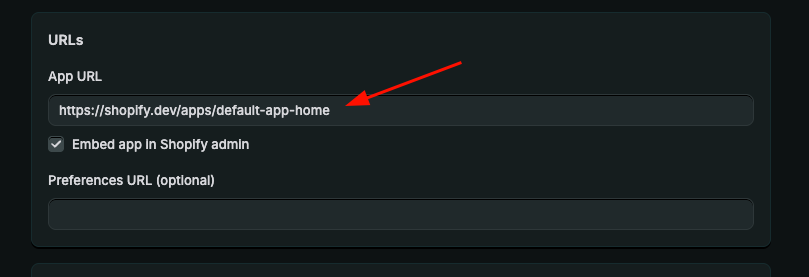
 7. Copy the **URL** and paste it in the **App URL** field
```plaintext theme={null}
https://shopify.dev/apps/default-app-home
```
7. Copy the **URL** and paste it in the **App URL** field
```plaintext theme={null}
https://shopify.dev/apps/default-app-home
```
 8. In Webhooks API Version, select version 2026-01
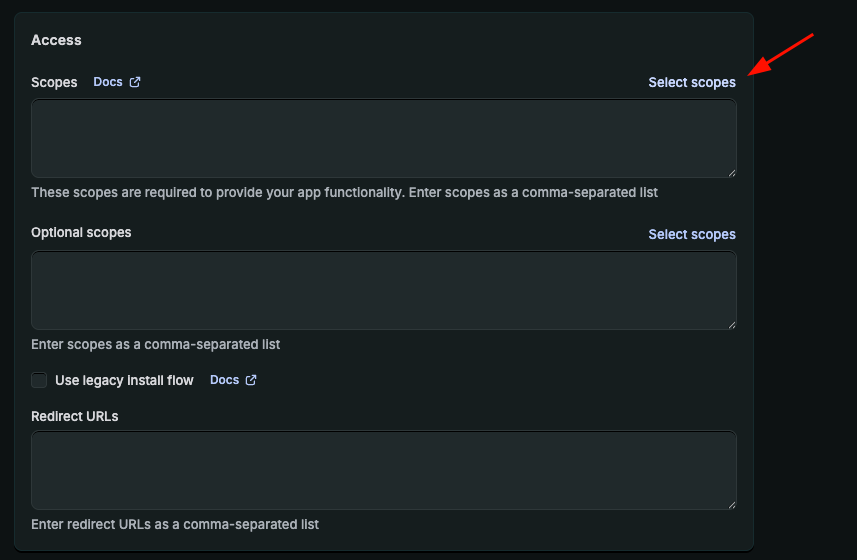
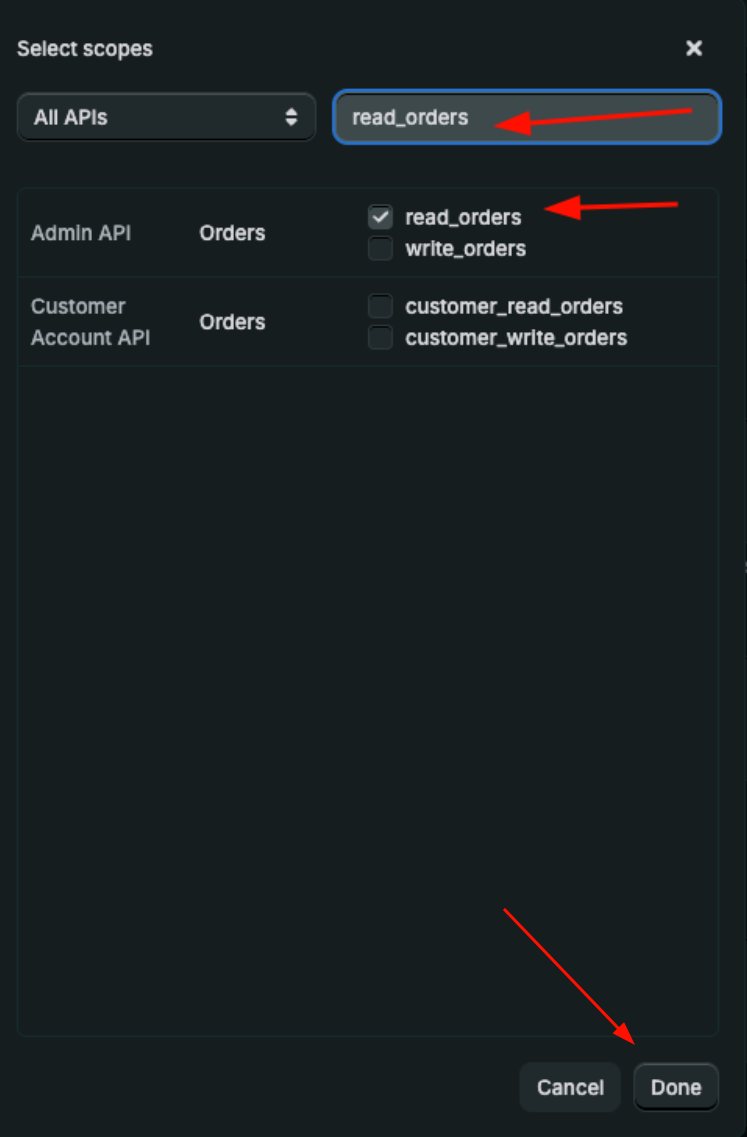
 9. Click on **Select scopes**
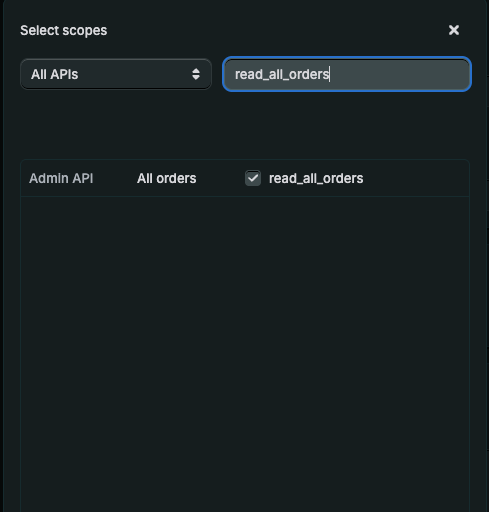
 10. Search for:
* `read_all_orders`
* `read_orders`
Check these options and click on **Done**
10. Search for:
* `read_all_orders`
* `read_orders`
Check these options and click on **Done**
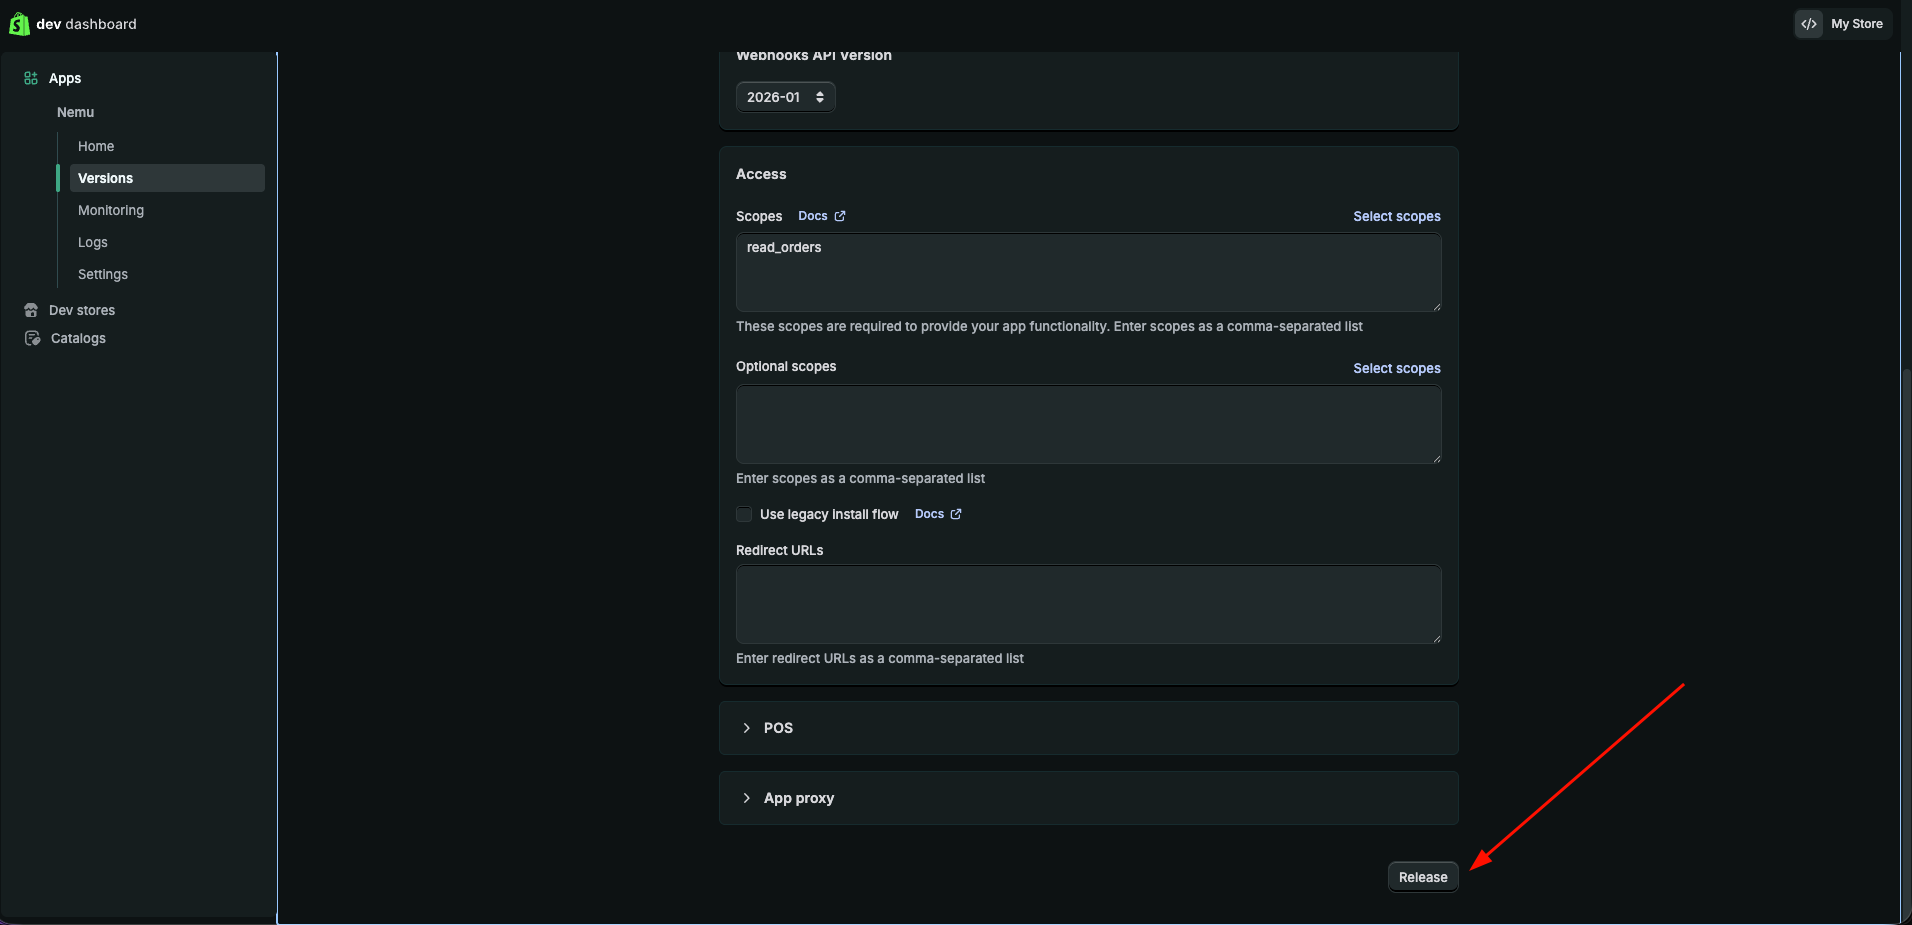
 11. Scroll down to the bottom of the page and click on **Release**
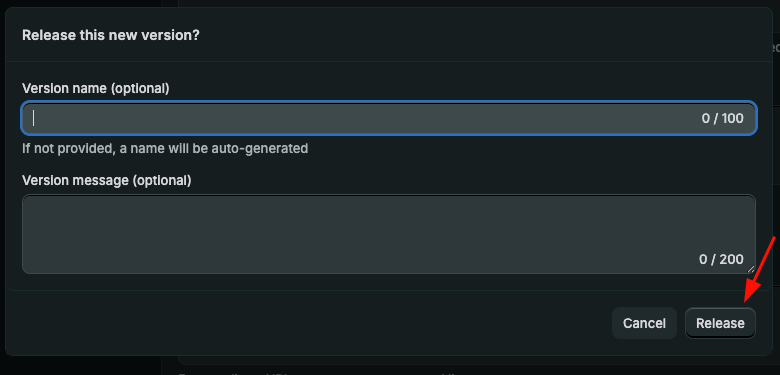
 12. In **Version name**, you can leave it blank and click on **Release**
 ## Installing the app on Shopify
1. In the sidebar, click on **Home**
## Installing the app on Shopify
1. In the sidebar, click on **Home**
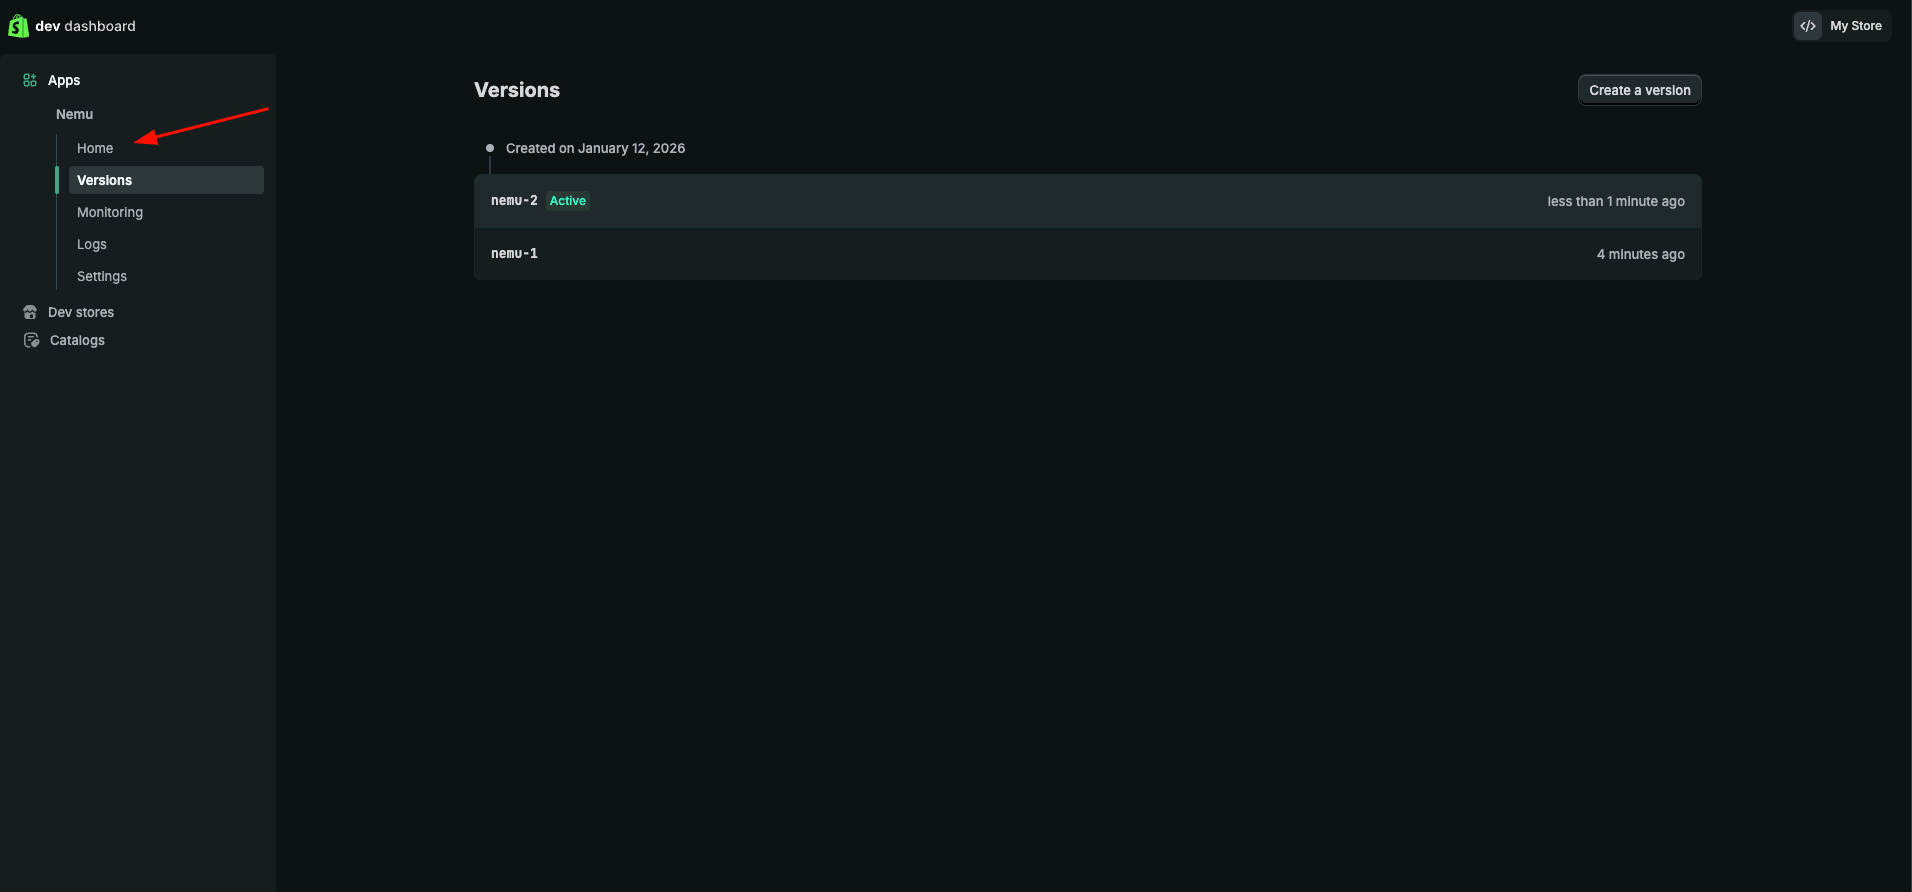 2. Click on **Install app**
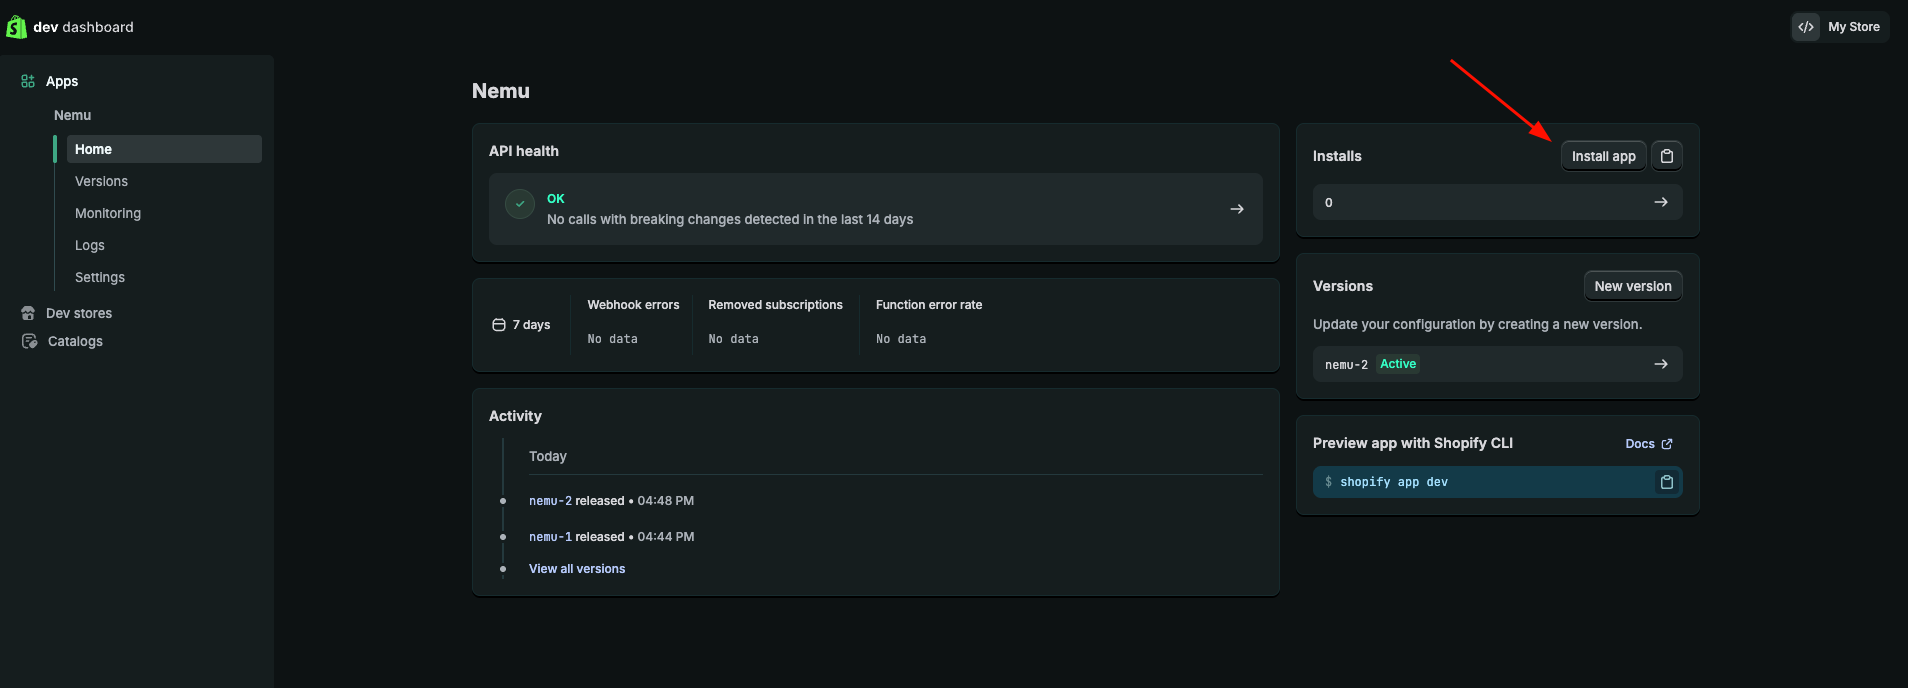 Keep this page open, as we will need the **Client ID** and **Client Secret** for the next steps.
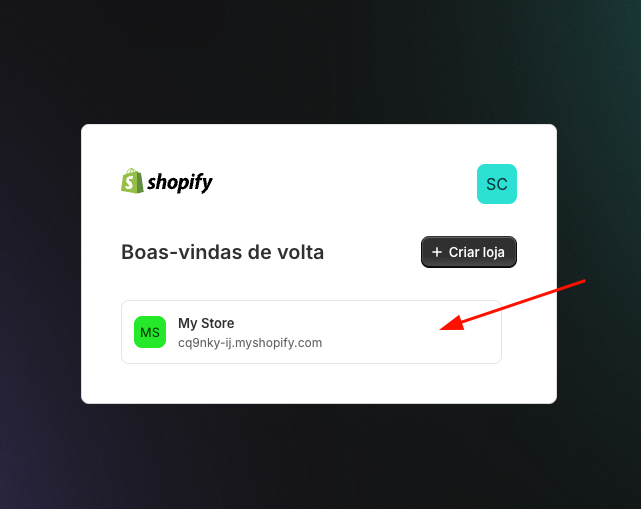
3. Click on the store card where you want to install the app
Keep this page open, as we will need the **Client ID** and **Client Secret** for the next steps.
3. Click on the store card where you want to install the app
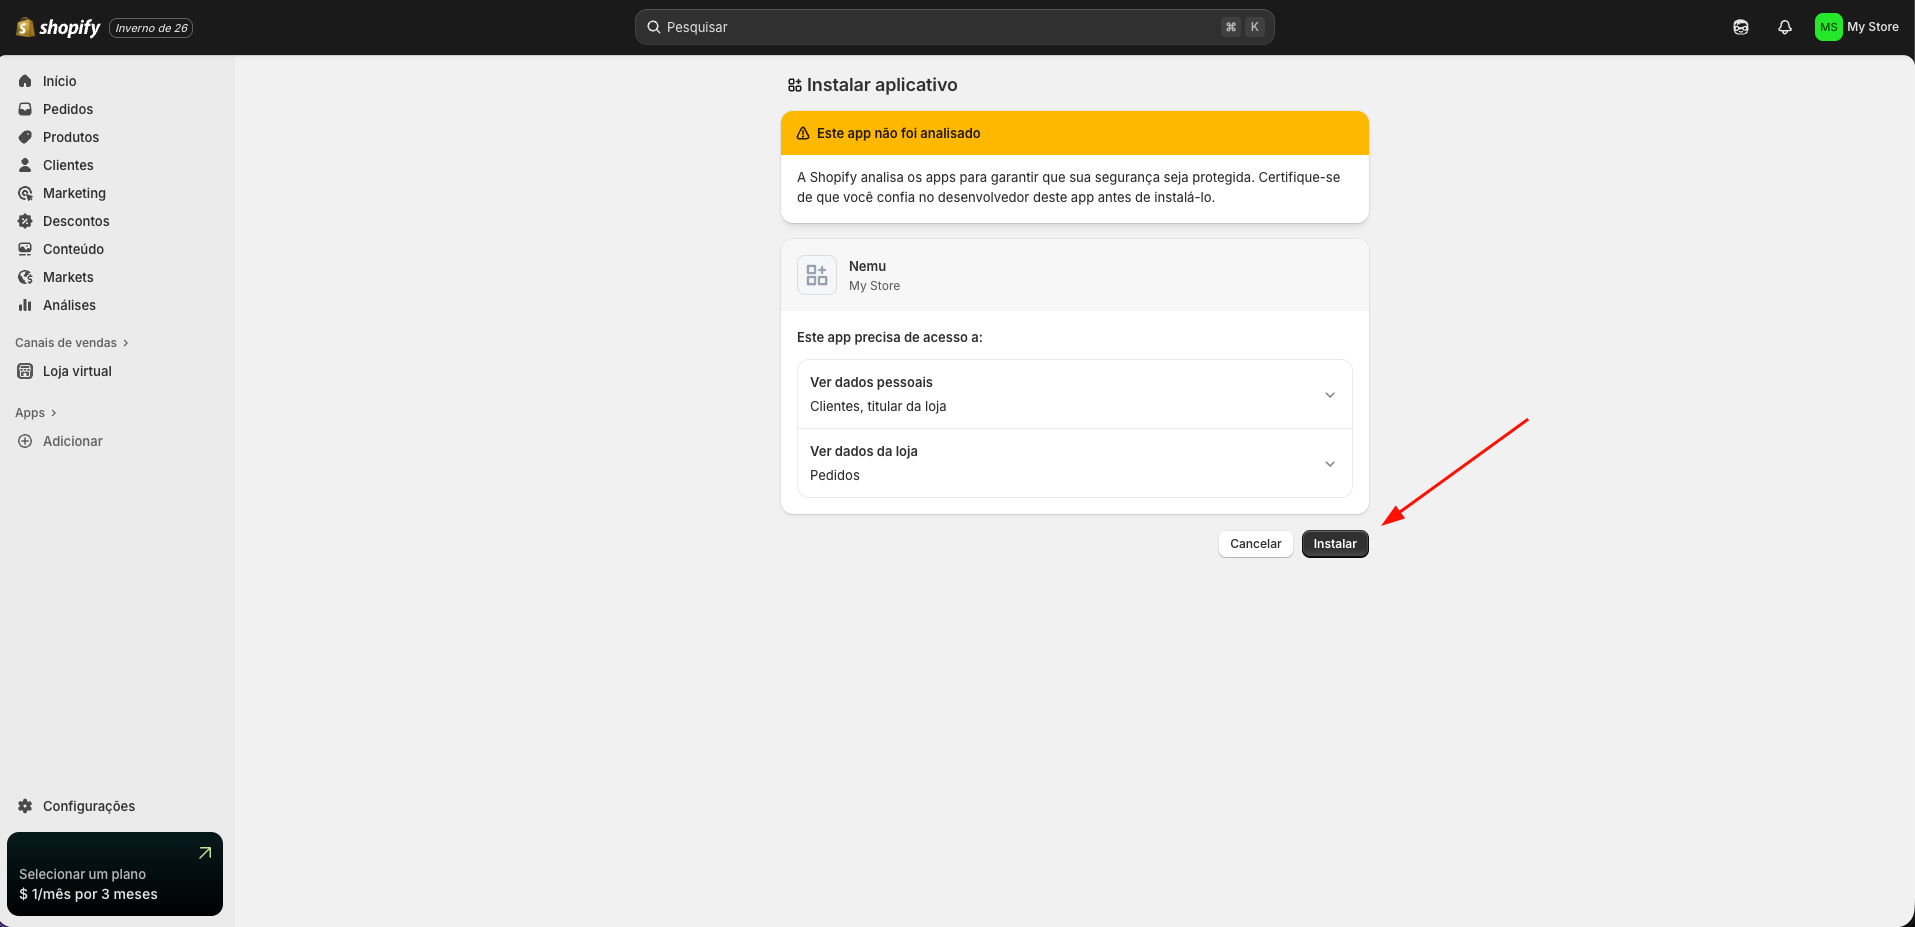
 4. Click on the **Install** button
 ## Configuring Webhooks in Nemu
1. Access the Shopify dev dashboard [by clicking here](https://dev.shopify.com/dashboard/)
2. Click on the app card that we created in the [step configuring webhooks on Shopify](/en/onboarding/integrations/shopify/#configuring-webhooks-on-shopify)
## Configuring Webhooks in Nemu
1. Access the Shopify dev dashboard [by clicking here](https://dev.shopify.com/dashboard/)
2. Click on the app card that we created in the [step configuring webhooks on Shopify](/en/onboarding/integrations/shopify/#configuring-webhooks-on-shopify)
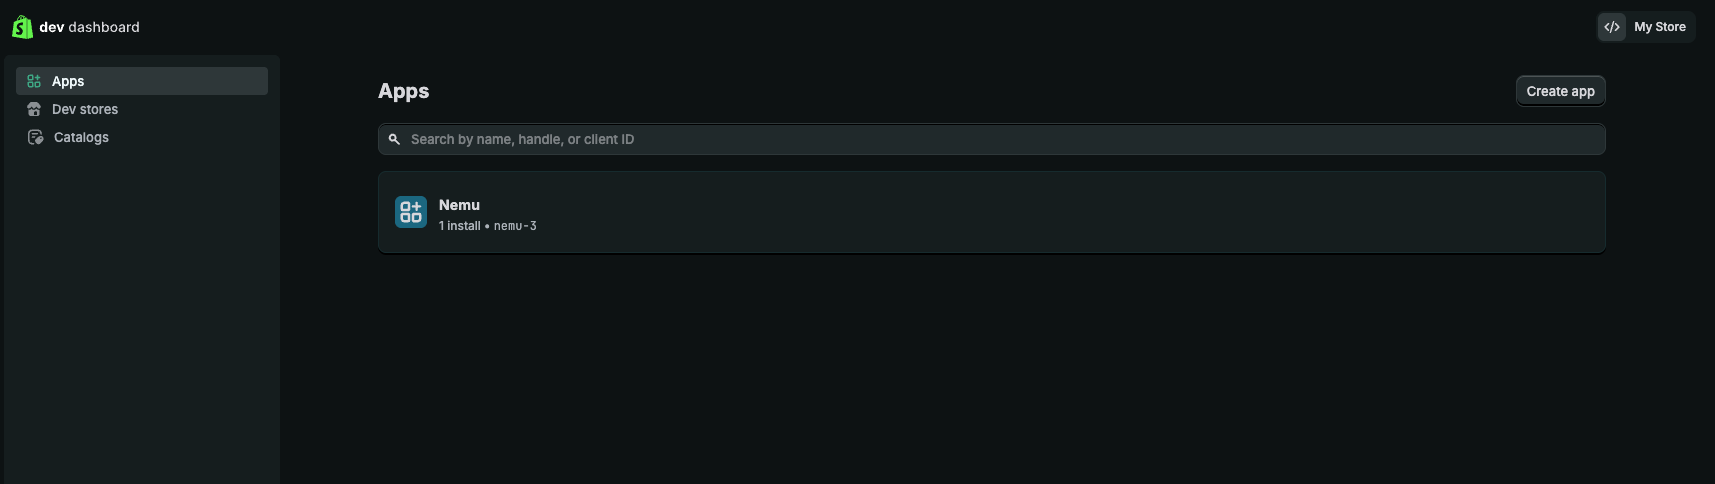 3. In the sidebar, click on **Settings** and copy the **Client ID** and **Client Secret**
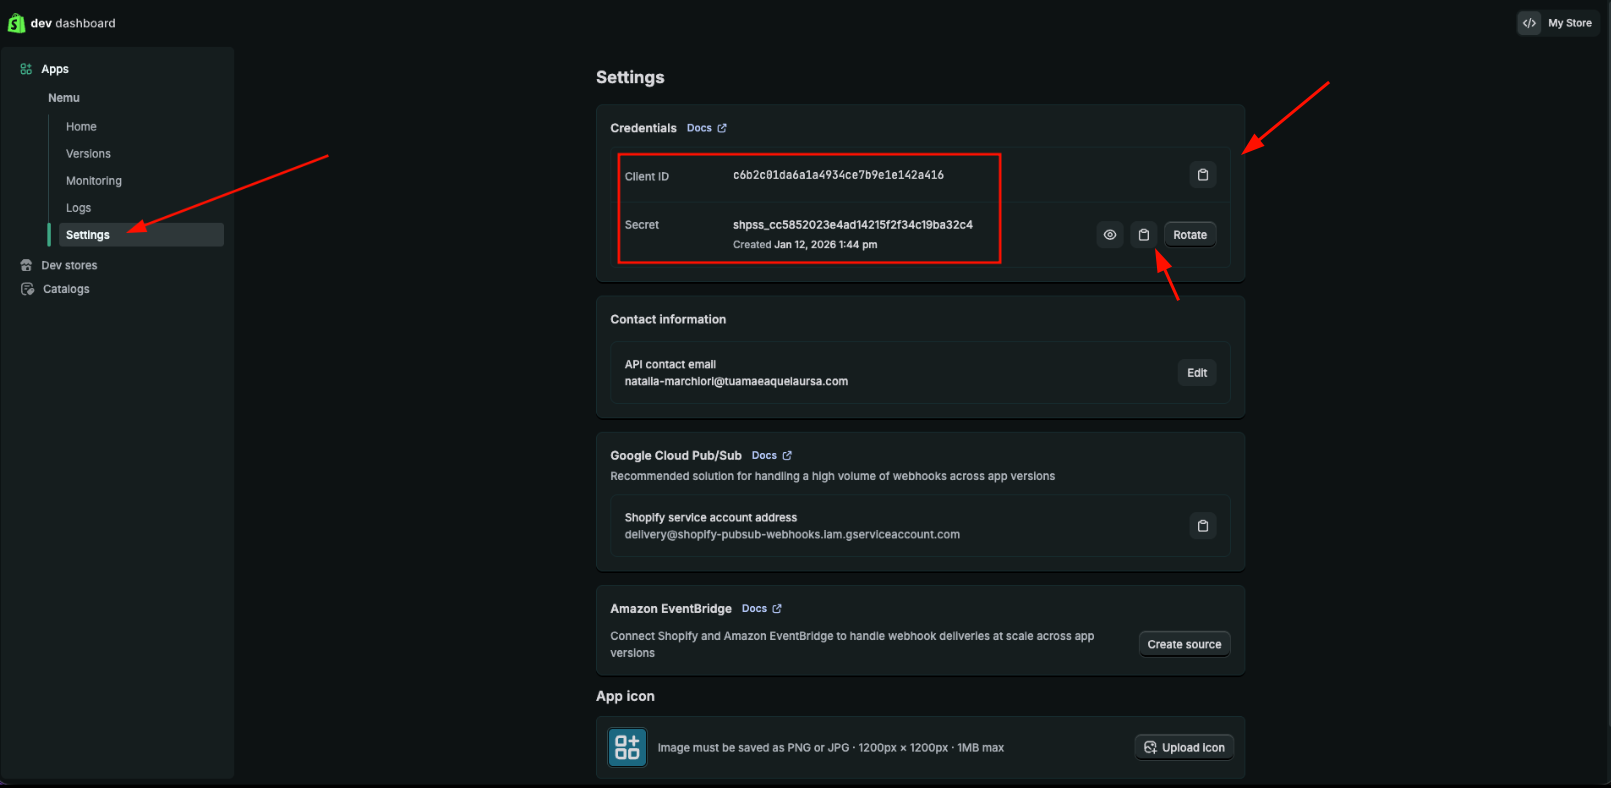 4. In Nemu, go to **Settings** > **Webhooks**, search for **Shopify** and click on **Connect**
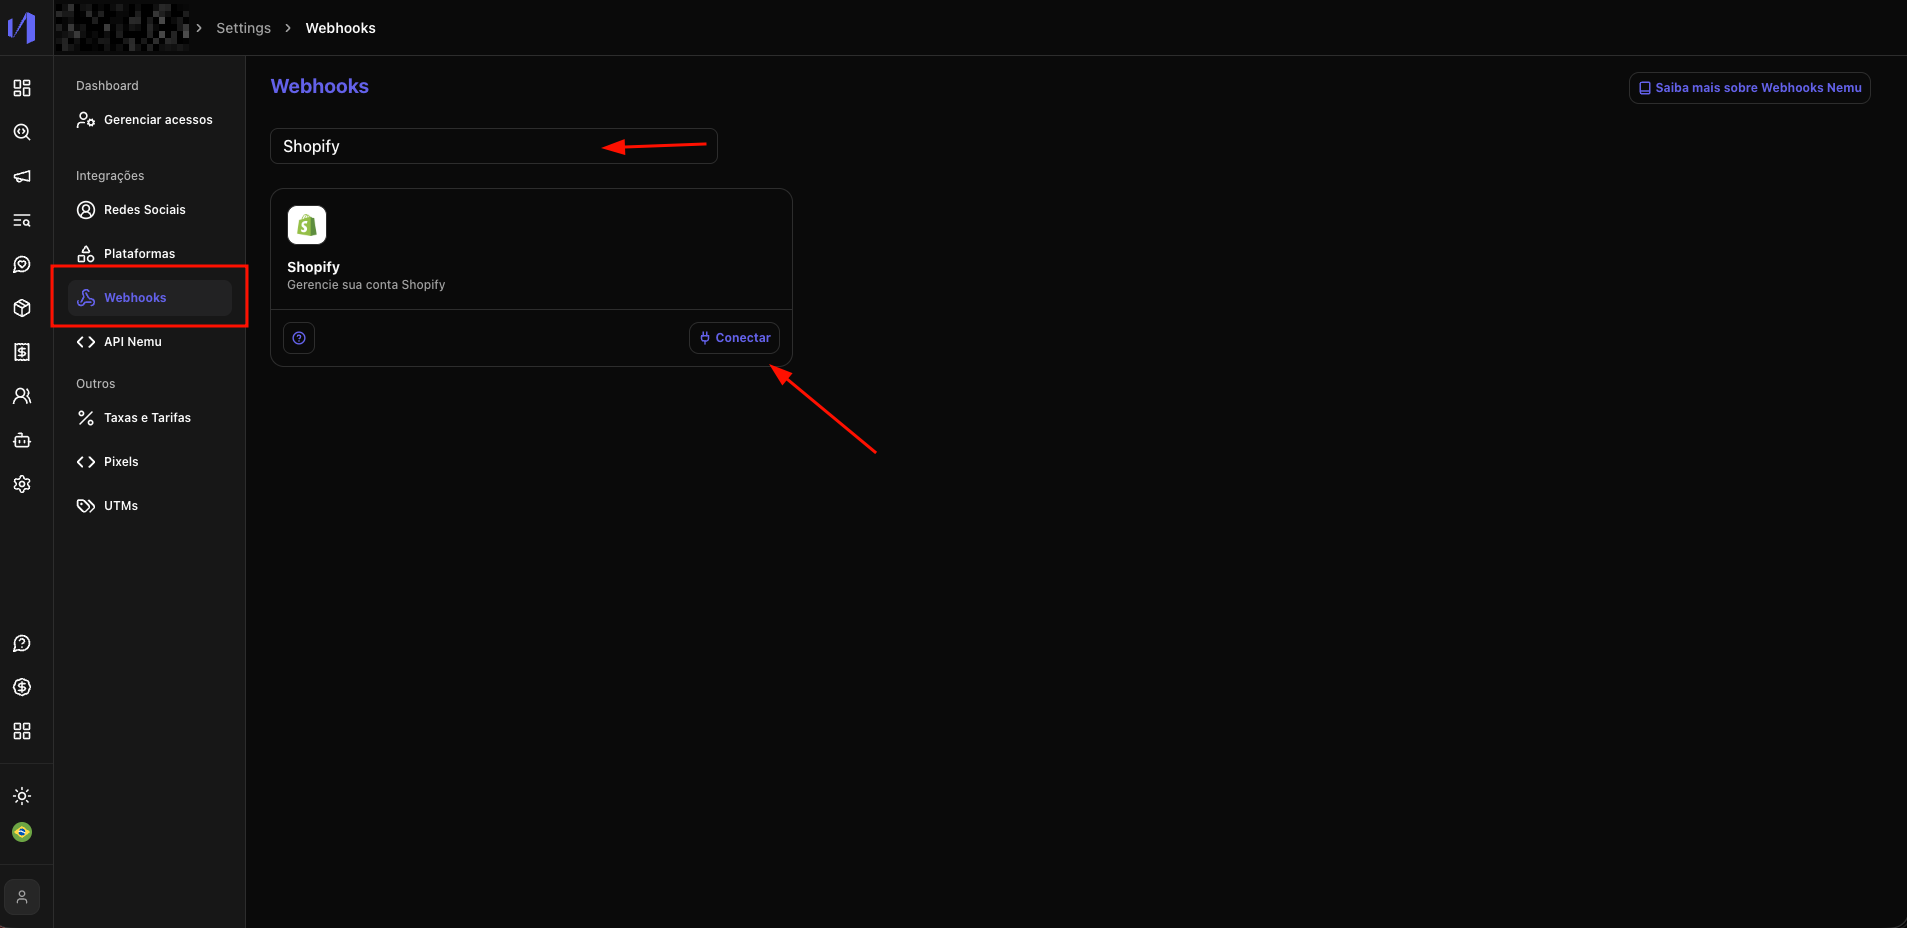 5. Paste the **Client ID** and **Client Secret** in their respective fields
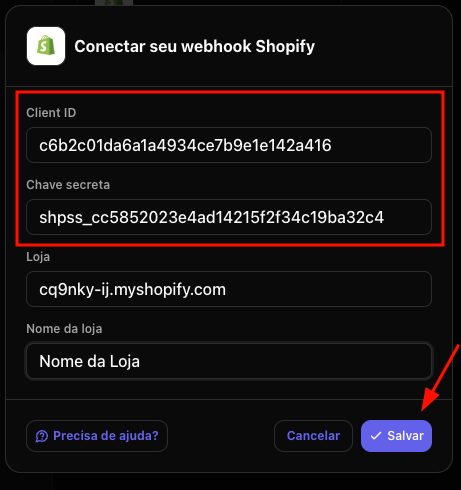 6. Fill in the Store data and click on **Save**
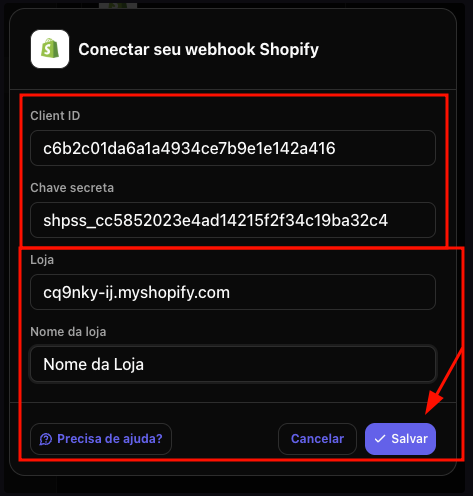 Do not close the popup that will be displayed, as we will need the **Pixel URL** for the next steps.
## Configuring Custom Pixel on Shopify
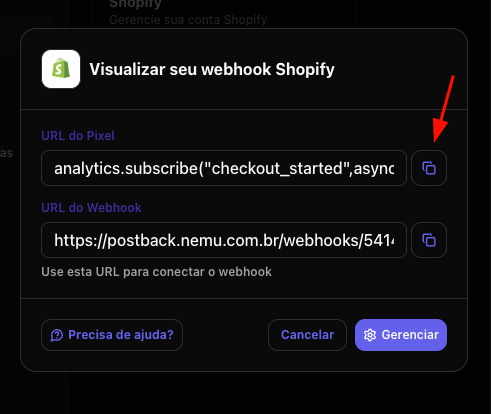
1. Copy the **Pixel URL**, we will use it in step 7 of this section to configure the Custom Pixel on Shopify.
Do not close the popup that will be displayed, as we will need the **Pixel URL** for the next steps.
## Configuring Custom Pixel on Shopify
1. Copy the **Pixel URL**, we will use it in step 7 of this section to configure the Custom Pixel on Shopify.
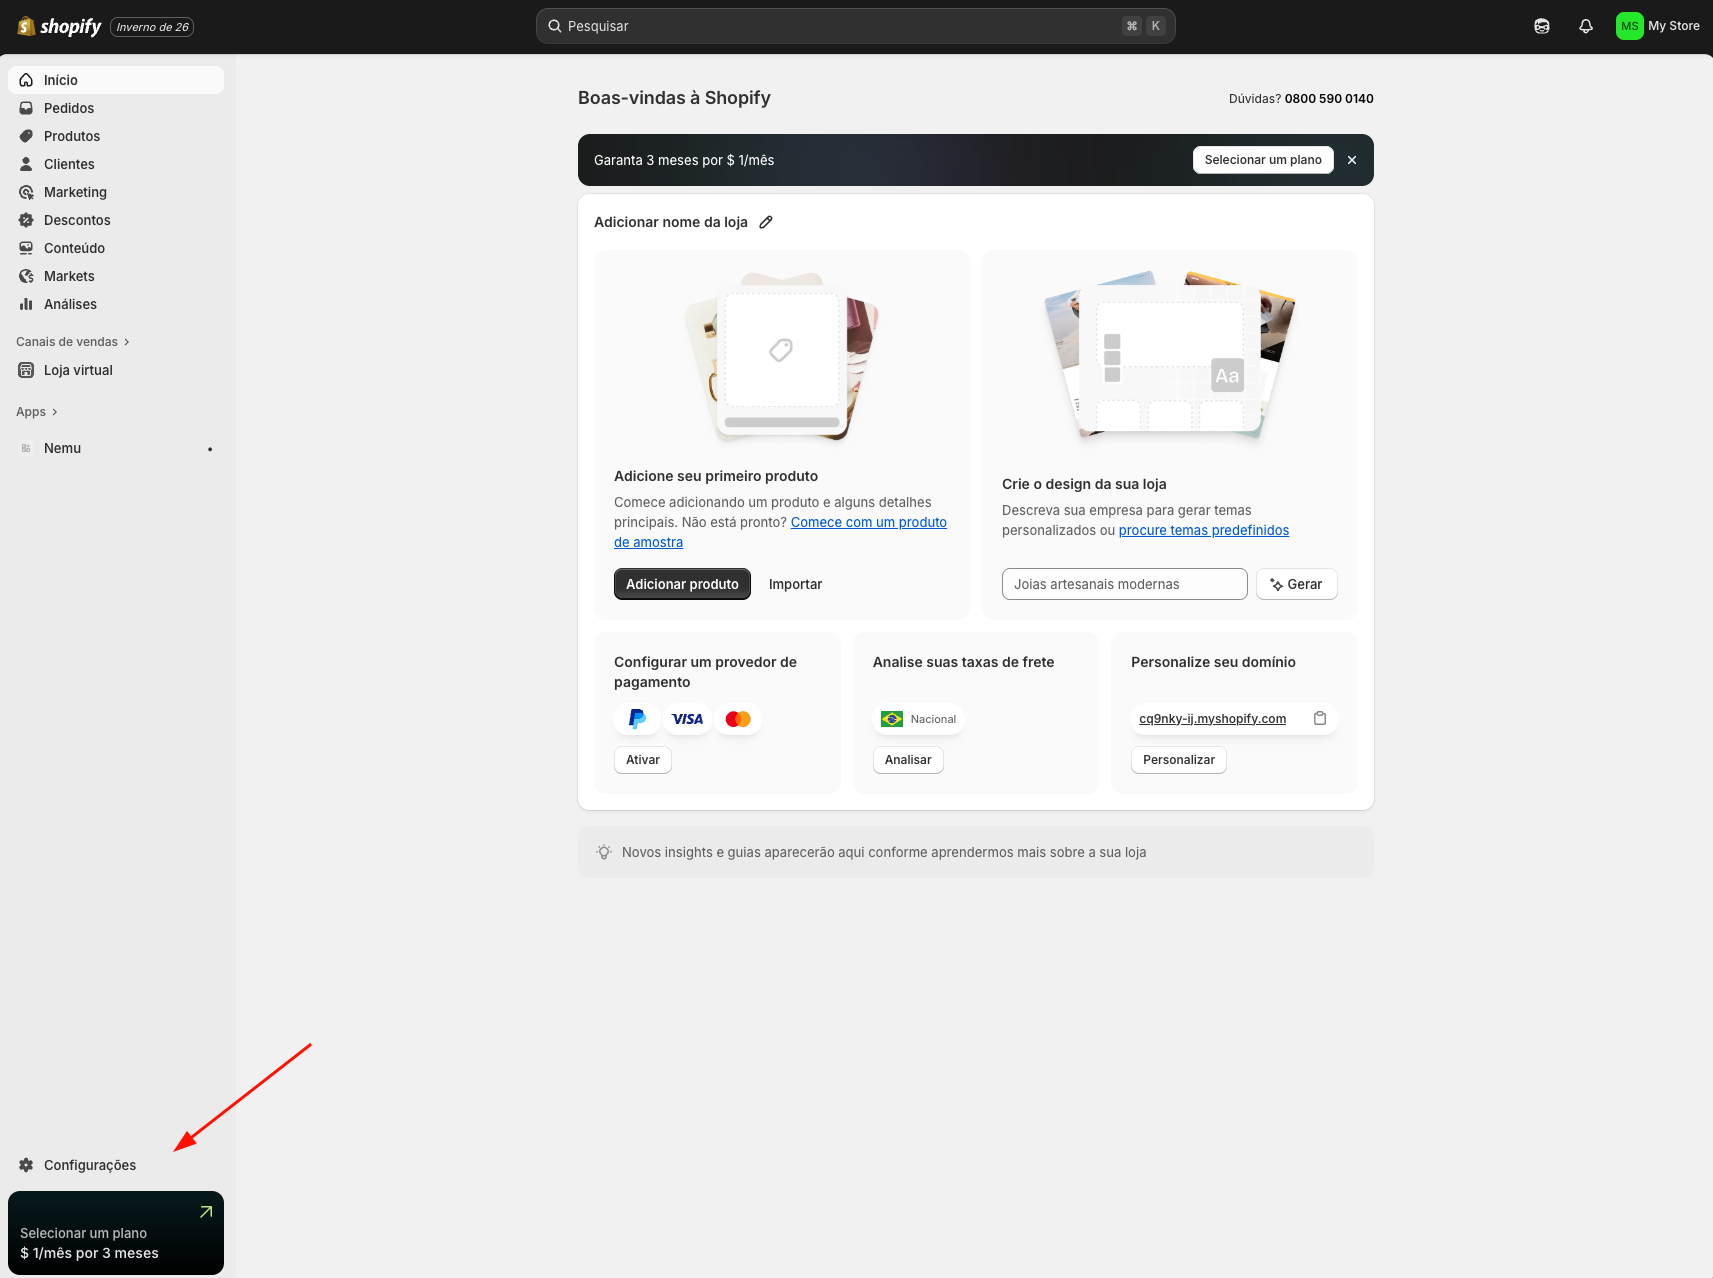
 2. In the sidebar, click on **Settings**
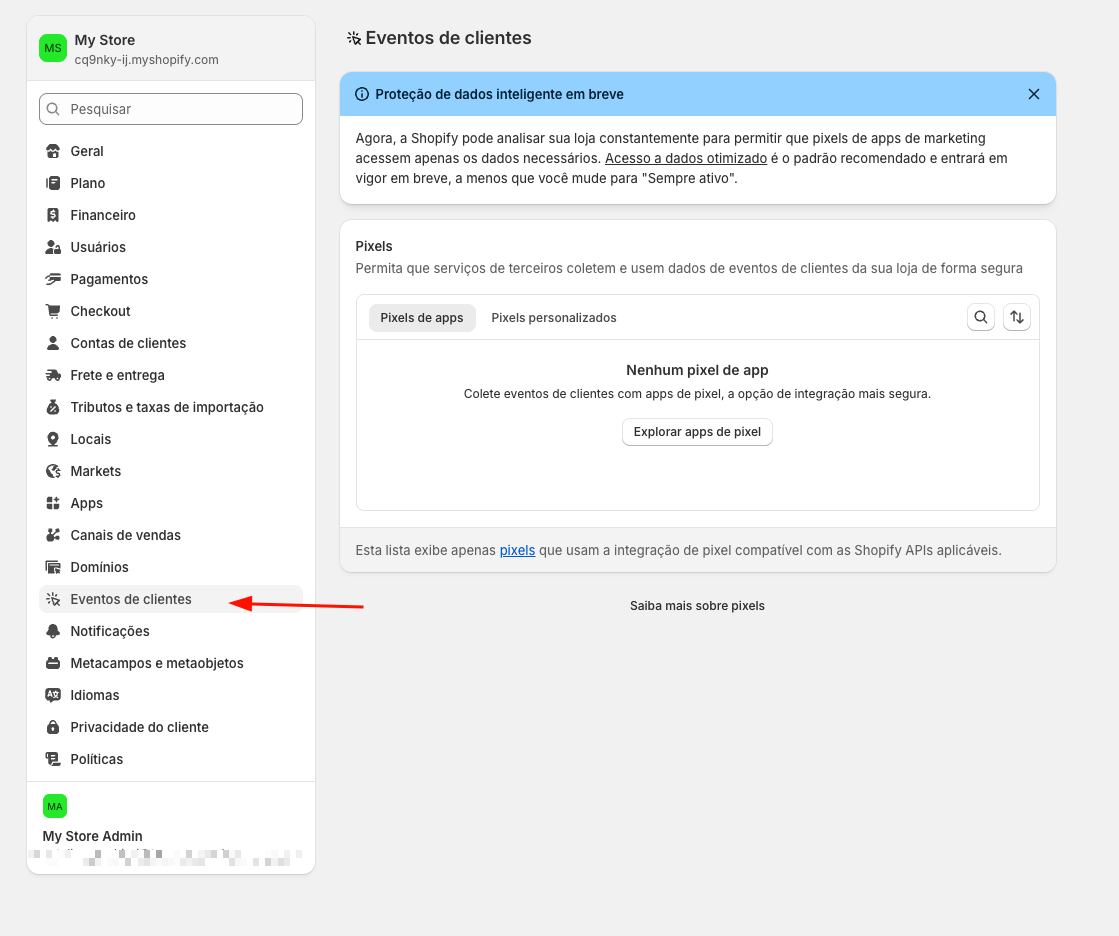
 3. Then, a new page will open, click on **Customer Events**
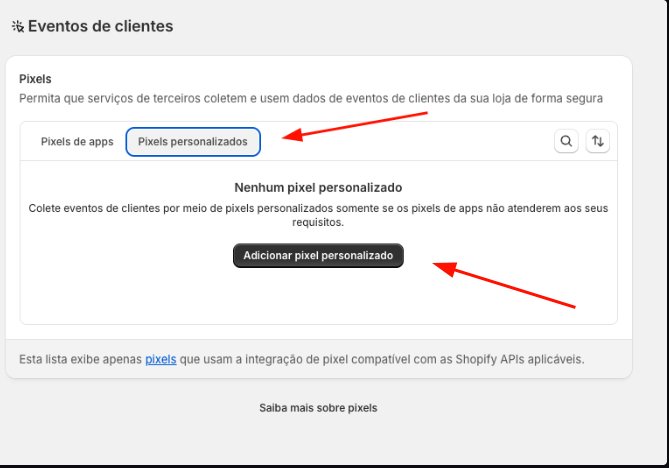
 4. Click on the **Custom Pixels** tab and click on **Add custom pixel**
 5. Define a name for the Pixel and click on **Add pixel**
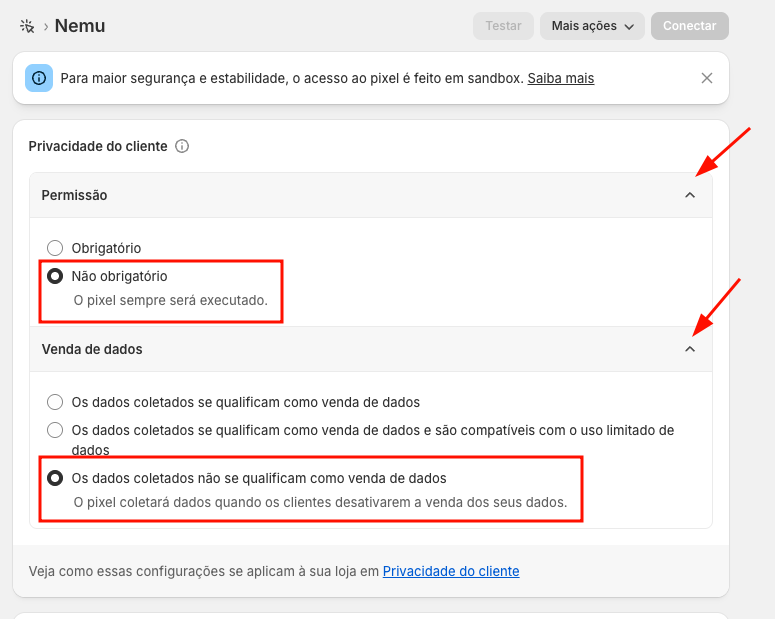
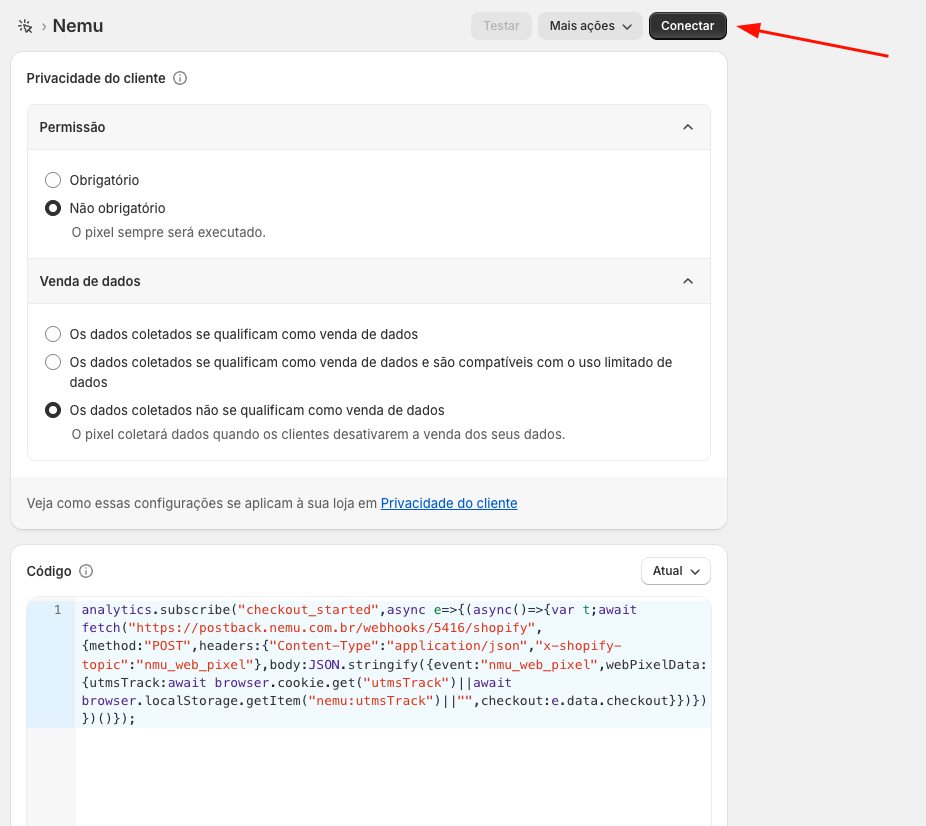
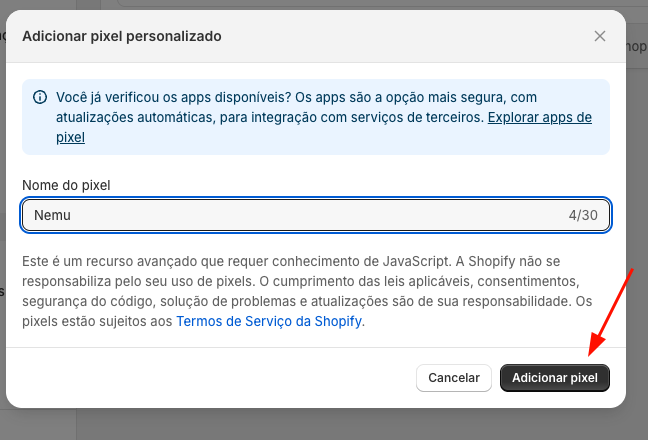 6. Expand the **Customer Privacy** section and configure:
* **Permission**: *Not required*
* **Data sale select**: *The collected data does not qualify as data sale*
6. Expand the **Customer Privacy** section and configure:
* **Permission**: *Not required*
* **Data sale select**: *The collected data does not qualify as data sale*
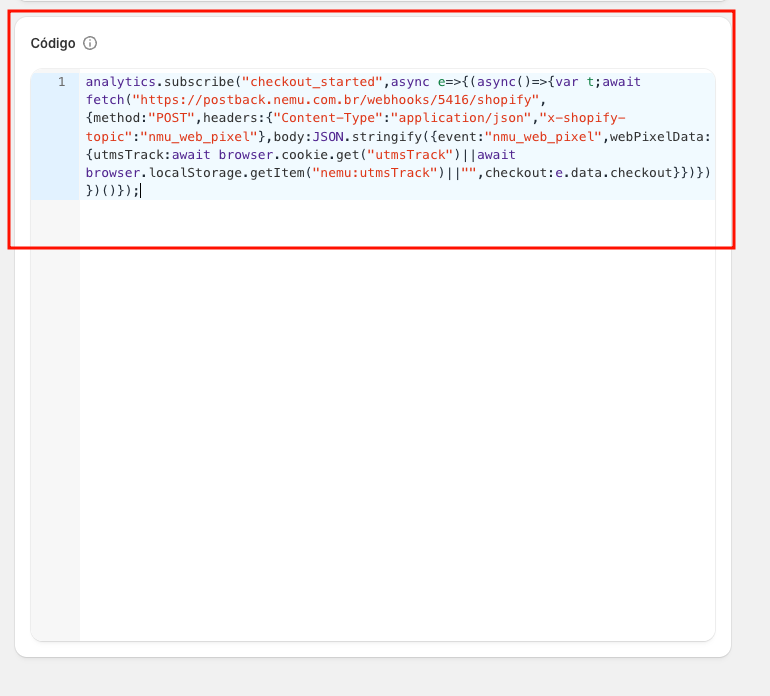
 7. Paste the code copied in step **1**
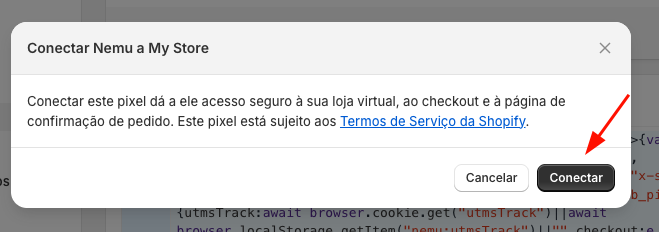
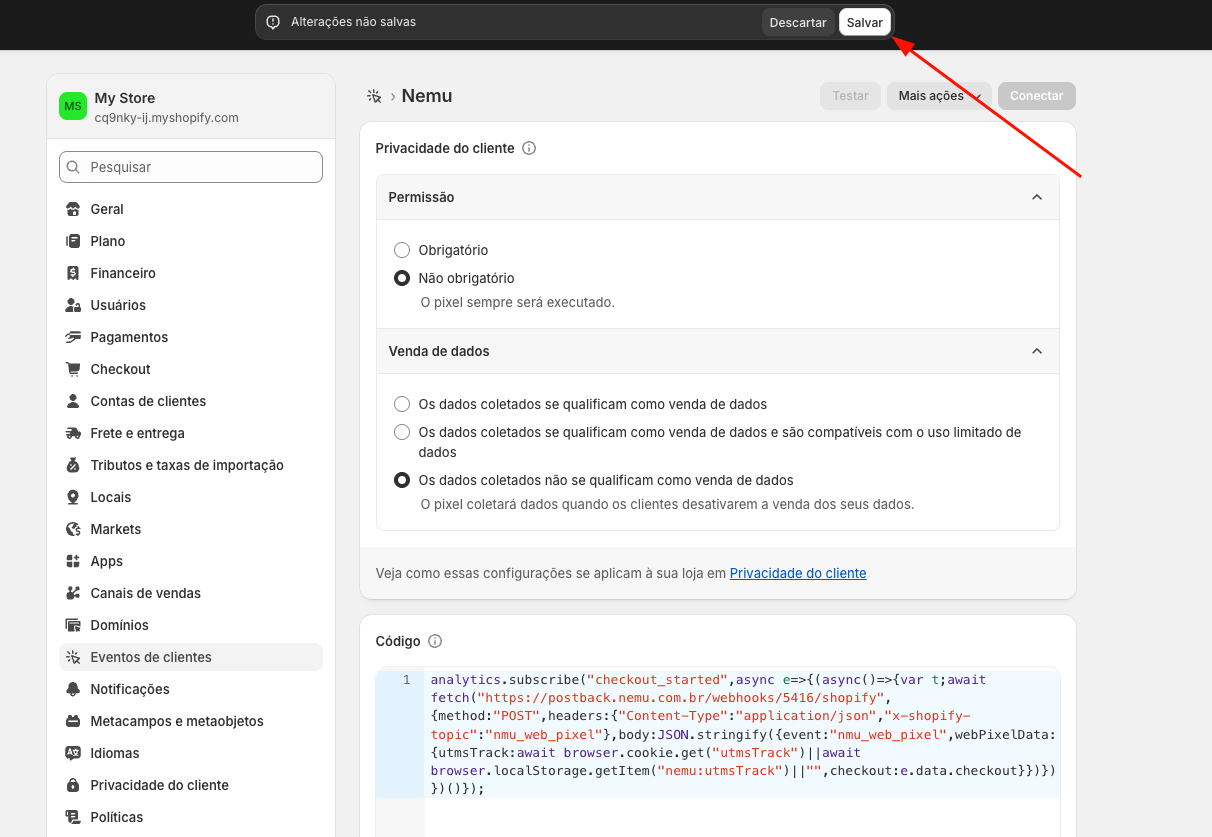
 8. At the top of the page, after pasting the code, the **Save** button will appear and then click on **Connect**
 9. Confirm again on **Connect**