> ## Documentation Index
> Fetch the complete documentation index at: https://docs.nemu.com.br/llms.txt
> Use this file to discover all available pages before exploring further.
# Braip
> How to connect your Braip account to Nemu Dashboard
> Follow the step-by-step guide and start receiving sales automatically in Nemu.
## Setting Up Webhooks
### On Braip Panel
1. In the Braip panel, in the sidebar, go to **Tools** > **Postback**.
2. Click on the **Documentation** tab.
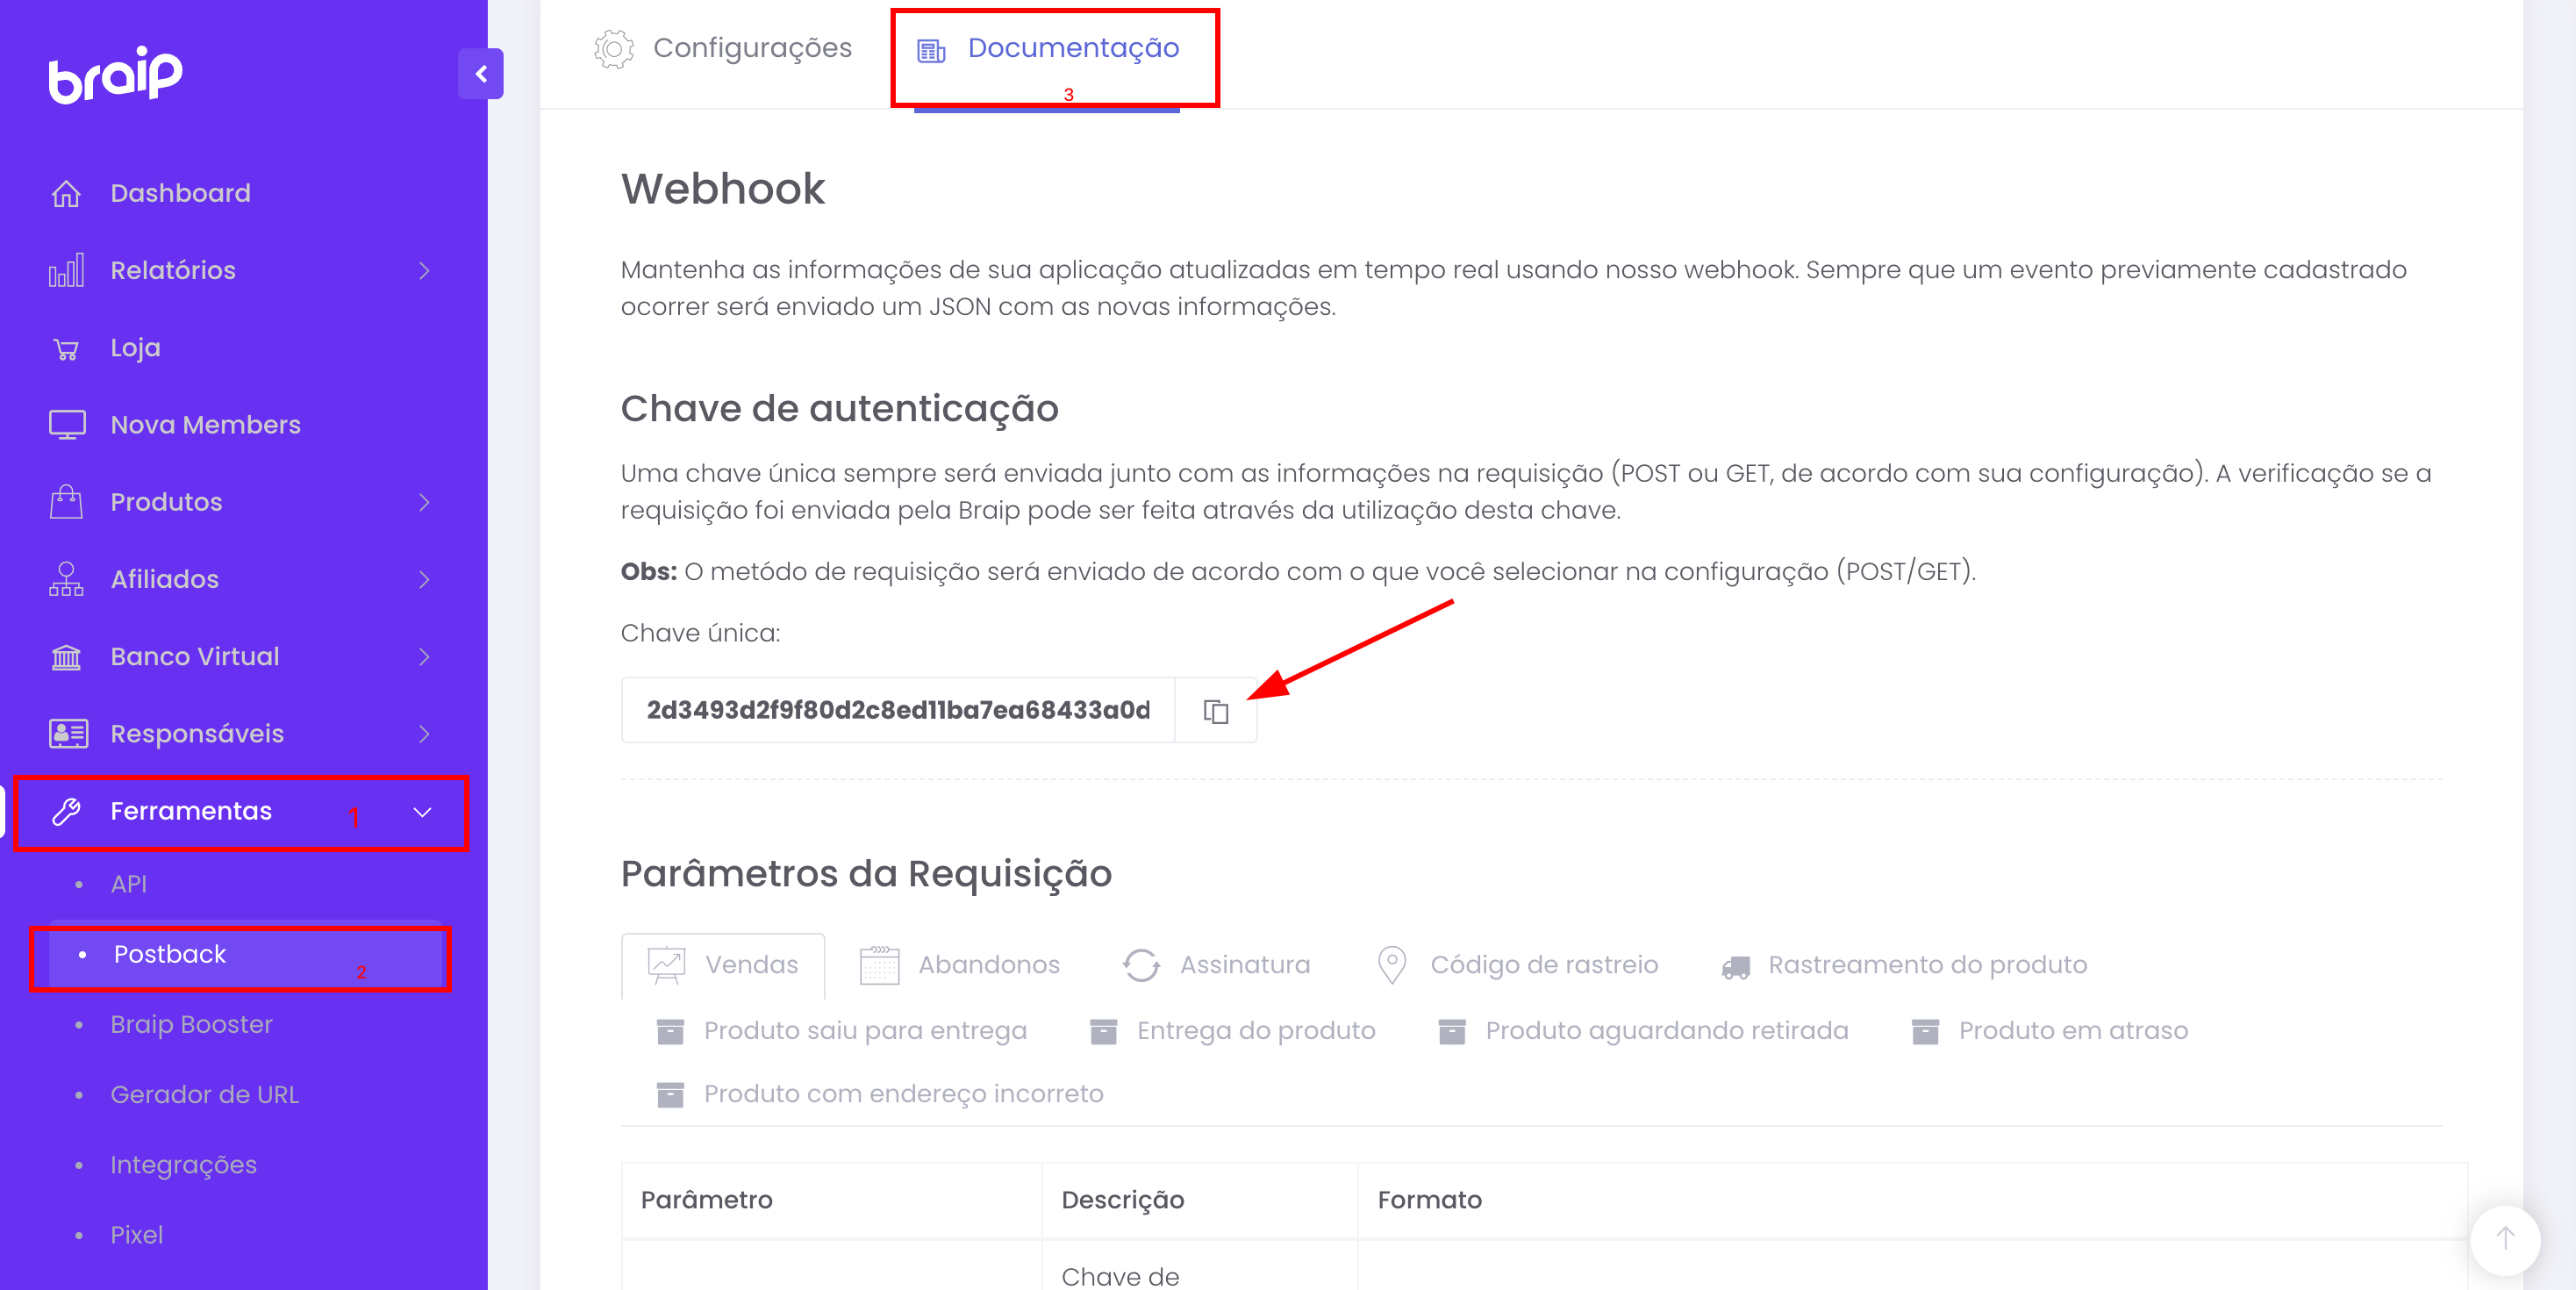 3. In the **Authentication Key** section, locate the **Unique Key** field and click the icon to **copy** the key.
Keep this page open, as we will need the key in the next steps. The authentication key is unique and will be used to verify that requests were sent by Braip.
### On Nemu Dashboard
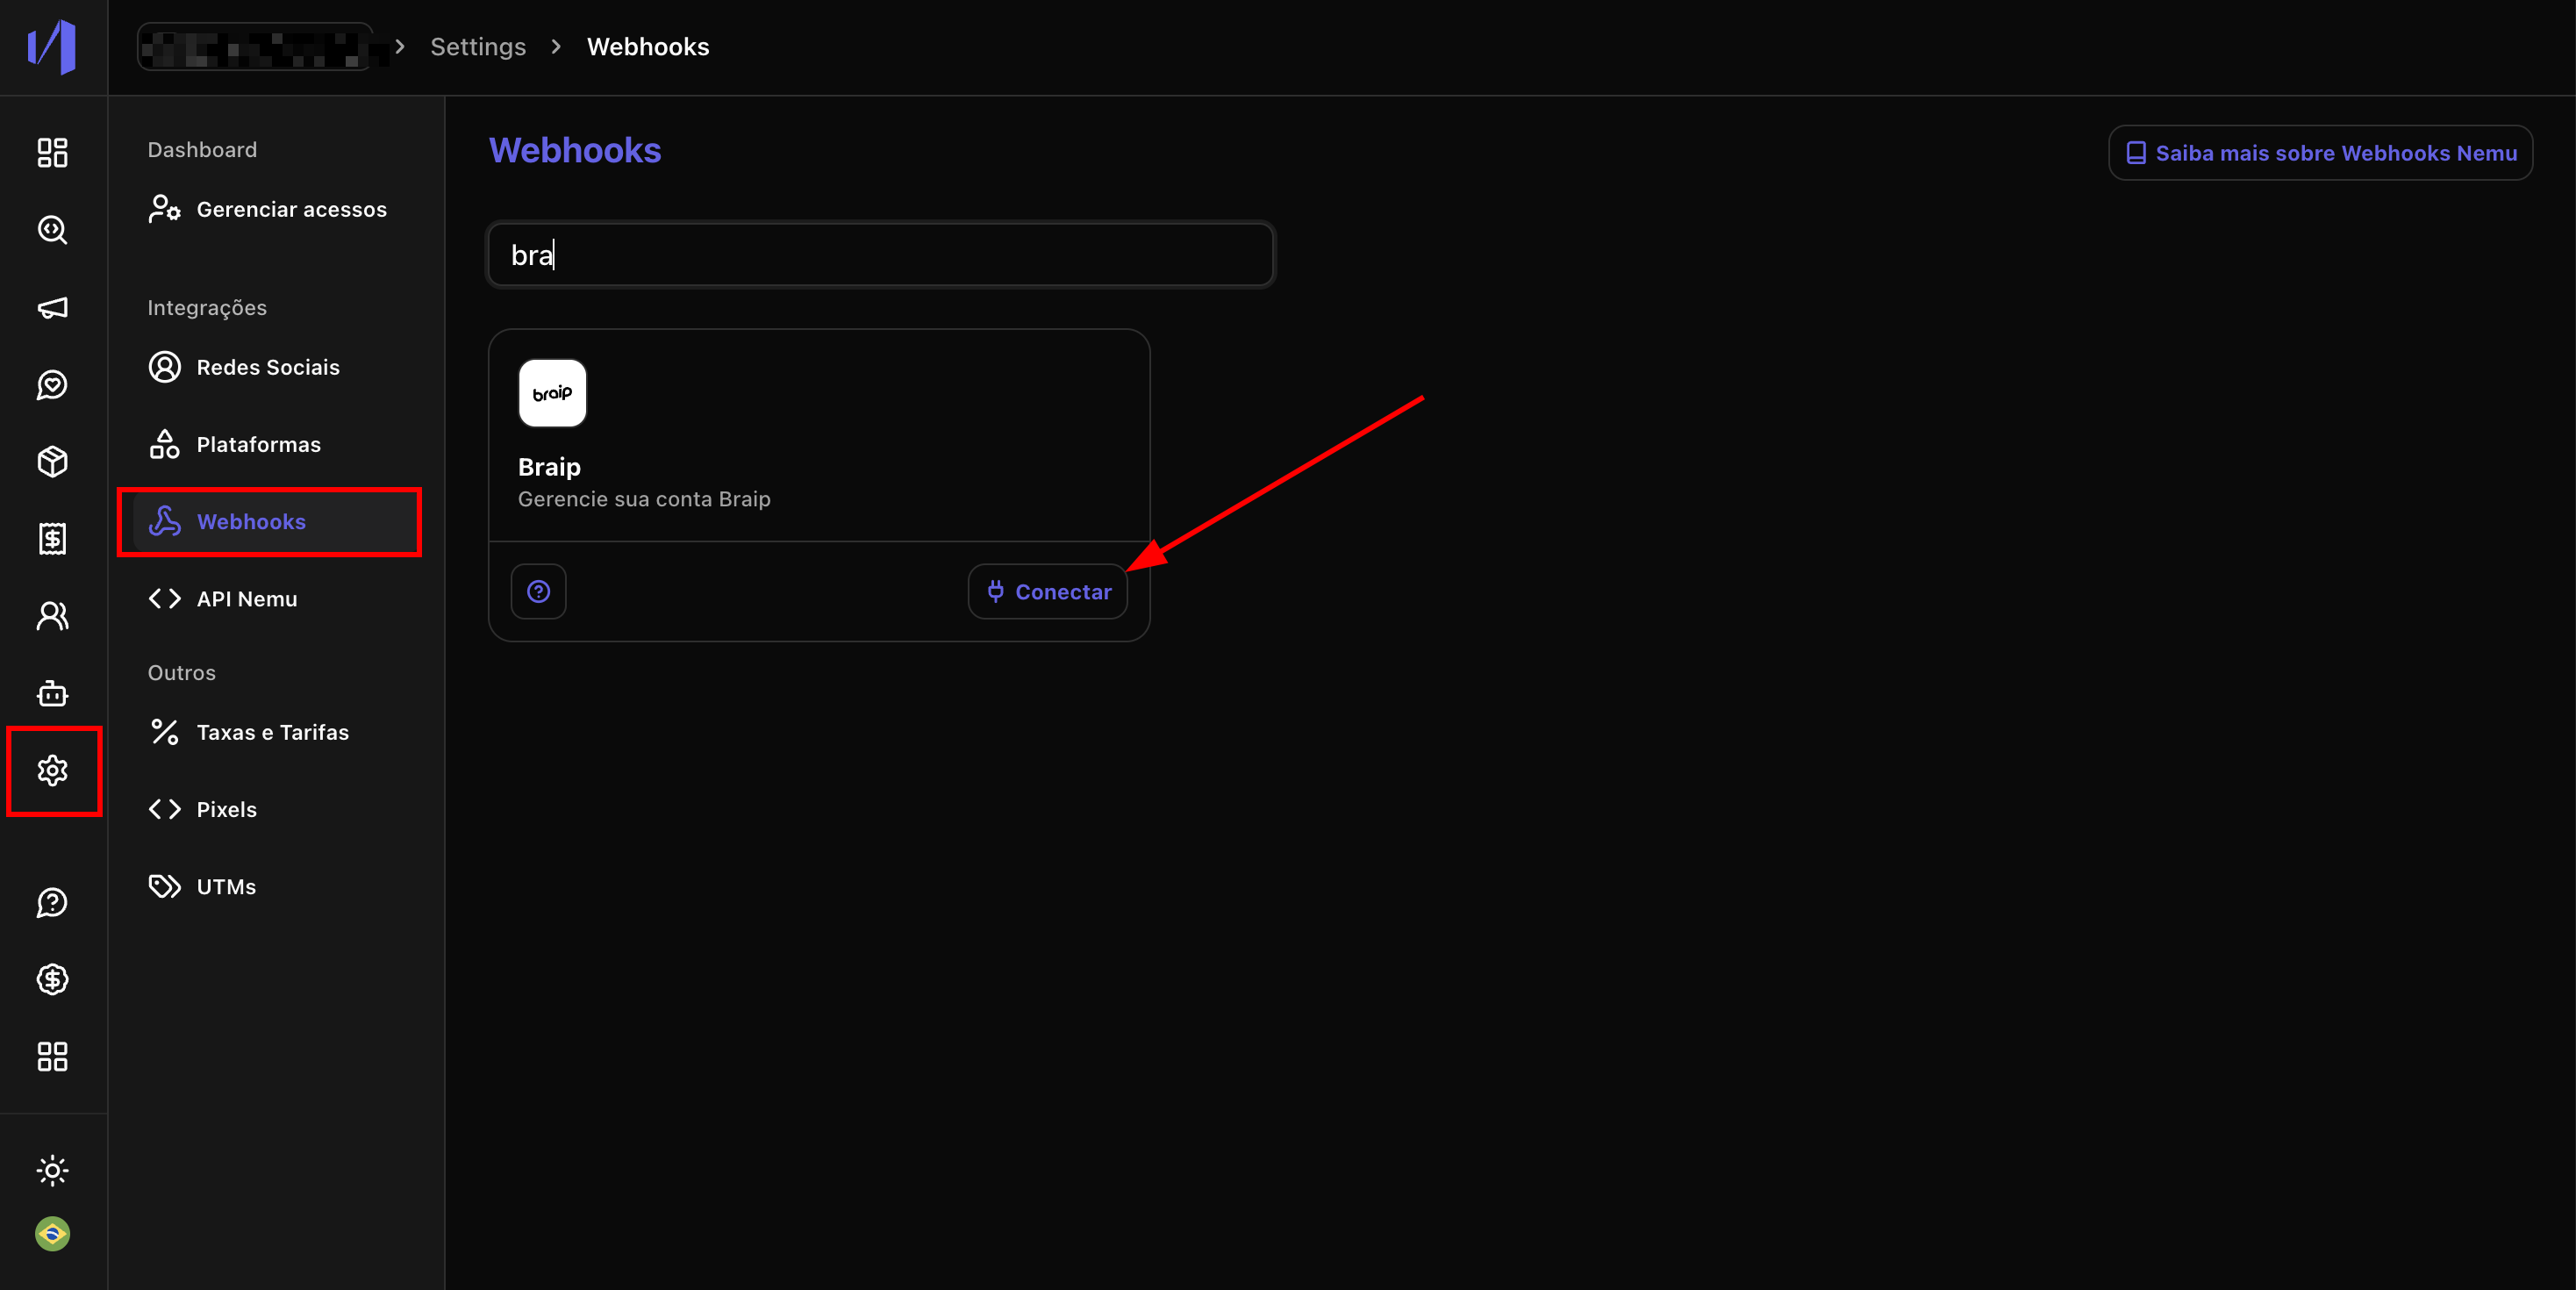
4. In the Nemu panel, go to **Settings** > **Webhooks**.
5. Search for **Braip** and click on **Connect**.
3. In the **Authentication Key** section, locate the **Unique Key** field and click the icon to **copy** the key.
Keep this page open, as we will need the key in the next steps. The authentication key is unique and will be used to verify that requests were sent by Braip.
### On Nemu Dashboard
4. In the Nemu panel, go to **Settings** > **Webhooks**.
5. Search for **Braip** and click on **Connect**.
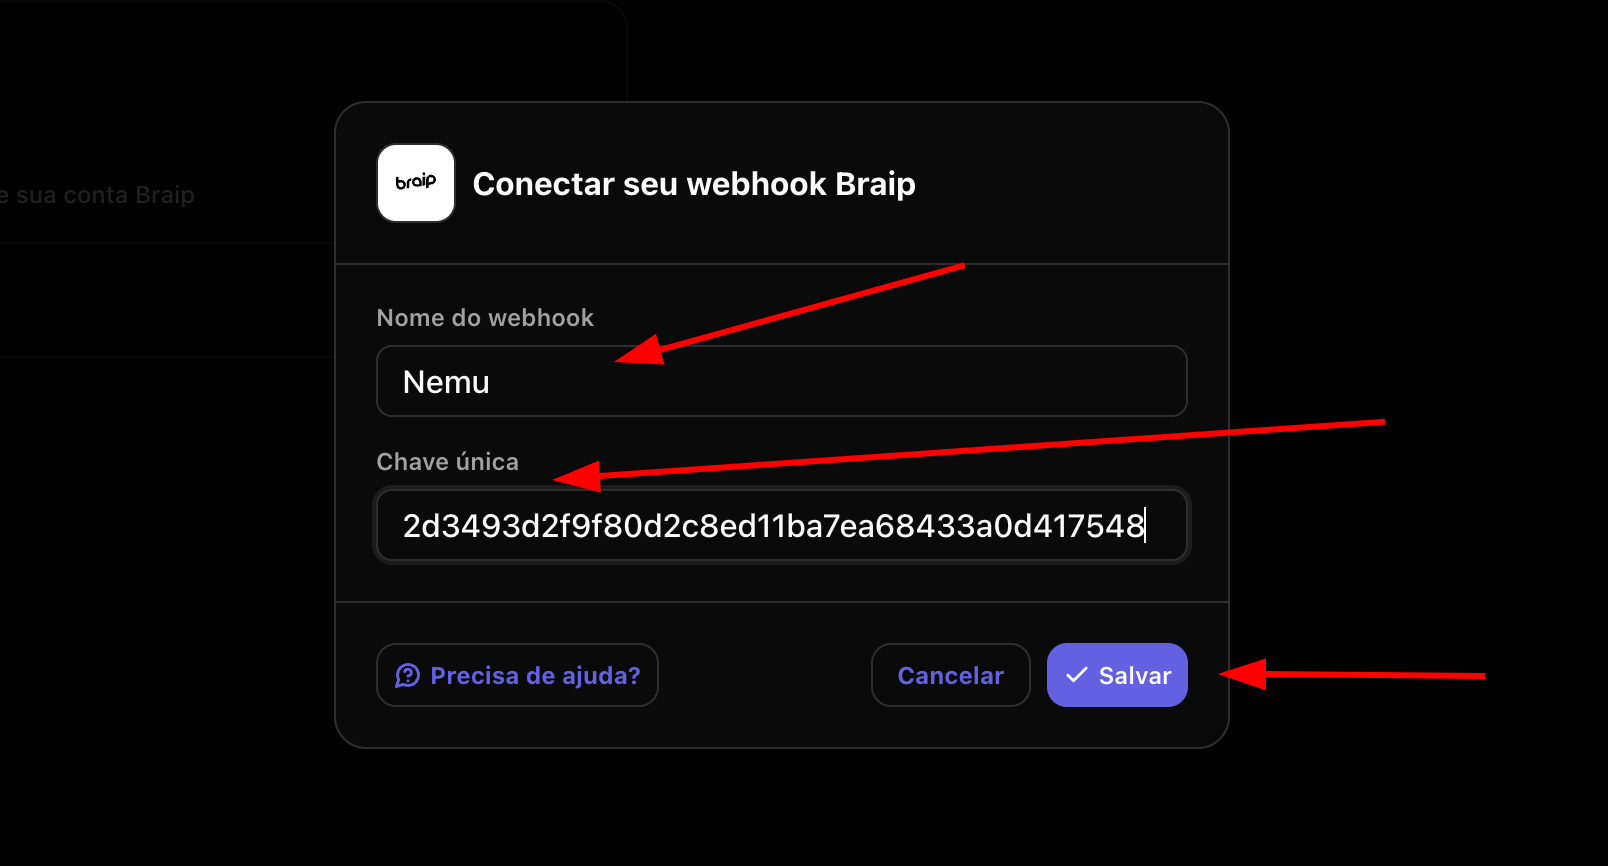
 6. Define a **Name** for the webhook, paste the **Unique Key** copied in step 3 and click on **Save**.
 7. Click the button to **copy** the **webhook URL** generated by Nemu.
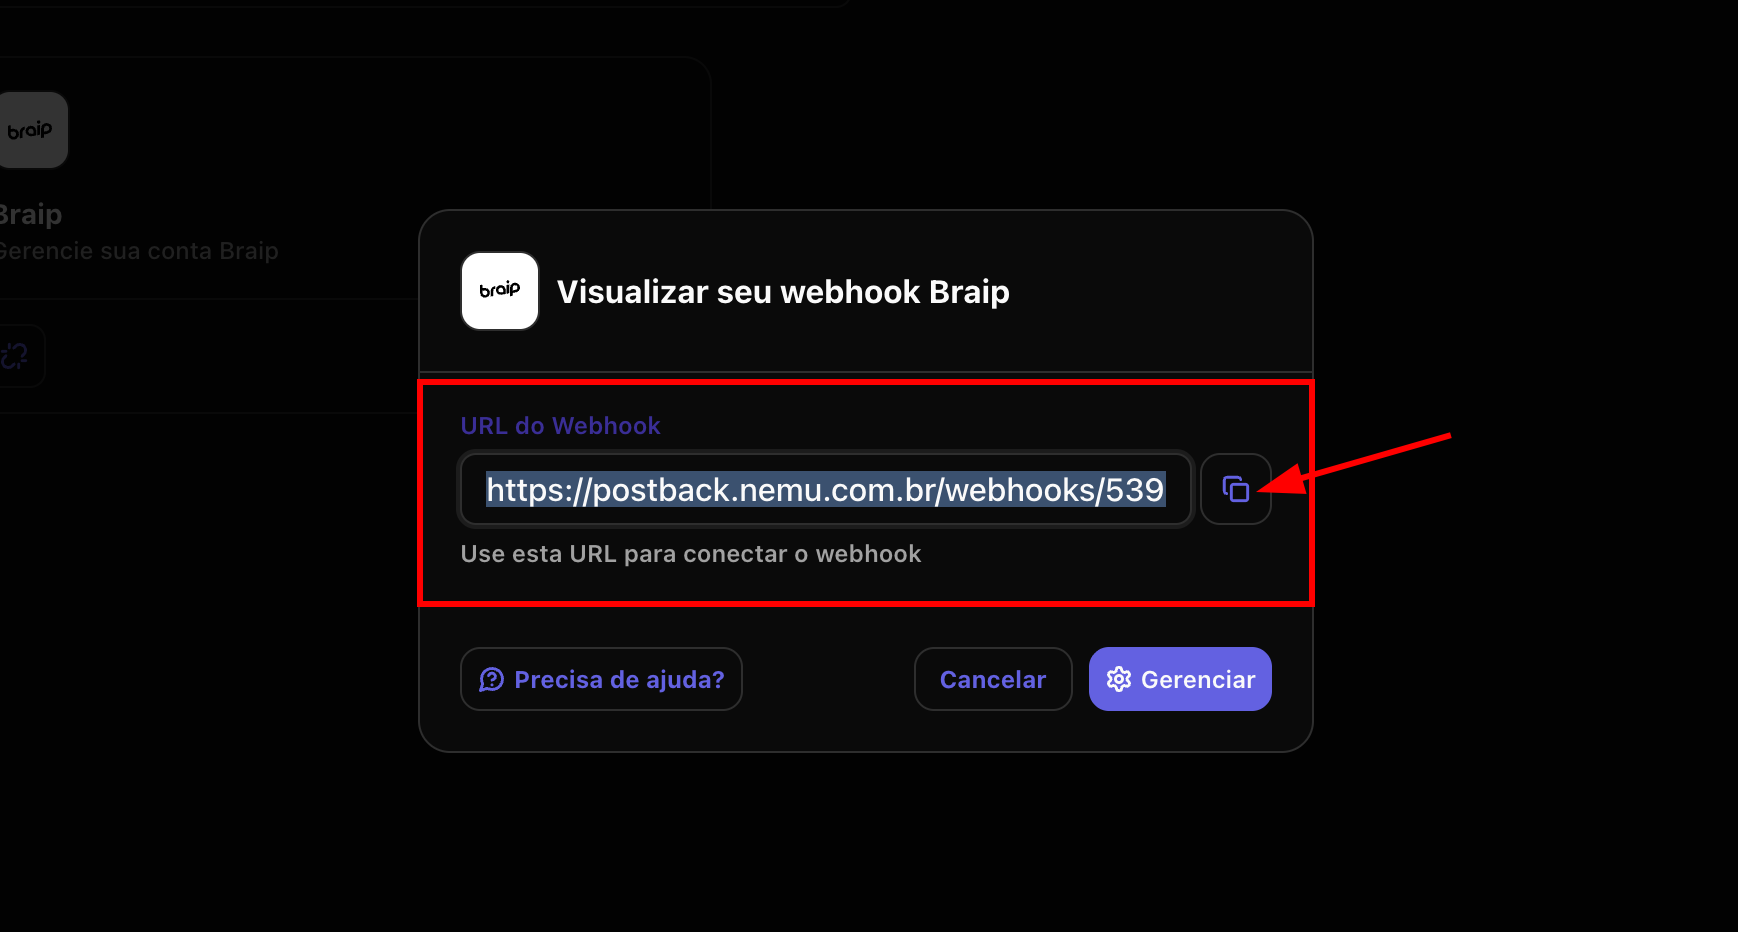 ### On Braip Panel
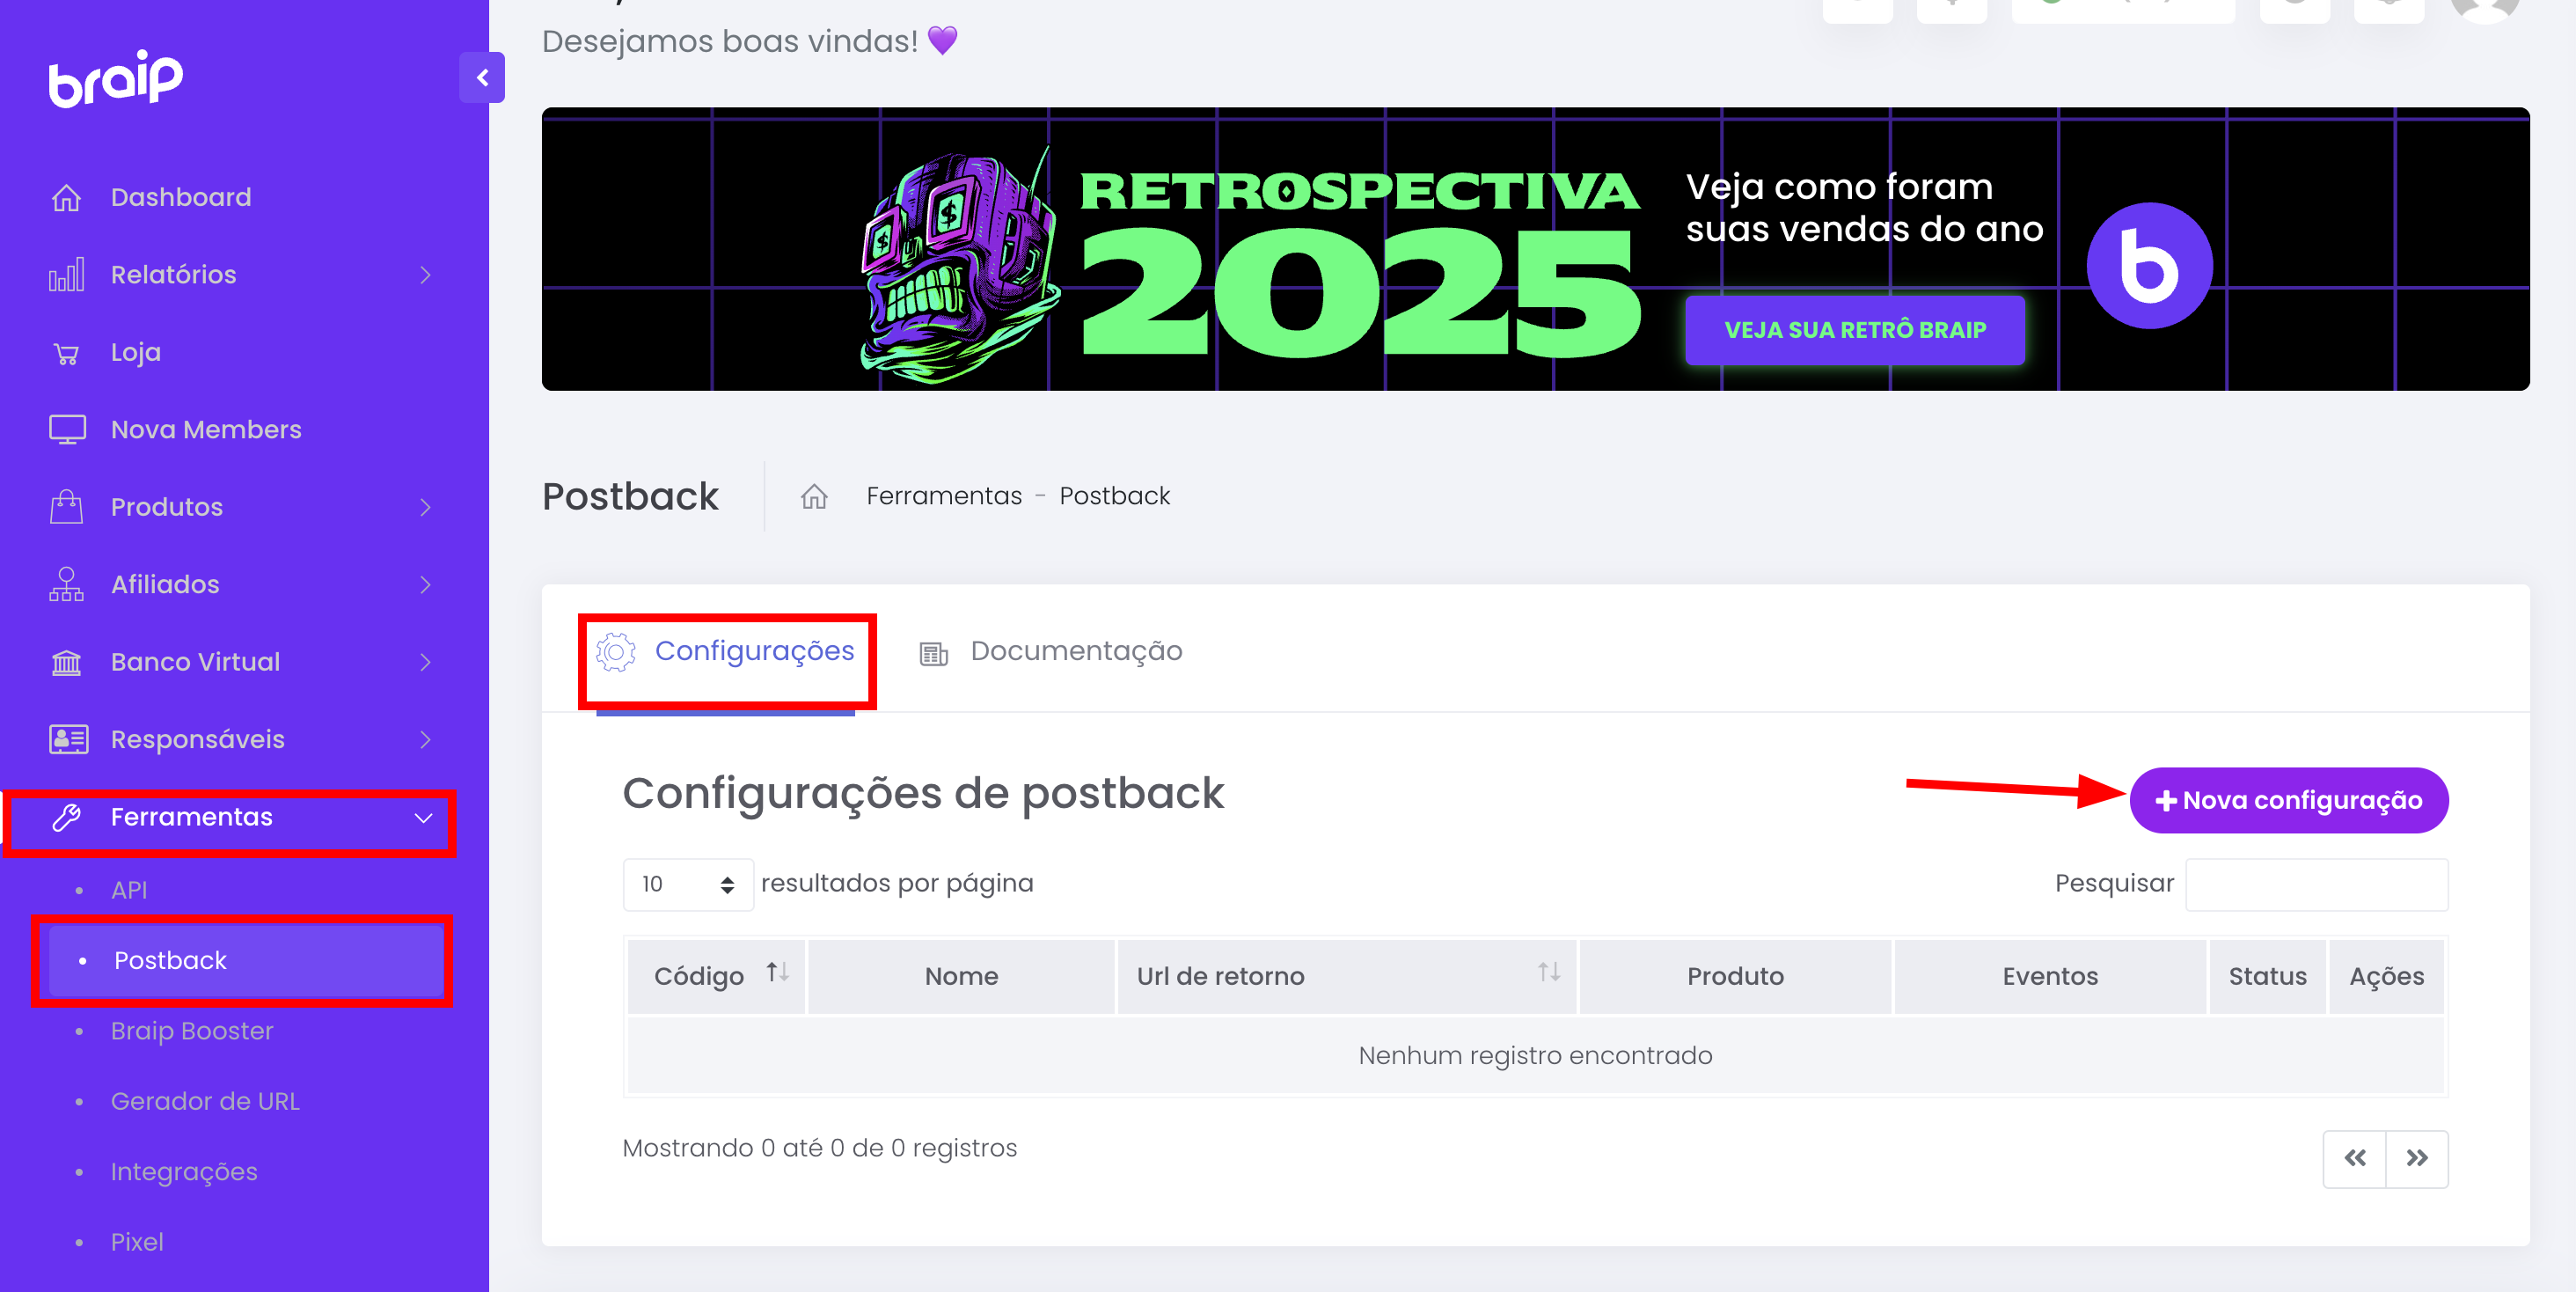
8. In the Braip panel, go to **Tools** > **Postback** > **Settings**.
9. Click on the **+ New configuration** button.
### On Braip Panel
8. In the Braip panel, go to **Tools** > **Postback** > **Settings**.
9. Click on the **+ New configuration** button.
 10. Fill in the following fields:
* **Name**: Define a name for the configuration (e.g., "Nemu")
* **Return URL**: Paste the **URL** copied in step 7
* **Product**: Select the desired product or "All products"
10. Fill in the following fields:
* **Name**: Define a name for the configuration (e.g., "Nemu")
* **Return URL**: Paste the **URL** copied in step 7
* **Product**: Select the desired product or "All products"
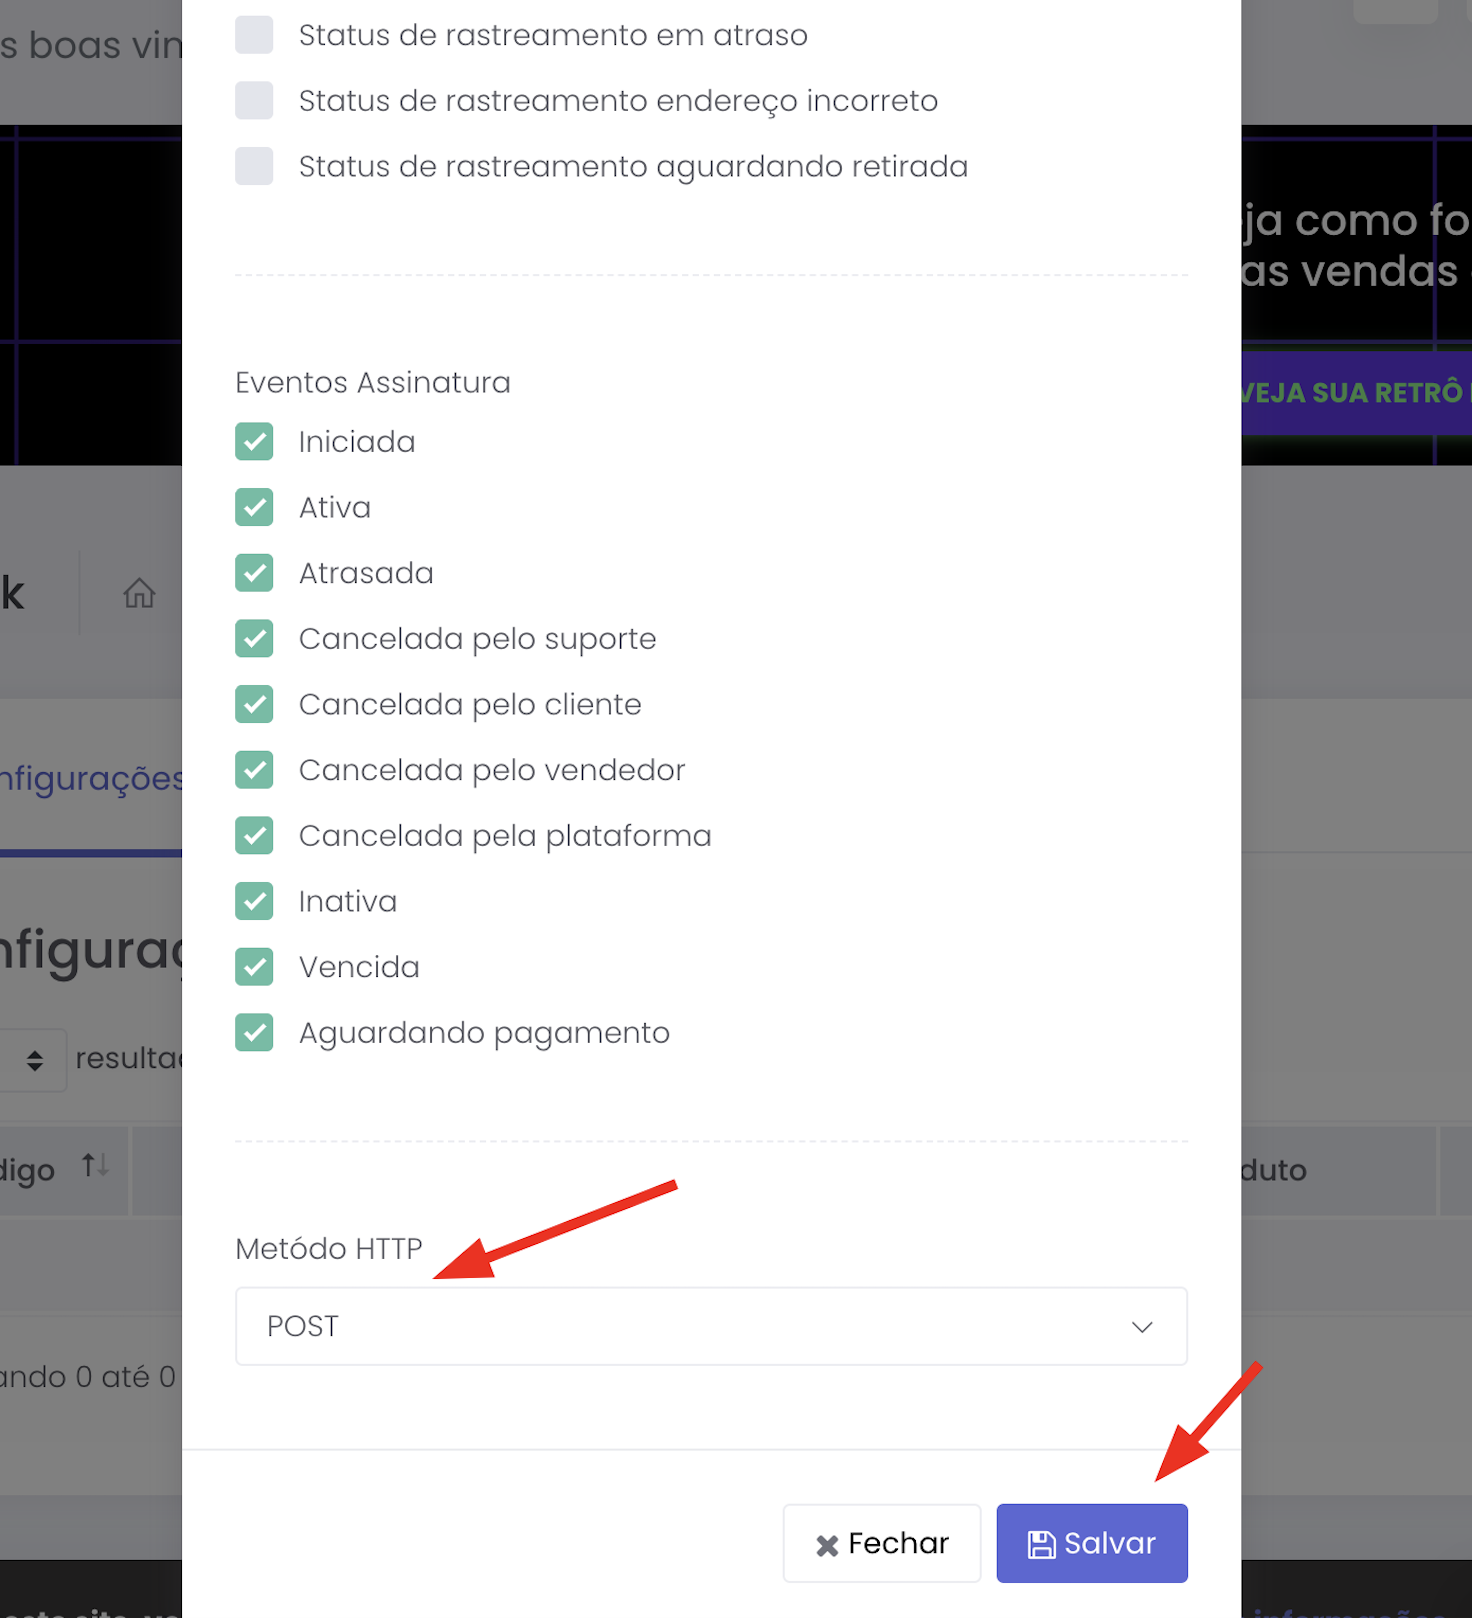
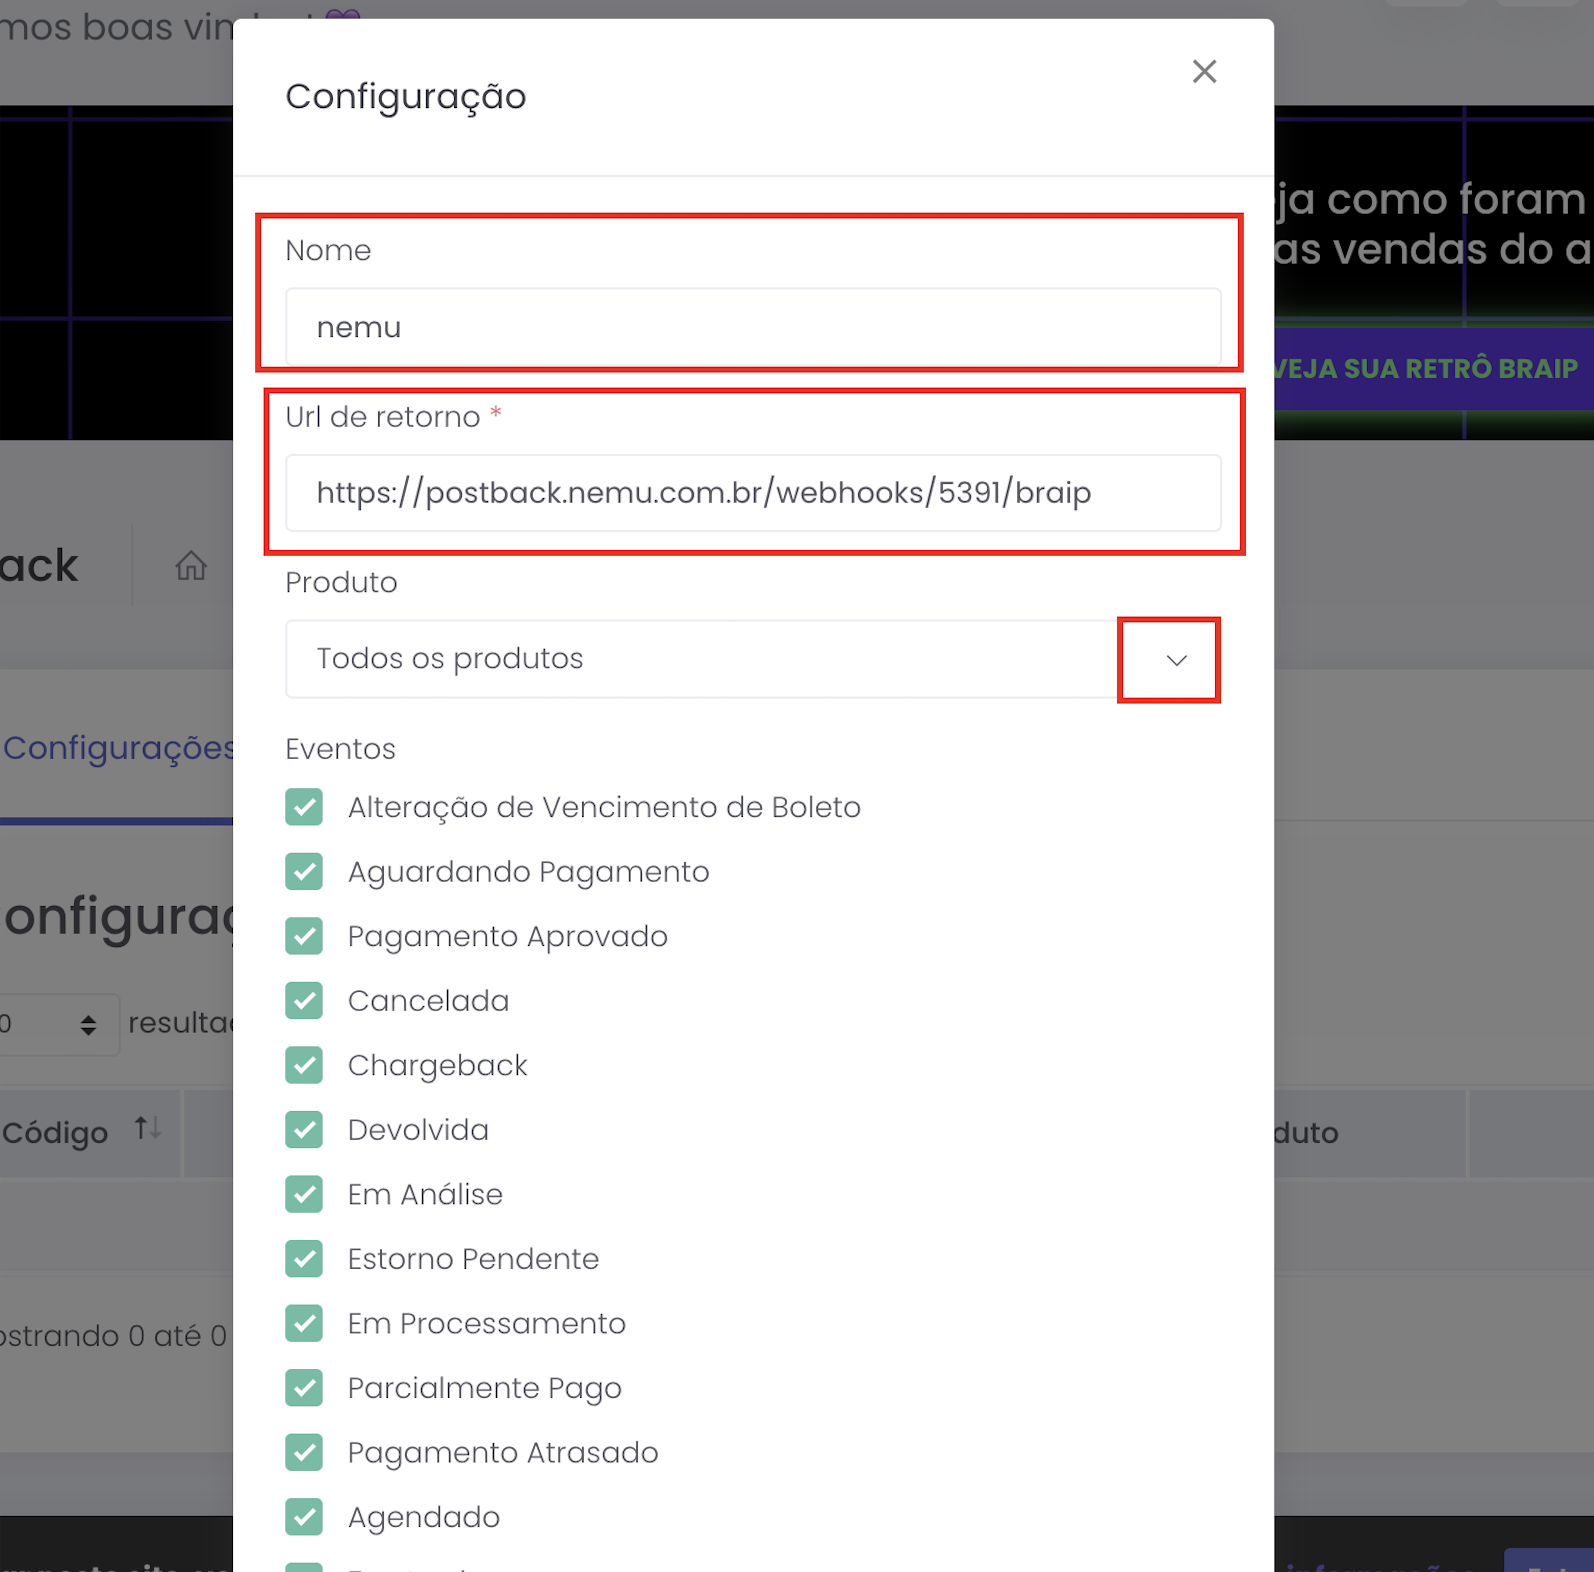 11. In the **Events** section, select all events.
12. In the **Subscription** section, select all events again.
13. Confirm that the **HTTP Method** is set to **POST**.
14. Click on **Save** to complete the integration.
11. In the **Events** section, select all events.
12. In the **Subscription** section, select all events again.
13. Confirm that the **HTTP Method** is set to **POST**.
14. Click on **Save** to complete the integration.