> ## Documentation Index
> Fetch the complete documentation index at: https://docs.nemu.com.br/llms.txt
> Use this file to discover all available pages before exploring further.
# Buygoods
> How to connect your Buygoods account to Nemu Dashboard
> Follow the step-by-step guide and start receiving sales automatically in Nemu.
## Setting Up Webhooks
### On Nemu Dashboard
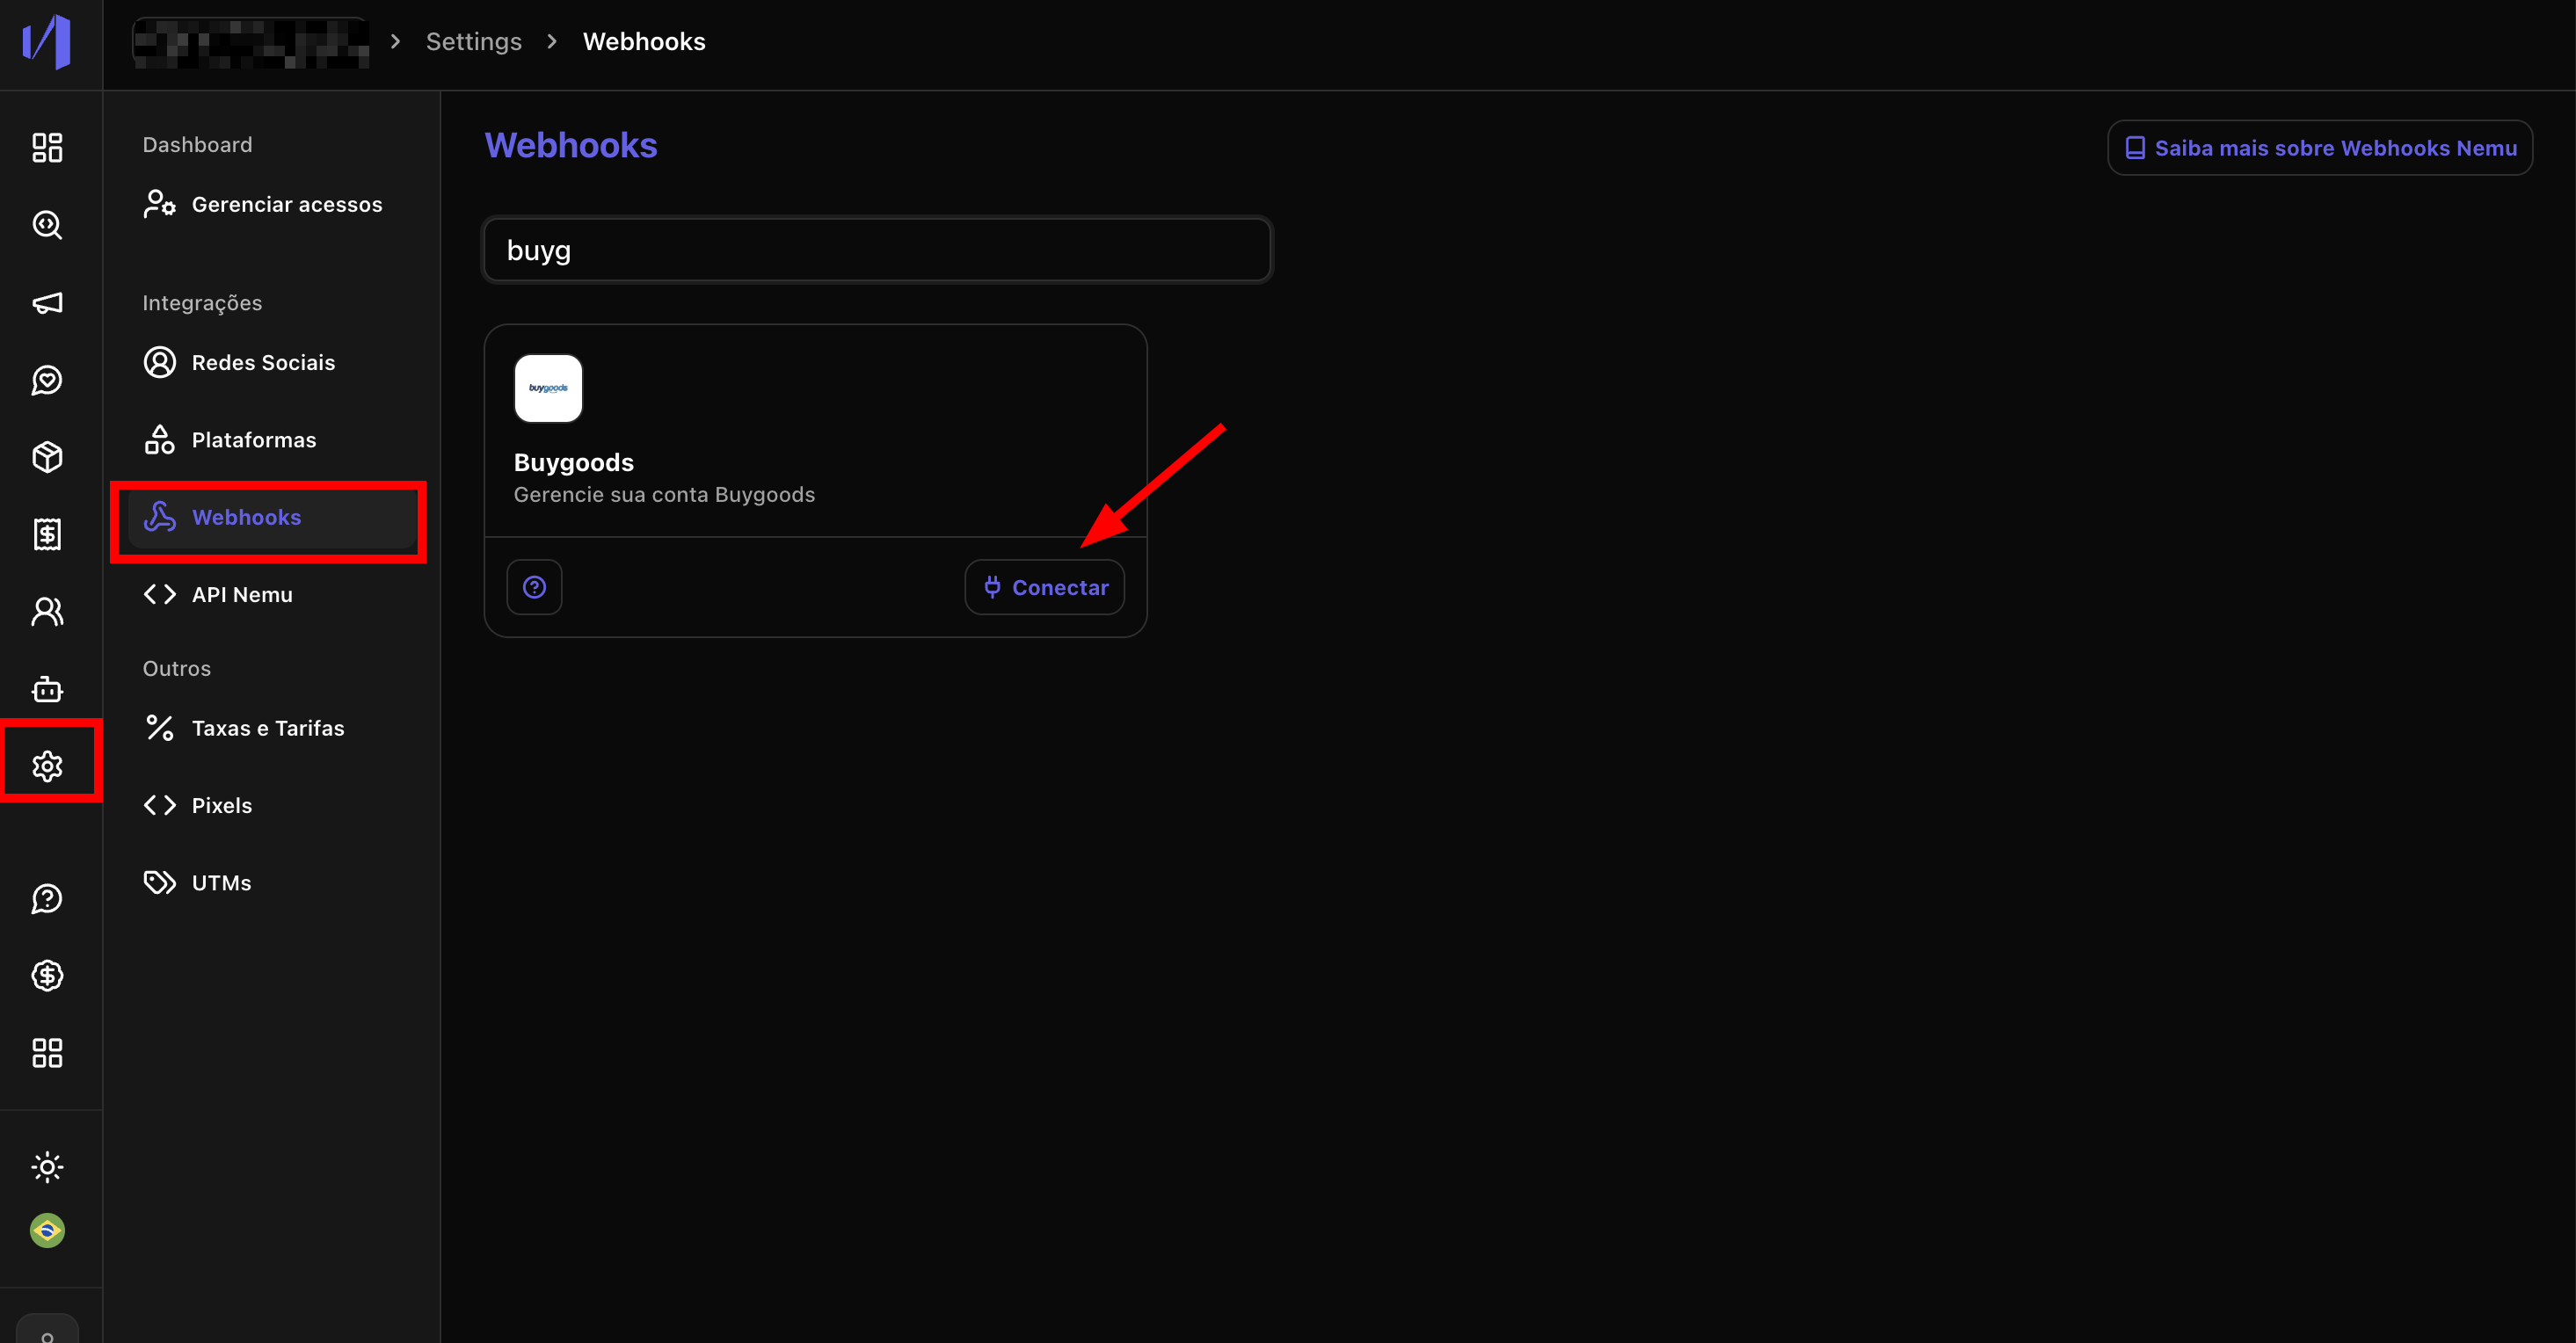
1. In the sidebar, go to **Settings** > **Webhooks**.
2. Search for **Buygoods** in the search field and click the **Connect** button on the integration card.
 3. In the modal that opens, define a **Webhook name** (e.g., "Buygoods") and click on **Save**.
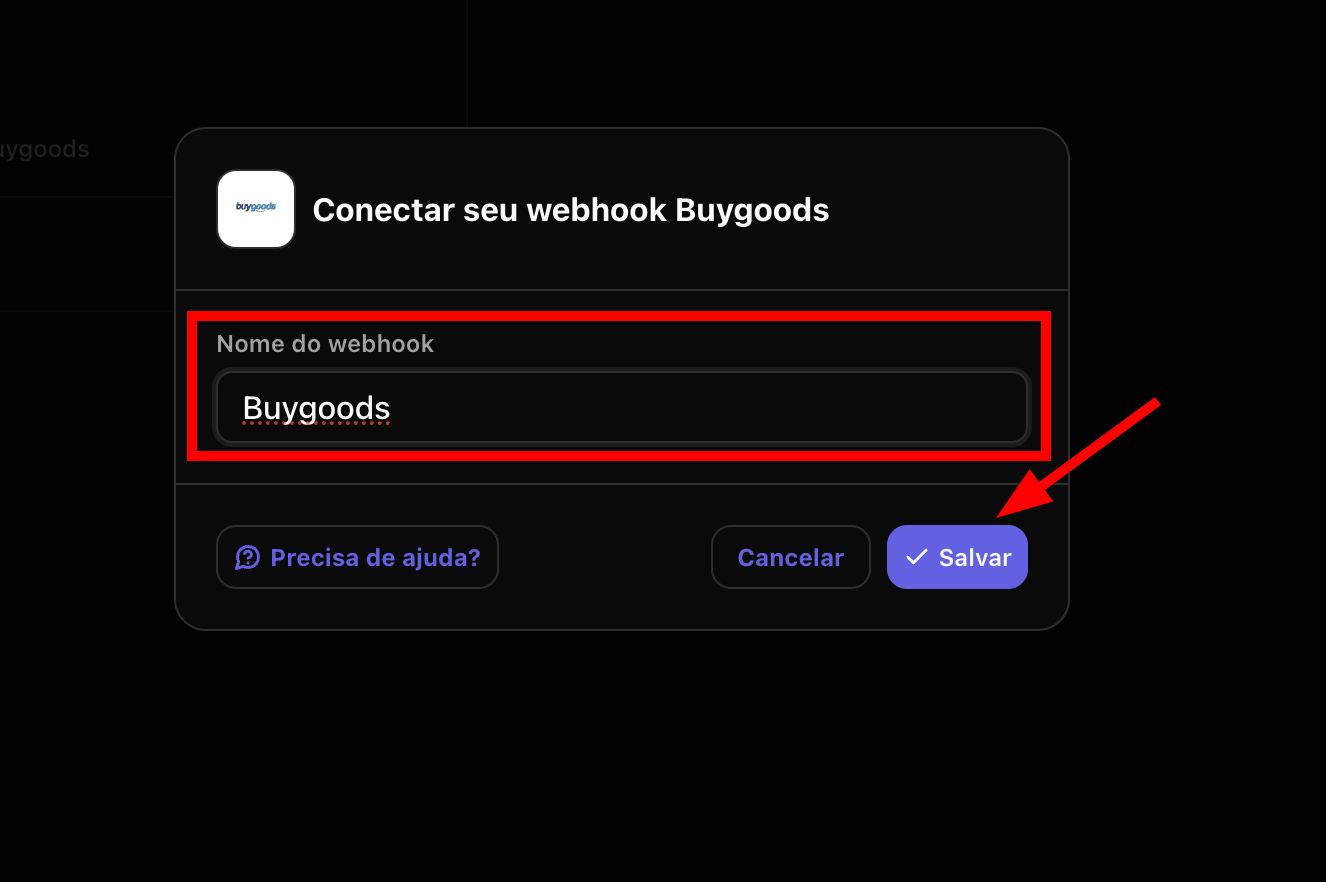 The webhook name helps identify the integration in your panel. Choose a name that makes recognition easy.
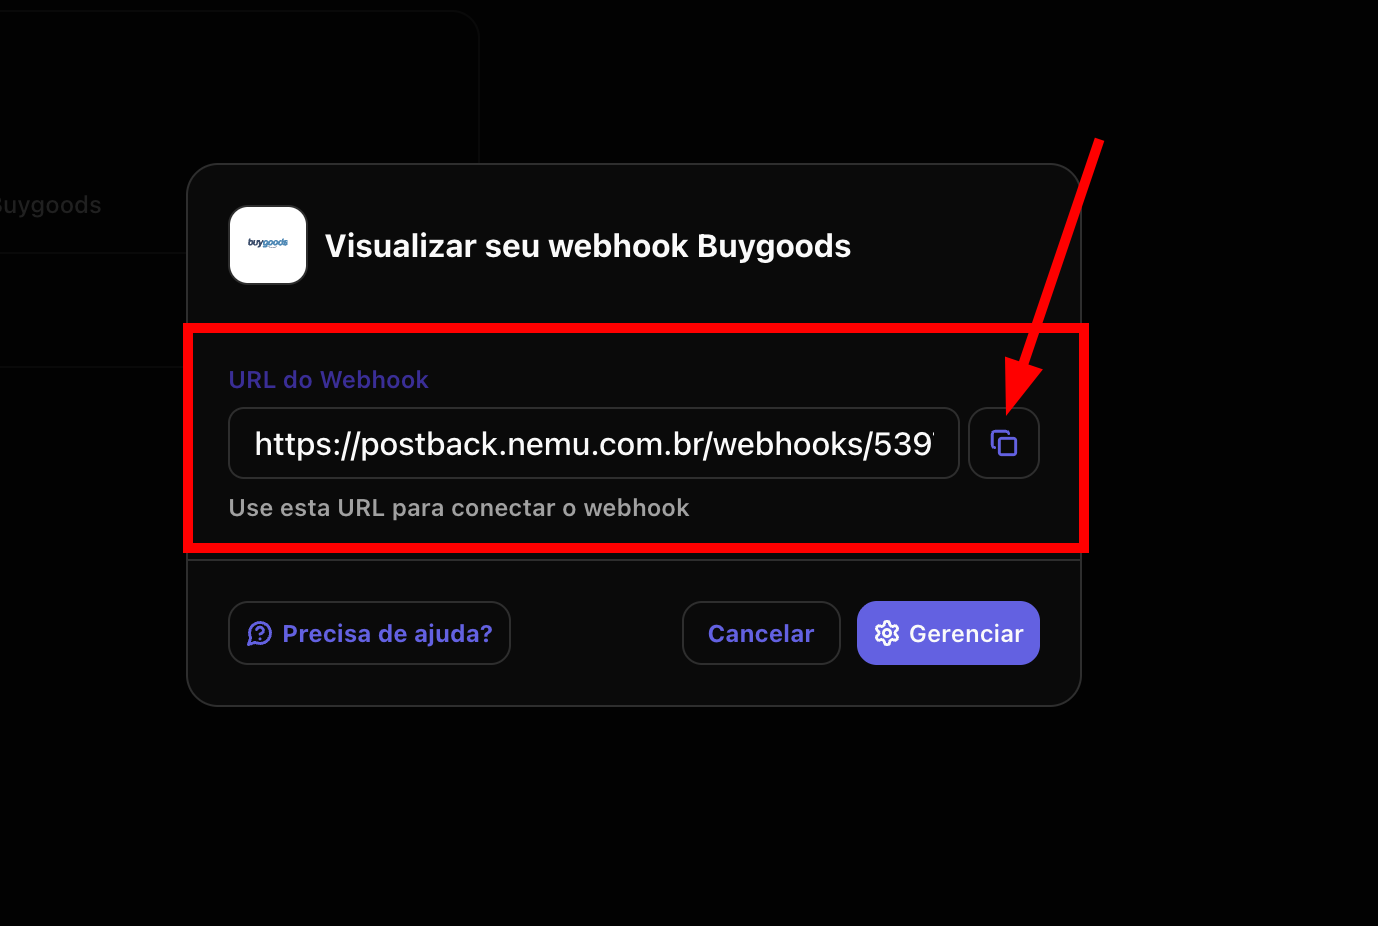
4. After saving, a modal will be displayed with the **Webhook URL** generated by Nemu. Click the **copy** button
The webhook name helps identify the integration in your panel. Choose a name that makes recognition easy.
4. After saving, a modal will be displayed with the **Webhook URL** generated by Nemu. Click the **copy** button
 ### On Buygoods Panel
5. Access the **Buygoods** panel and, in the navigation menu at the top of the page, click on **Setup**.
### On Buygoods Panel
5. Access the **Buygoods** panel and, in the navigation menu at the top of the page, click on **Setup**.
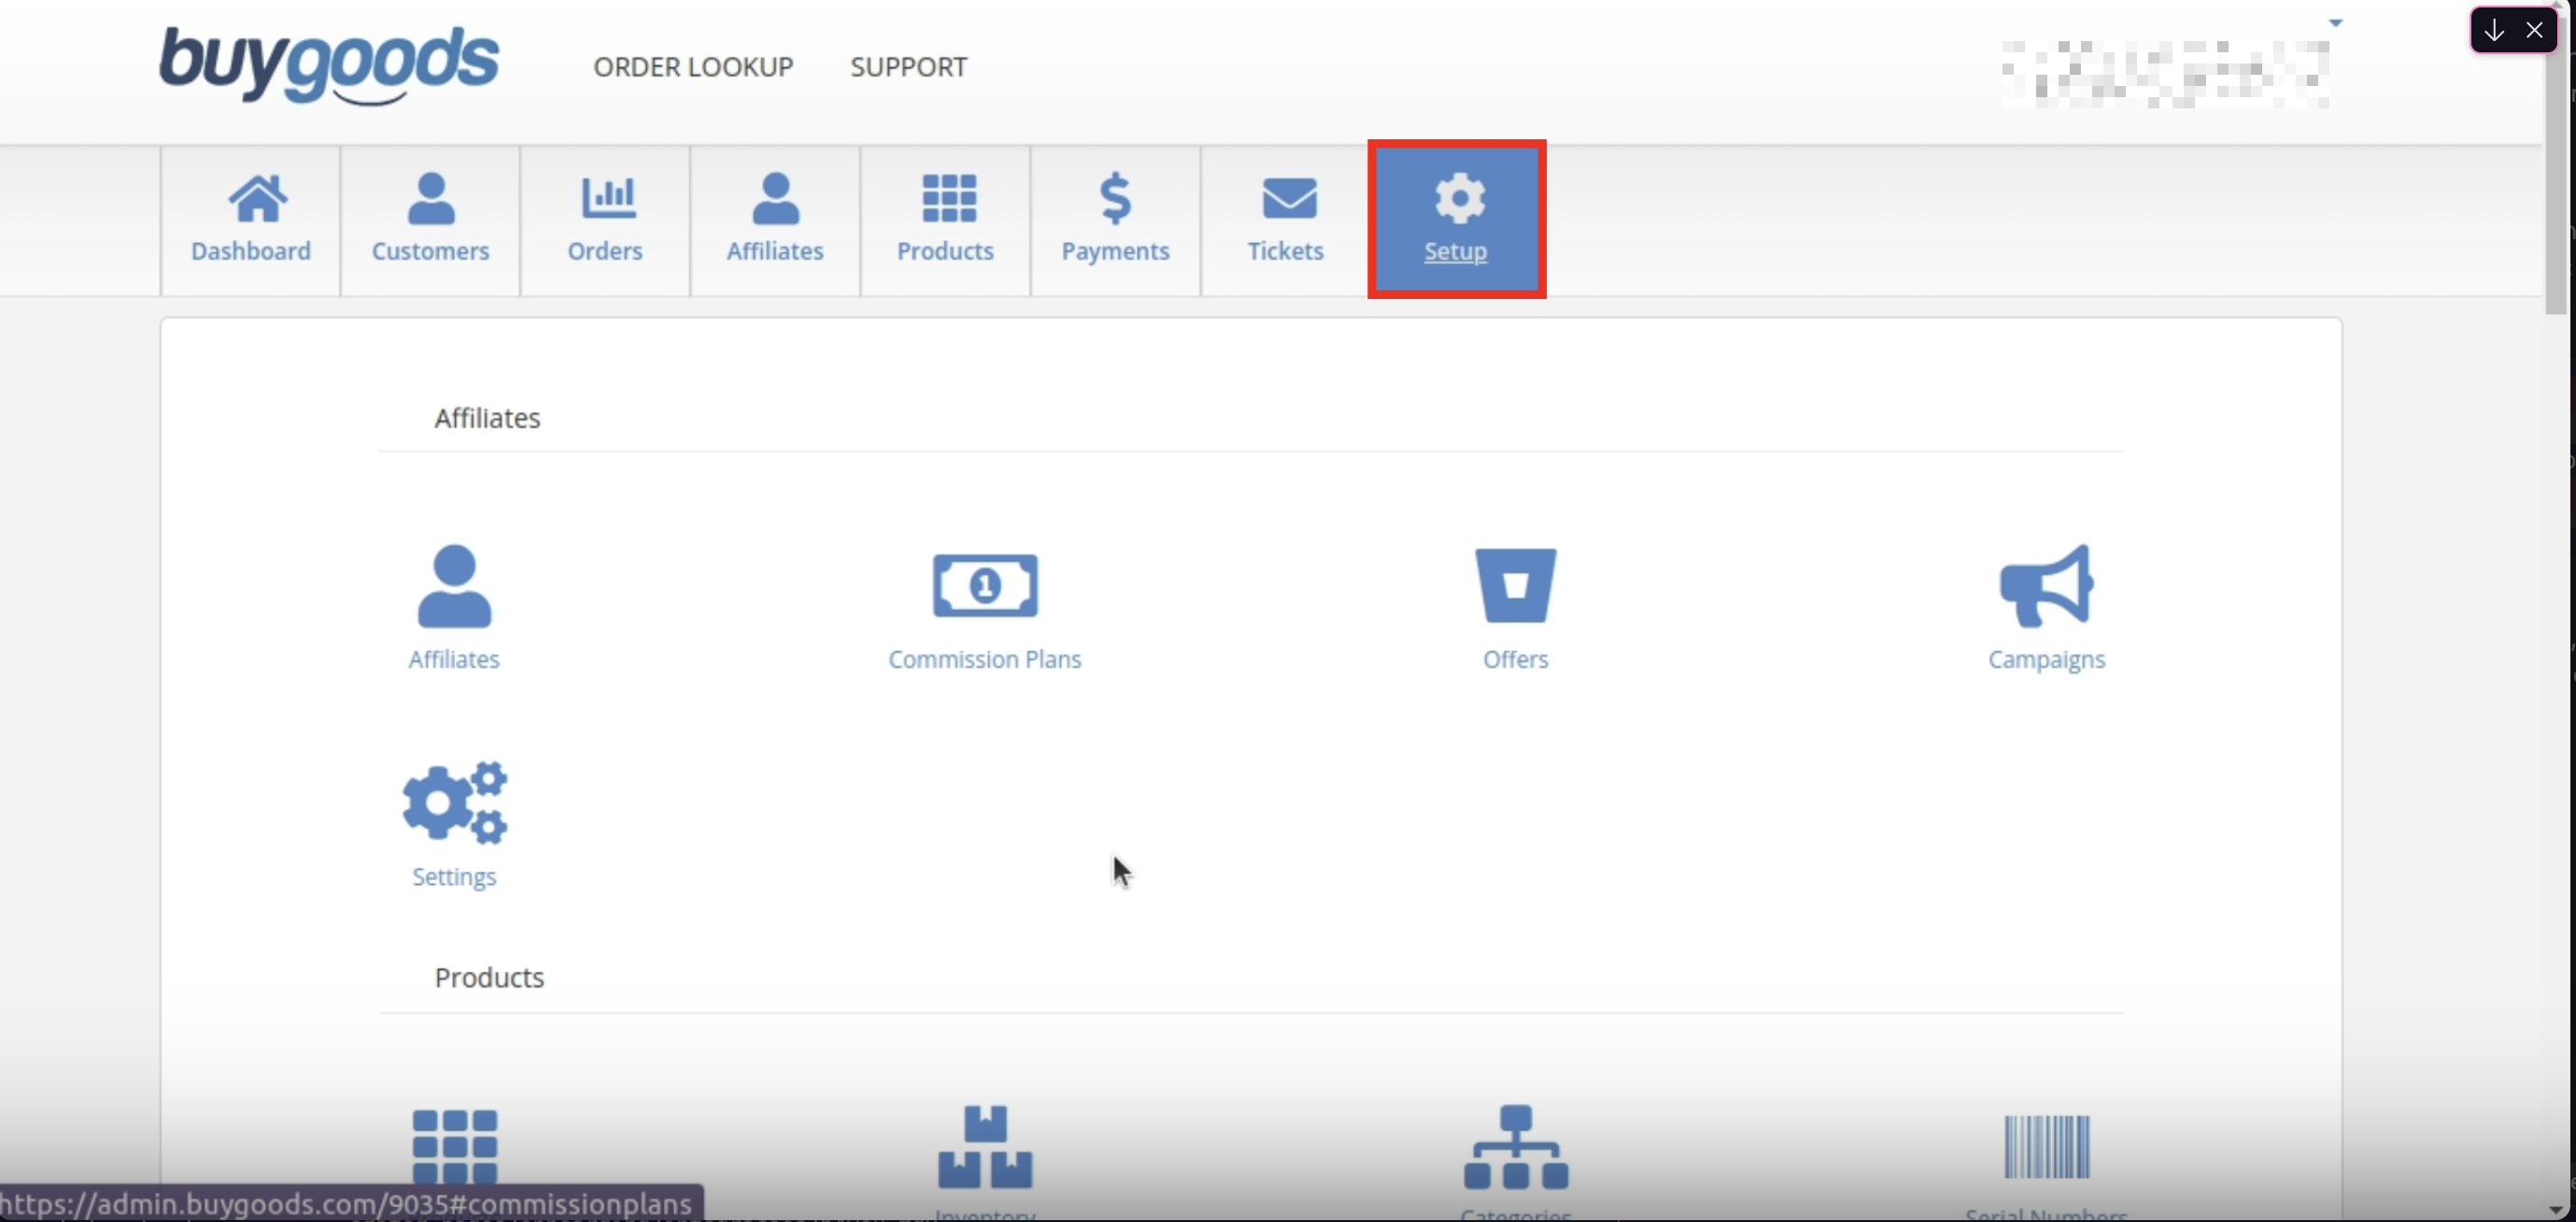 6. On the Setup page, locate the **Products** section and click on **Settings**.
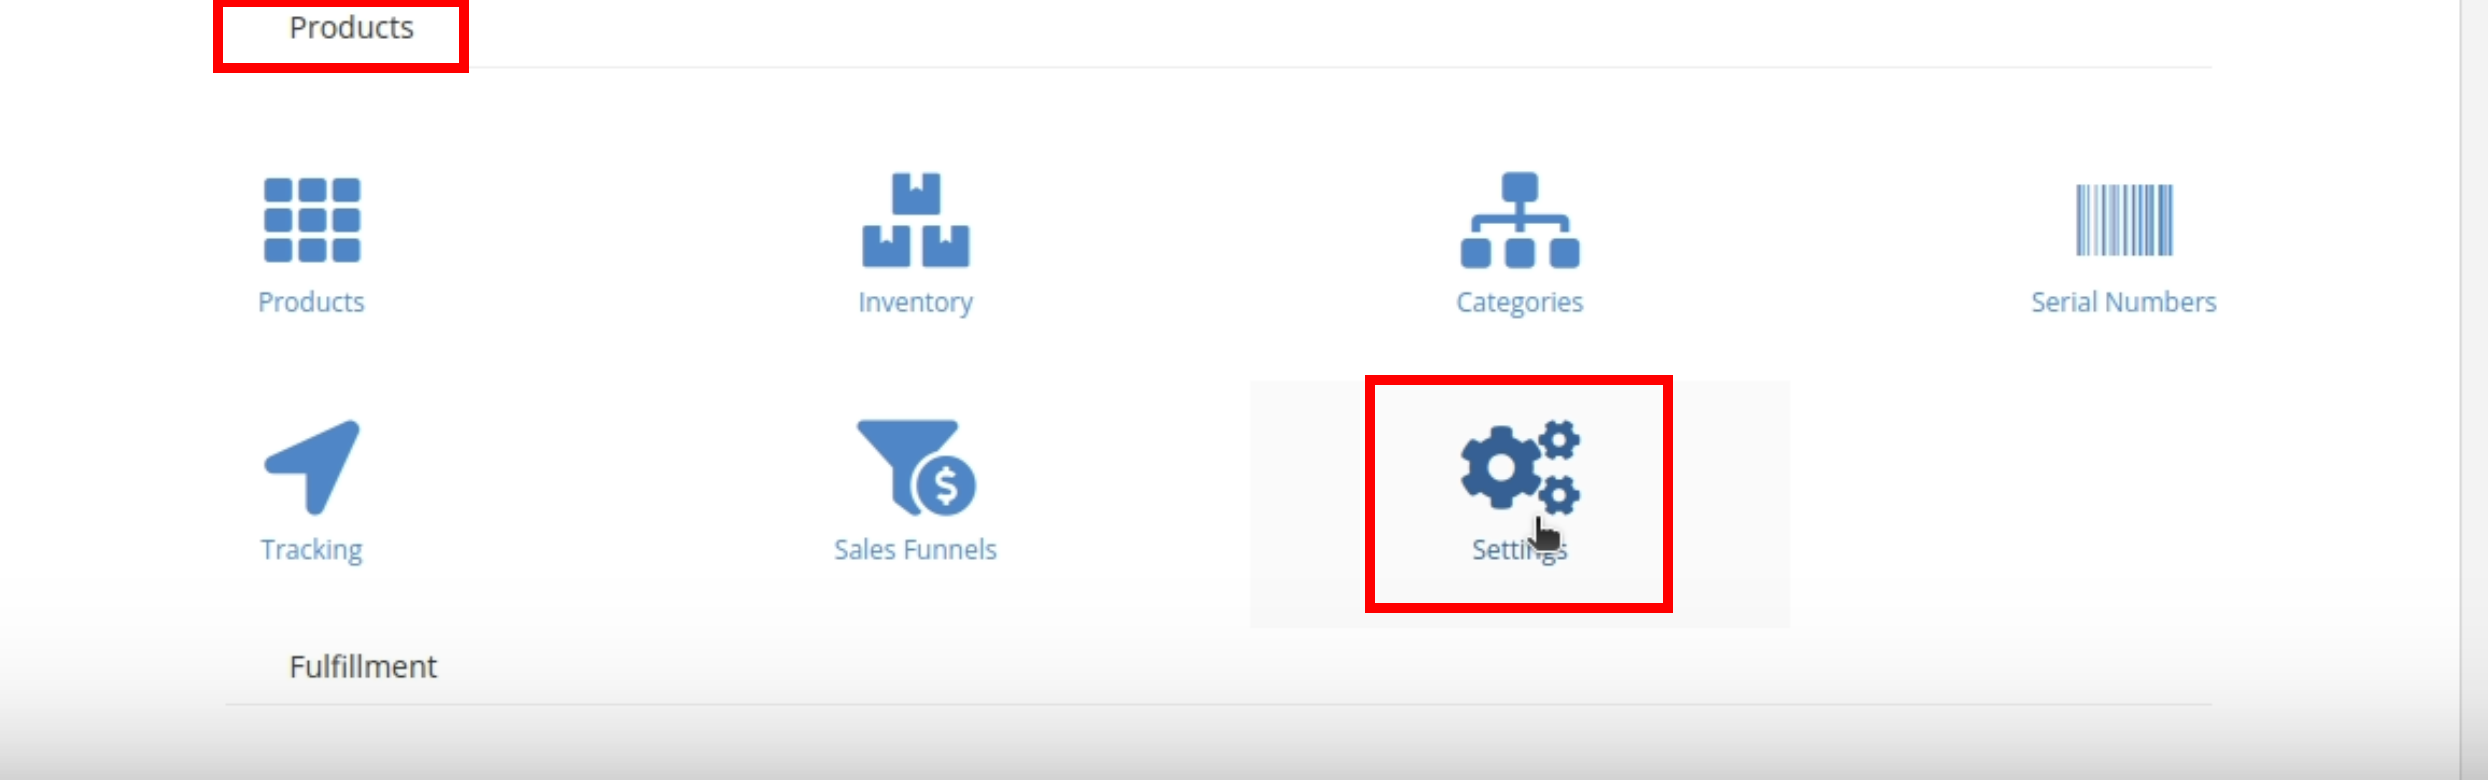 8. To better locate yourself, verify that you are on the **Products> Products Settings** page as shown in the image, where you will see various URL fields.
You can add more URL fields if needed, just click on the **+** that appears at the end of the URL field.
8. To better locate yourself, verify that you are on the **Products> Products Settings** page as shown in the image, where you will see various URL fields.
You can add more URL fields if needed, just click on the **+** that appears at the end of the URL field.
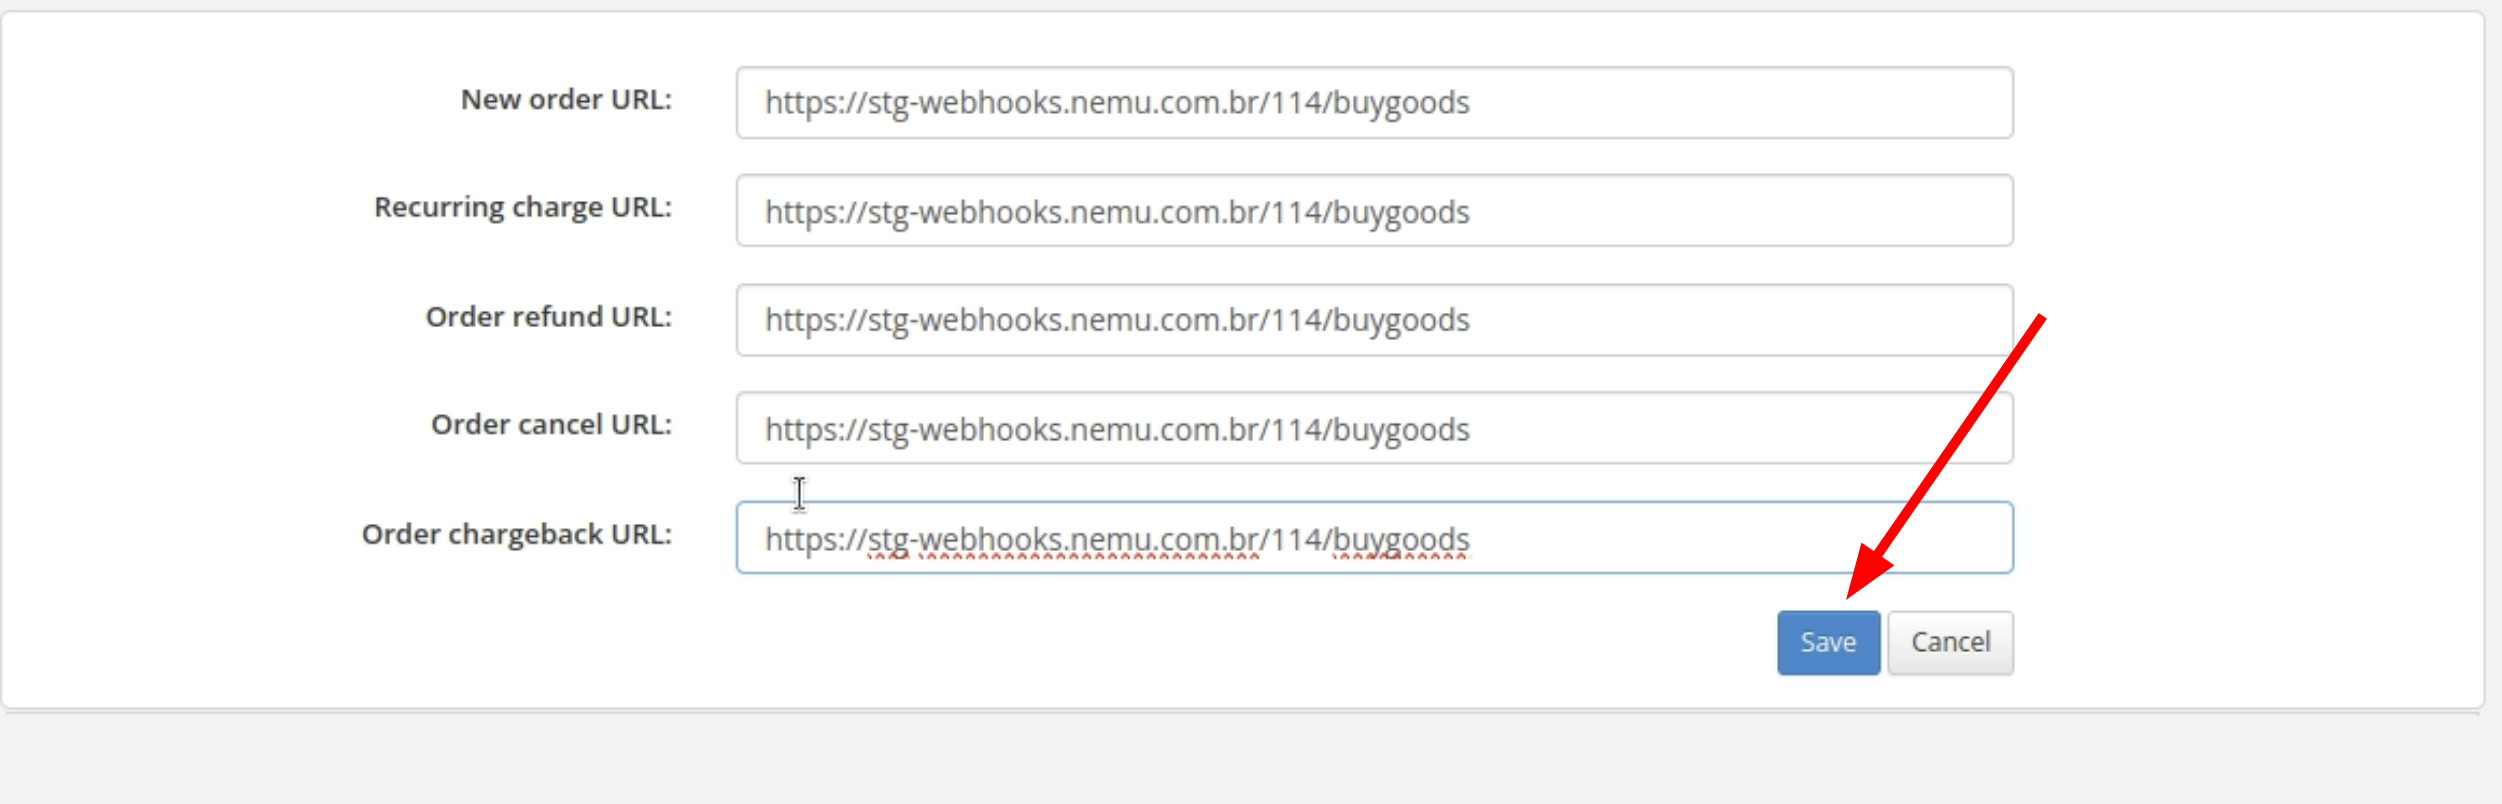
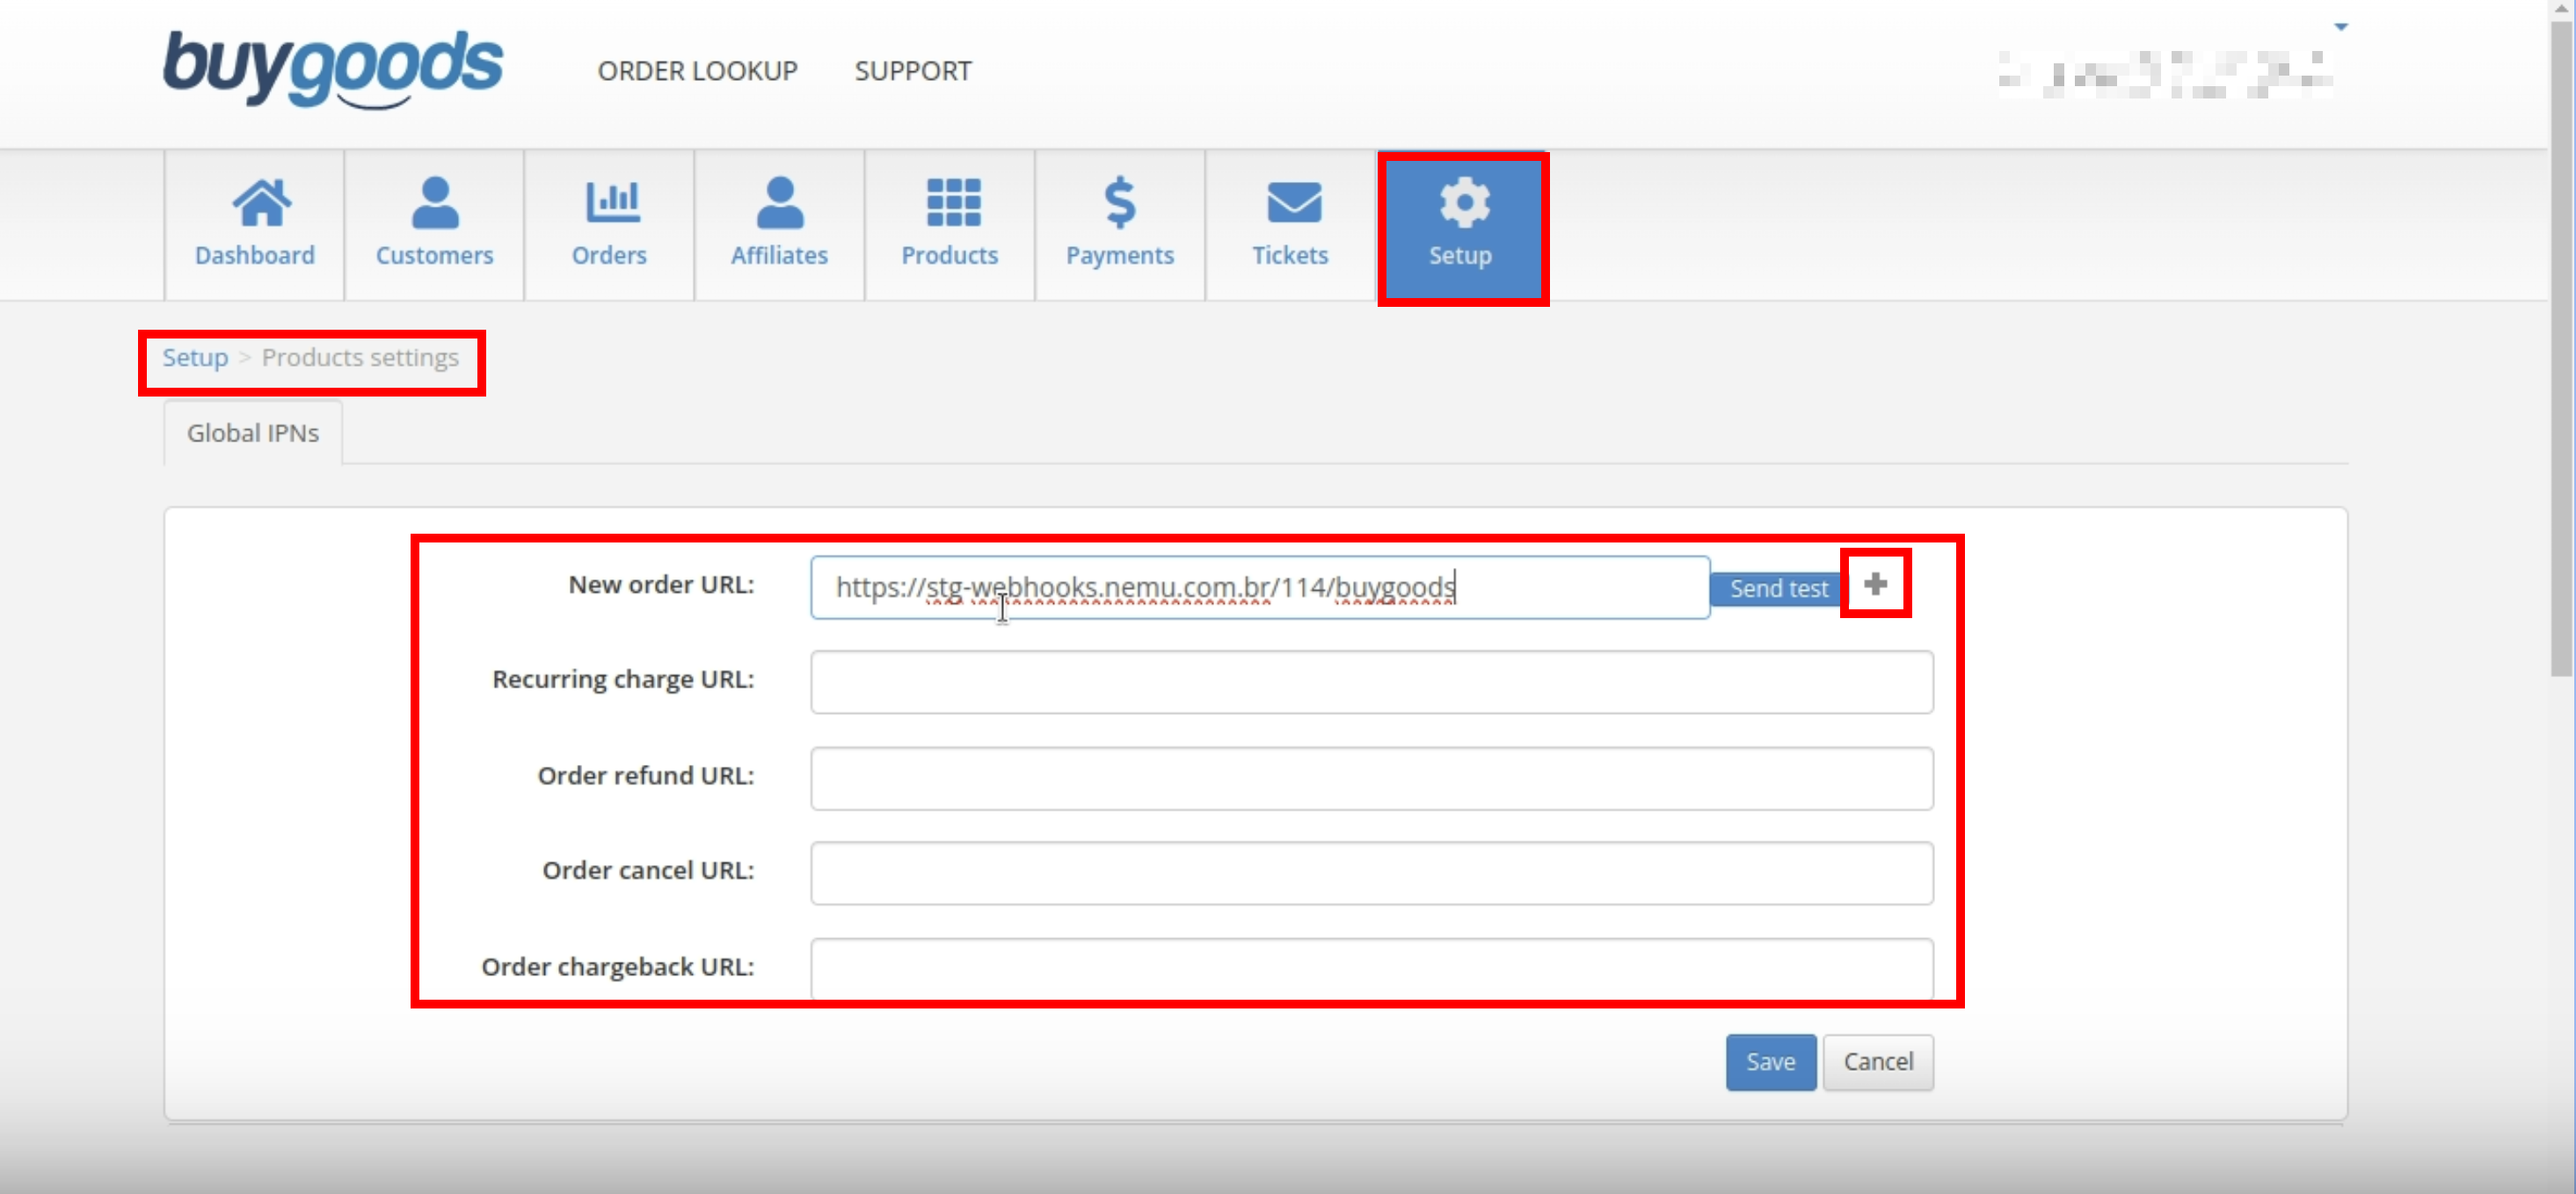 9. Paste the **Webhook URL** you copied in step 5 in the following fields:
* **New order URL**
* **Recurring charge URL**
* **Order refund URL**
* **Order cancel URL**
* **Order chargeback URL**
You must use the same URL in all fields.
10. Verify that all URLs have been filled in correctly and click the **Save** button to complete the integration.
9. Paste the **Webhook URL** you copied in step 5 in the following fields:
* **New order URL**
* **Recurring charge URL**
* **Order refund URL**
* **Order cancel URL**
* **Order chargeback URL**
You must use the same URL in all fields.
10. Verify that all URLs have been filled in correctly and click the **Save** button to complete the integration.