> ## Documentation Index
> Fetch the complete documentation index at: https://docs.nemu.com.br/llms.txt
> Use this file to discover all available pages before exploring further.
# WBuy
> How to connect WBuy to Nemu Dashboard
## Setting Up Webhooks
1. In the Nemu panel, go to **Settings** > **Webhooks**.
2. Search for **WBuy** and click on **Connect**.
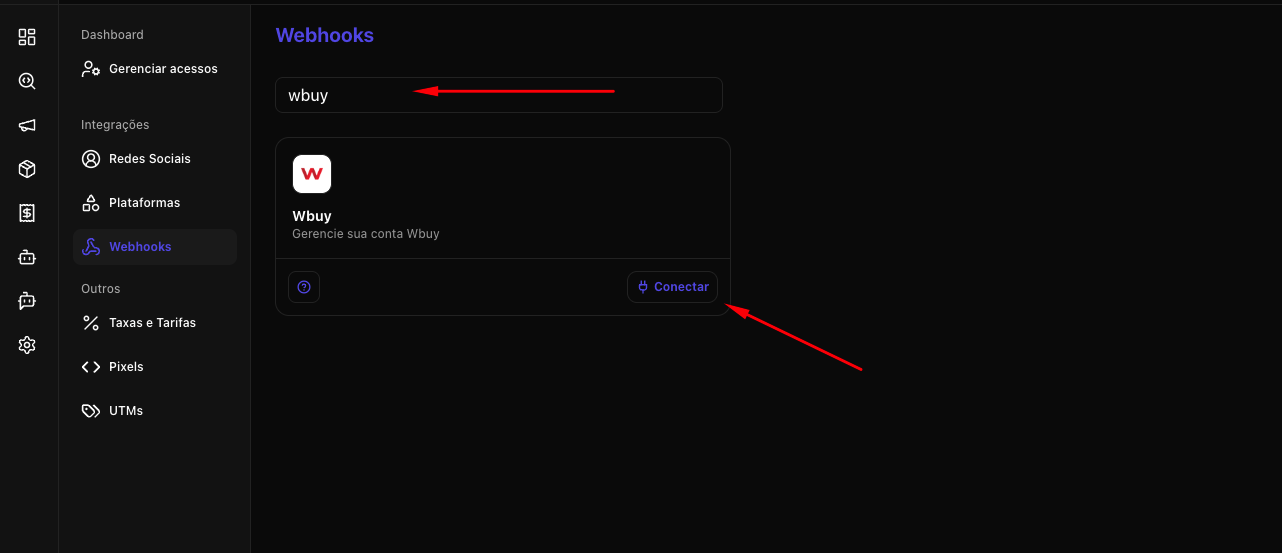 3. Define a **name** for your webhook and click on **Connect**.
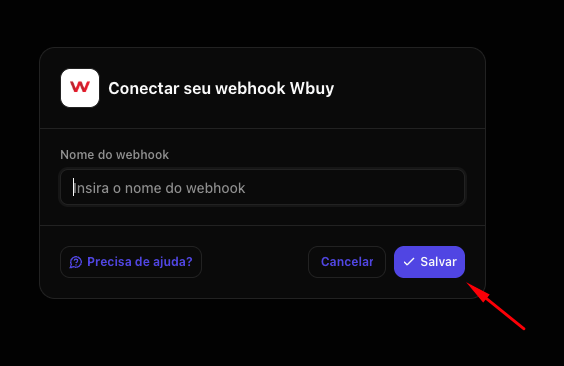 4. Click the button to **copy** the **webhook URL** generated by Nemu and click on **Finish**.
Keep this URL copied, as we will need it for the next steps.
4. Click the button to **copy** the **webhook URL** generated by Nemu and click on **Finish**.
Keep this URL copied, as we will need it for the next steps.
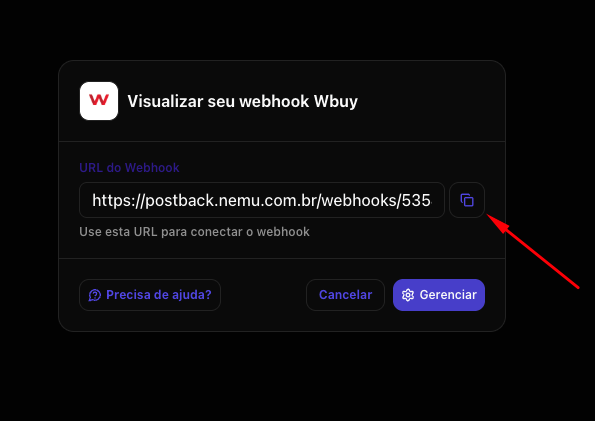 5. In the WBuy admin panel, in the left sidebar, navigate to **General** > **Platform** and click on **API and webhooks**.
6. Click on the **New webhook** button.
5. In the WBuy admin panel, in the left sidebar, navigate to **General** > **Platform** and click on **API and webhooks**.
6. Click on the **New webhook** button.
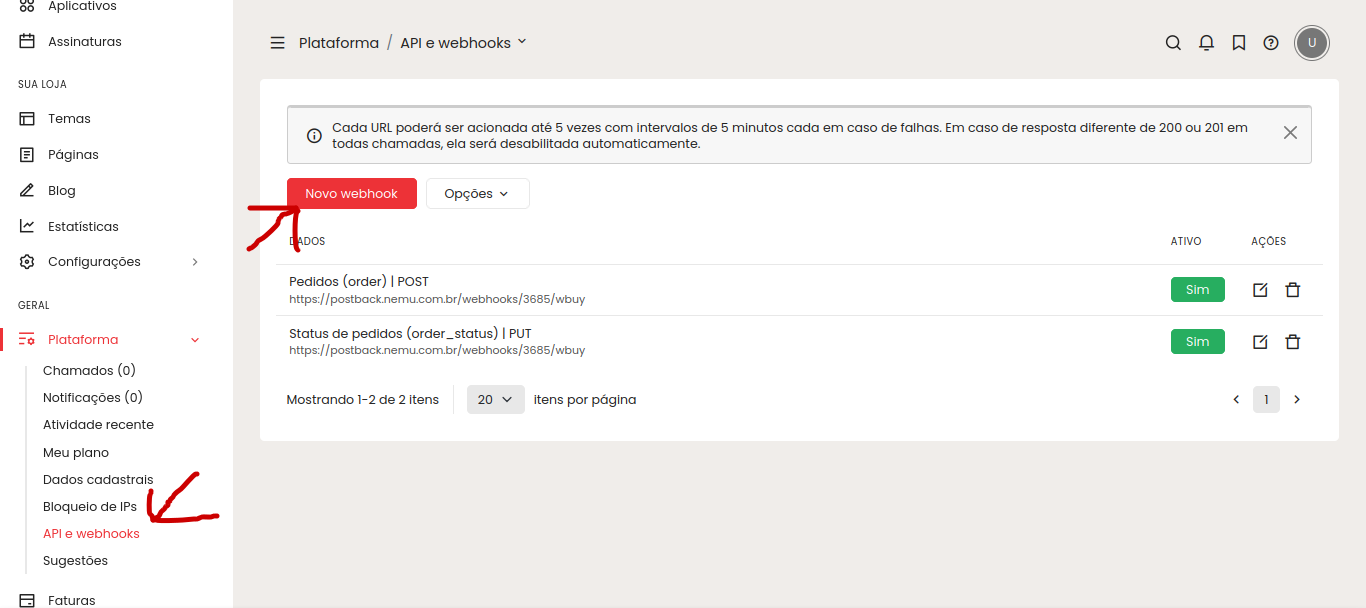 7. You need to create **2 webhooks** pointing to the same URL you copied earlier in Nemu:
It is necessary to create two different webhooks to capture both order creation and order updates.
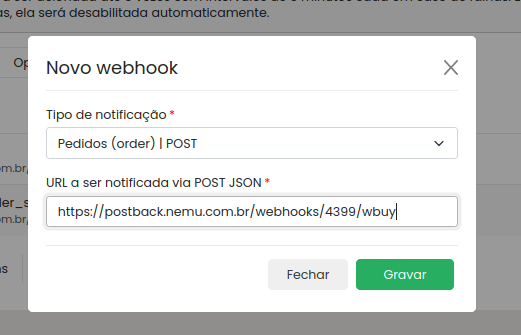
* **First webhook:** notification type **Orders (order) | POST**
7. You need to create **2 webhooks** pointing to the same URL you copied earlier in Nemu:
It is necessary to create two different webhooks to capture both order creation and order updates.
* **First webhook:** notification type **Orders (order) | POST**
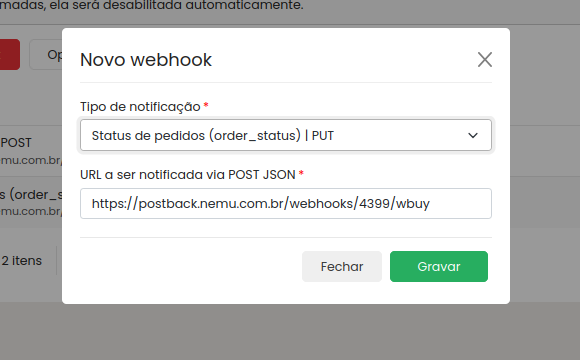
 * **Second webhook:** notification type **Order status (order\_status) | PUT**
 After configuring the webhooks, Nemu will start receiving sales from WBuy in your dashboard.
## Installing Nemu Pixel on WBuy
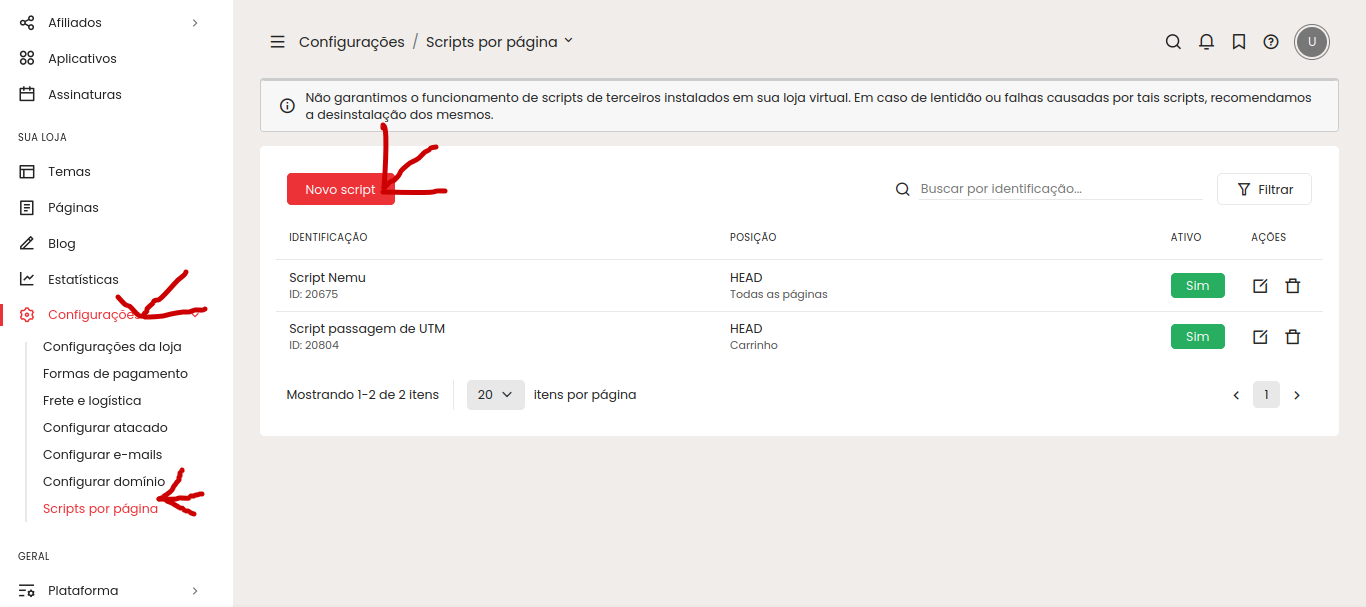
1. In the WBuy admin panel, in the left sidebar, navigate to **Your Store** > **Settings** > **Scripts per page**.
2. Click on **New script**.
After configuring the webhooks, Nemu will start receiving sales from WBuy in your dashboard.
## Installing Nemu Pixel on WBuy
1. In the WBuy admin panel, in the left sidebar, navigate to **Your Store** > **Settings** > **Scripts per page**.
2. Click on **New script**.
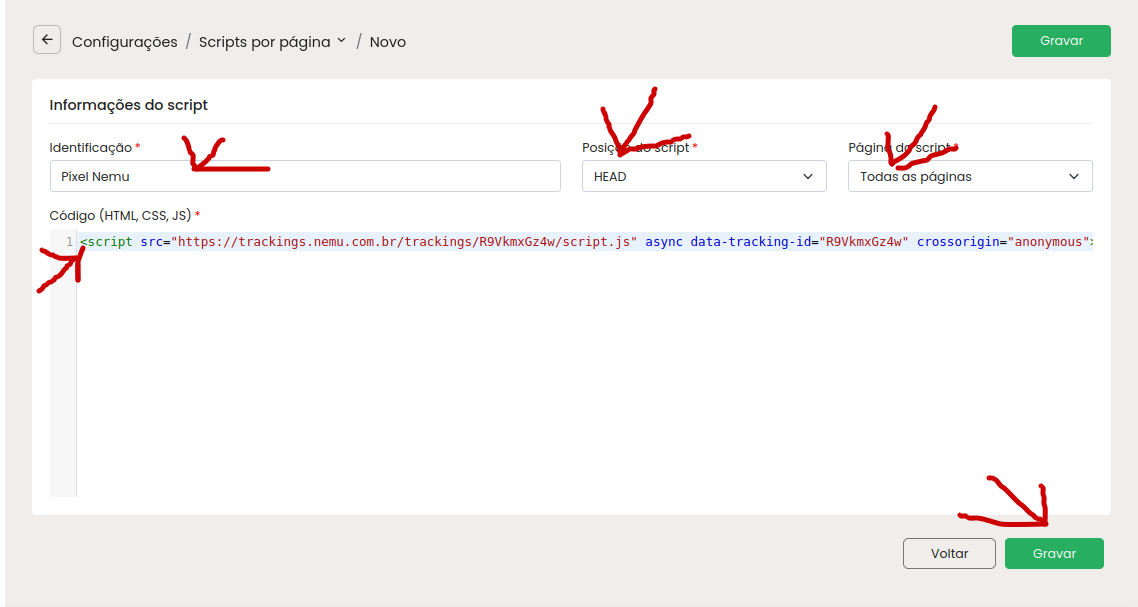
 3. Paste the [Nemu pixel script](/en/onboarding/configuring-pixel#4-click-on-the-button-to-copy-the-generated-script) copied earlier. This script must be in the `` tag and set on **all pages**.
 ## UTM Passing Script
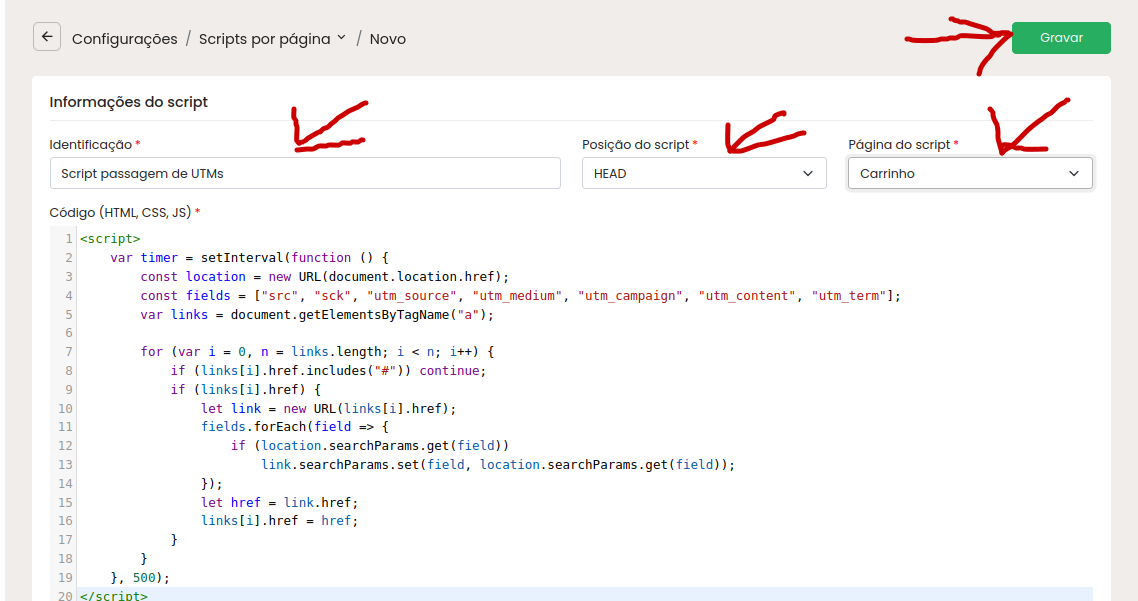
1. In the WBuy admin panel, in the left sidebar, navigate to **Your Store** > **Settings** > **Scripts per page**.
2. Click on **New script**.
4. Paste the UTM passing script below. This script must be in the `` tag and **added only on the cart page**.
The UTM passing script is essential to ensure that campaign parameters are transferred correctly during the checkout flow.
## UTM Passing Script
1. In the WBuy admin panel, in the left sidebar, navigate to **Your Store** > **Settings** > **Scripts per page**.
2. Click on **New script**.
4. Paste the UTM passing script below. This script must be in the `` tag and **added only on the cart page**.
The UTM passing script is essential to ensure that campaign parameters are transferred correctly during the checkout flow.
 ```js UTM Passing Script theme={null}
```
```js UTM Passing Script theme={null}
```