> ## Documentation Index
> Fetch the complete documentation index at: https://docs.nemu.com.br/llms.txt
> Use this file to discover all available pages before exploring further.
# Access Management
> Share your dashboard with your team and control access permissions in a simple and safe way
## What is Access Management?
**Access Management** allows you to share your Nemu dashboard with team members, controlling exactly which features each user can access. With different permission levels, you ensure that each person has access only to what they need to do their job.
## How to Access
1. In your dashboard sidebar, click on **Manage access**.
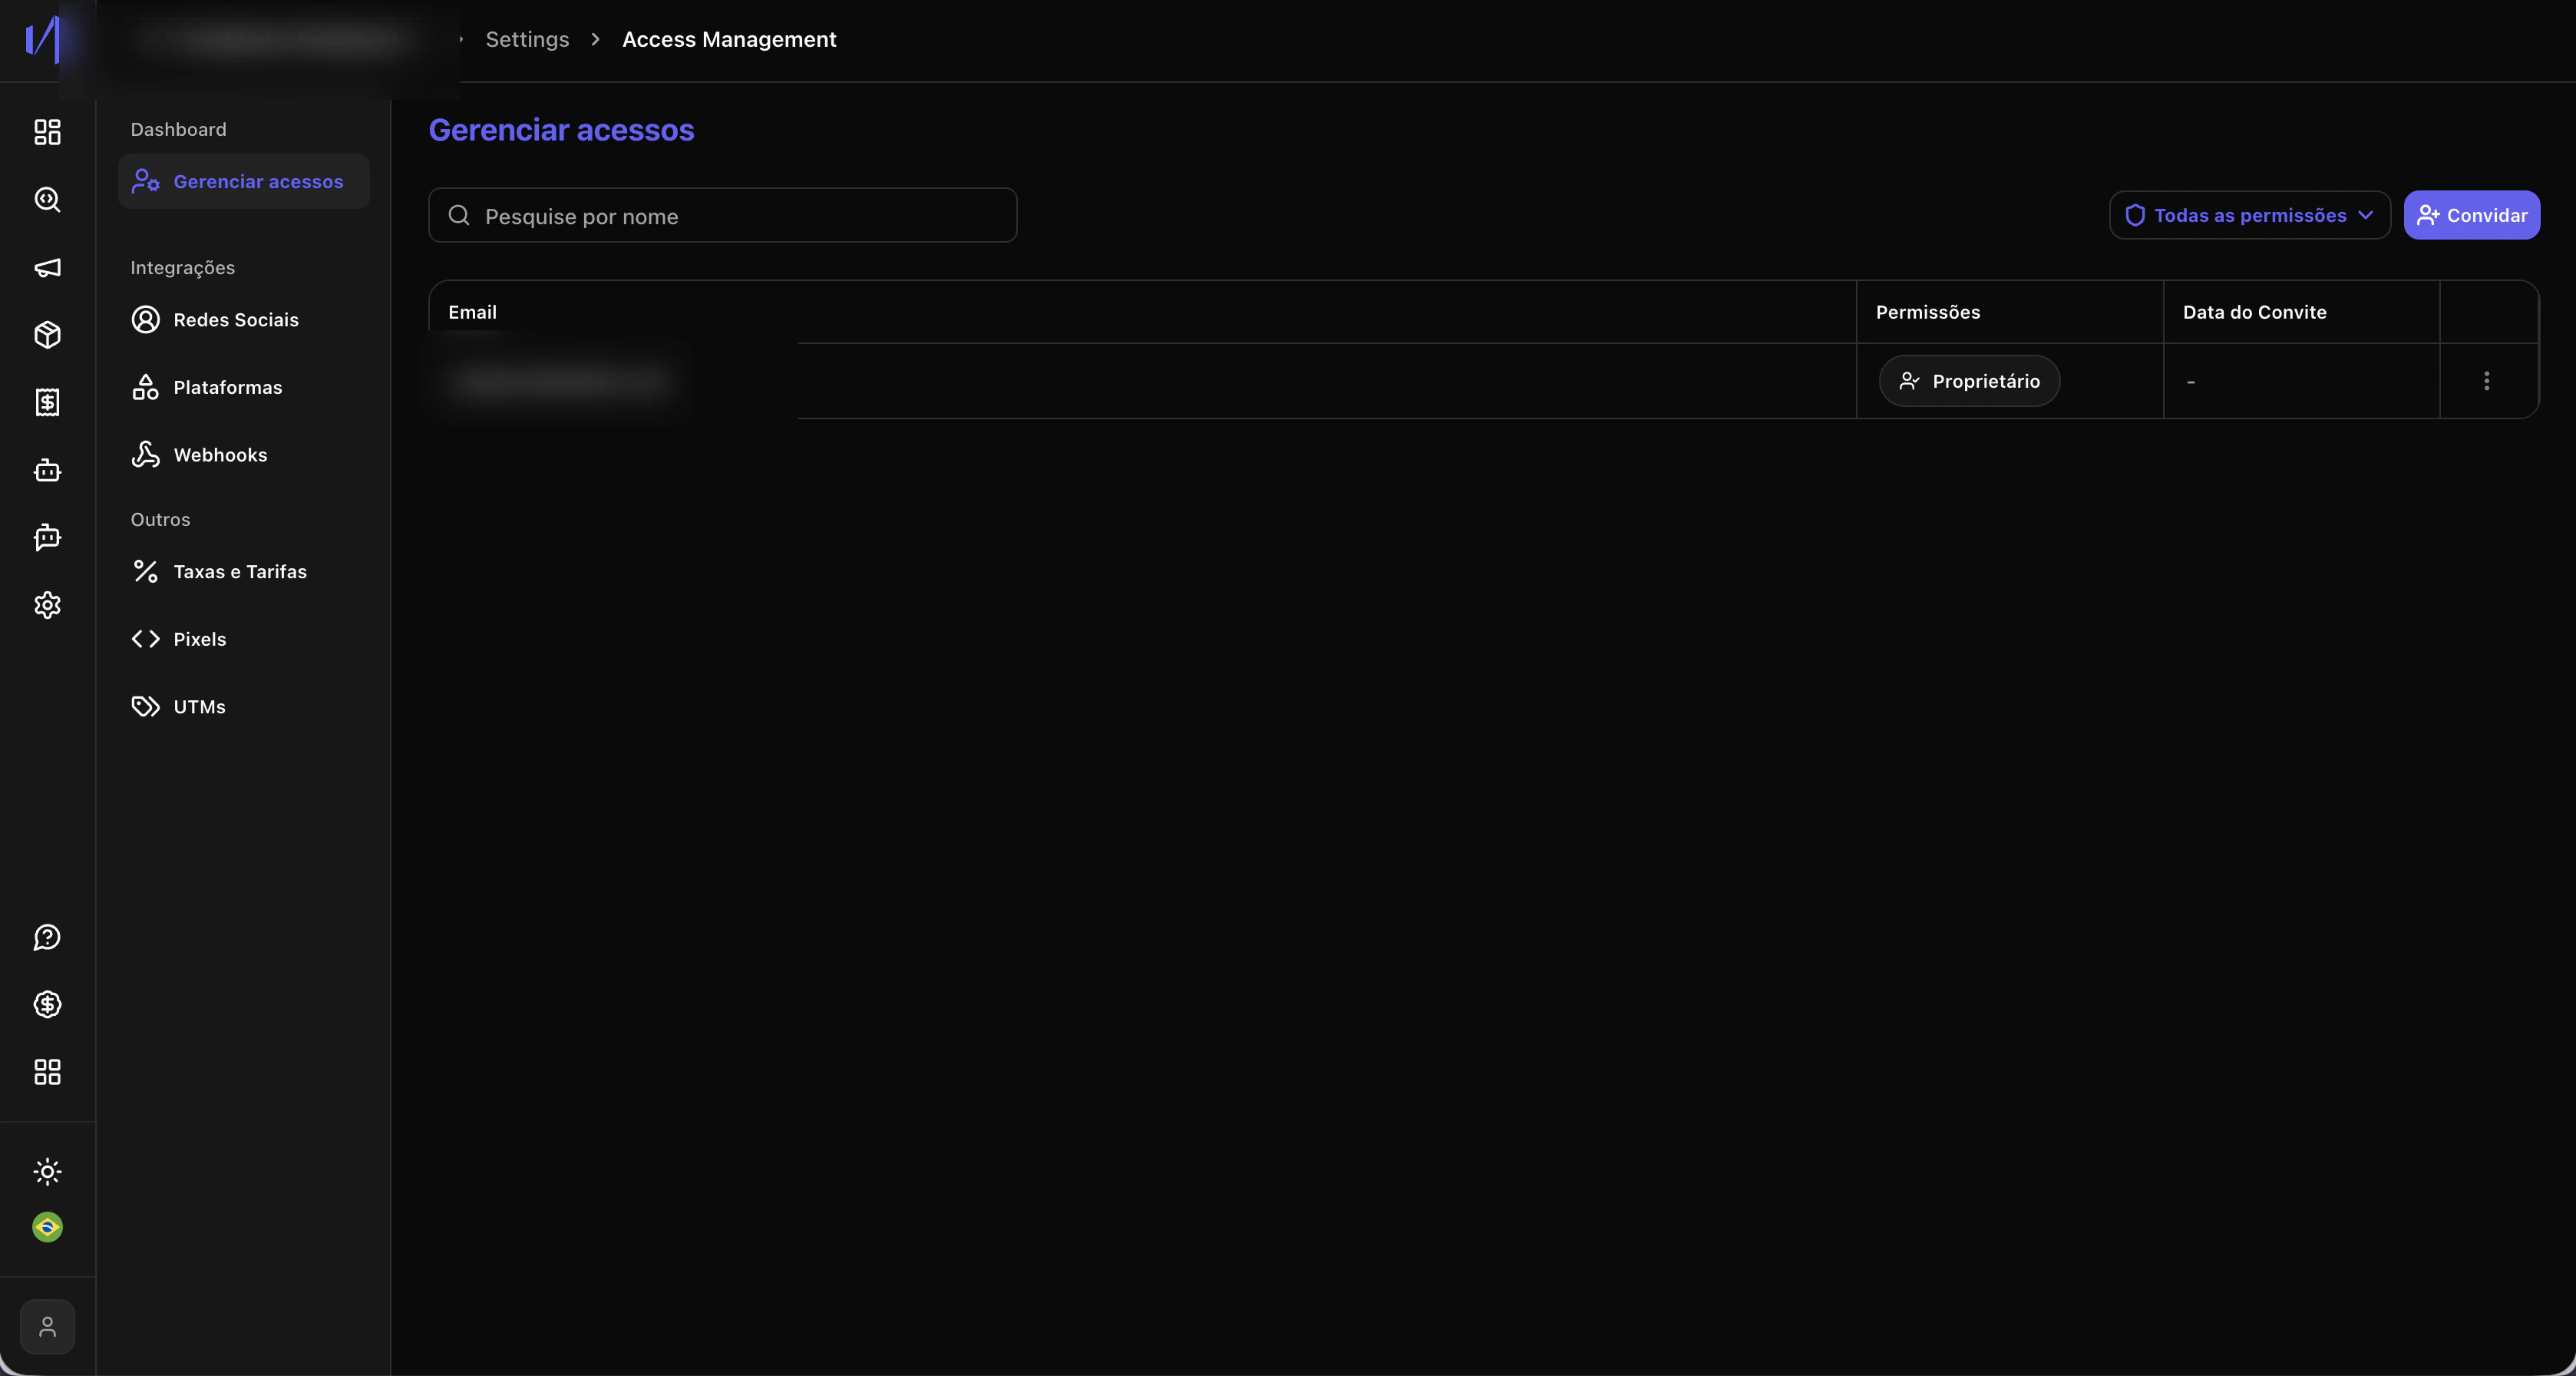 2. You will see the list of all users with access to the dashboard, including:
* User email
* Permission level
* Invitation date
## How to Invite New Users
### Send the Invitation
1. On the **Manage access** screen, click the **+ Invite** button in the upper right corner.
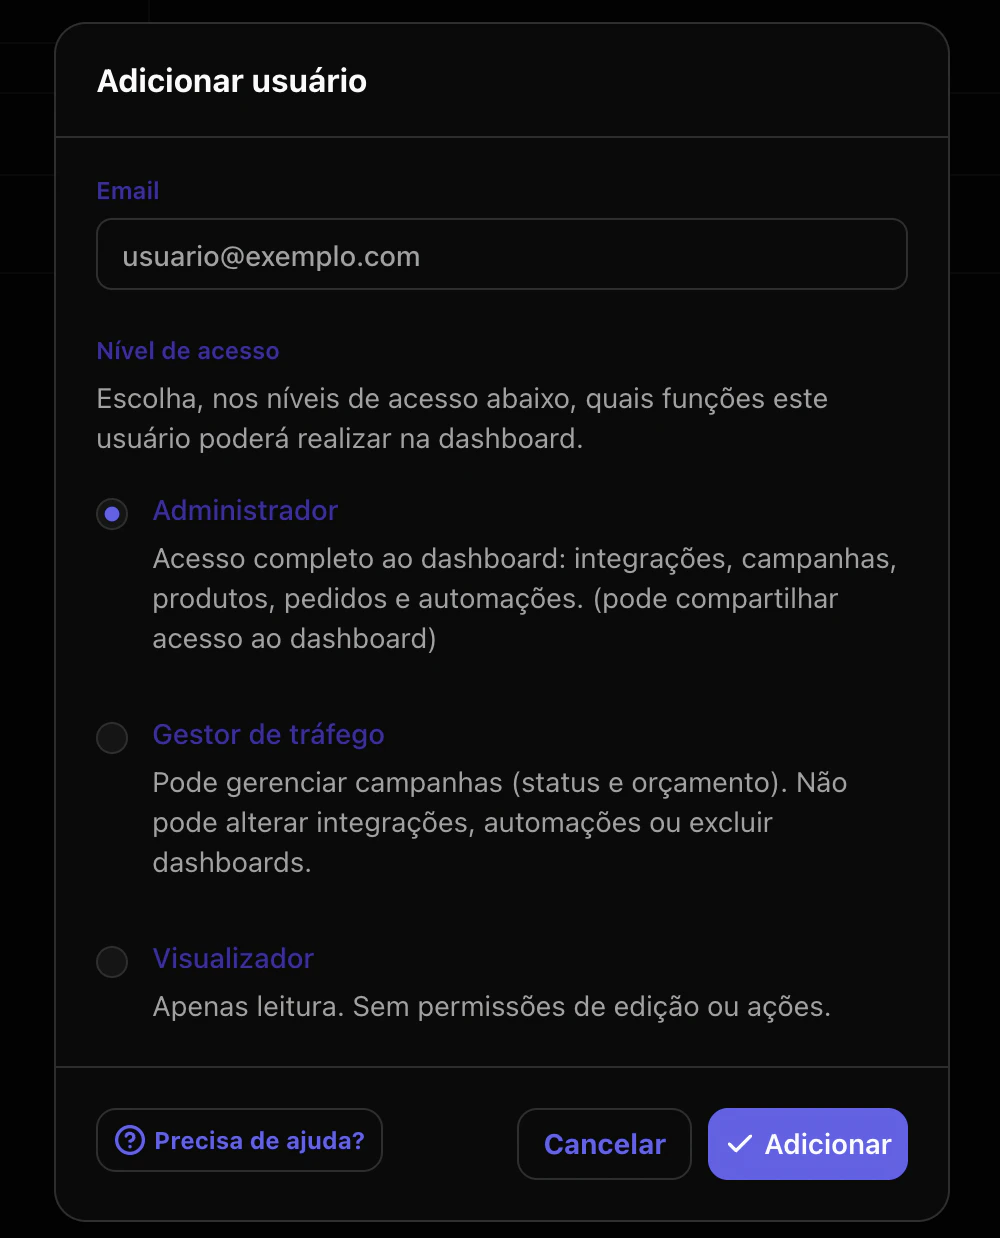
2. A modal will open to add the new user.
2. You will see the list of all users with access to the dashboard, including:
* User email
* Permission level
* Invitation date
## How to Invite New Users
### Send the Invitation
1. On the **Manage access** screen, click the **+ Invite** button in the upper right corner.
2. A modal will open to add the new user.
 ### Define Email and Access Level
In the **Add user** modal, you need to:
1. **Email**: Enter the email address of the user who will receive access.
2. **Access level**: Choose one of the three available levels:
## Permission Levels
### Administrator
**Full access** to the dashboard: integrations, campaigns, products, orders, and automations.
* ✅ View all data
* ✅ Edit settings
* ✅ Manage integrations
* ✅ Configure automations
* ✅ **Share dashboard access**
* ✅ Manage other users
**When to use?** For managers, partners, or people who need full control over the dashboard.
### Traffic Manager
Can manage campaigns (status and budget). Cannot change integrations, automations, or delete dashboards.
* ✅ View metrics and reports
* ✅ Manage advertising campaigns
* ✅ Adjust campaign status and budget
* ❌ Cannot change integrations
* ❌ Cannot modify automations
* ❌ Cannot delete dashboards
* ❌ Cannot manage users
**When to use?** For paid traffic professionals who need to manage campaigns without access to critical settings.
### Viewer
Read-only. No editing permissions or actions.
* ✅ View metrics and reports
* ❌ Cannot edit anything
* ❌ Cannot perform actions
* ❌ Cannot modify settings
**When to use?** For clients, stakeholders, or team members who only need to track results.
### Confirm the Invitation
After filling in the email and selecting the access level, click the **Add** button.
## What Happens After the Invitation?
### User Already Has a Nemu Account
If the email is already registered on the Nemu platform, the user will receive an email informing them that they have gained access to the new dashboard.
### Define Email and Access Level
In the **Add user** modal, you need to:
1. **Email**: Enter the email address of the user who will receive access.
2. **Access level**: Choose one of the three available levels:
## Permission Levels
### Administrator
**Full access** to the dashboard: integrations, campaigns, products, orders, and automations.
* ✅ View all data
* ✅ Edit settings
* ✅ Manage integrations
* ✅ Configure automations
* ✅ **Share dashboard access**
* ✅ Manage other users
**When to use?** For managers, partners, or people who need full control over the dashboard.
### Traffic Manager
Can manage campaigns (status and budget). Cannot change integrations, automations, or delete dashboards.
* ✅ View metrics and reports
* ✅ Manage advertising campaigns
* ✅ Adjust campaign status and budget
* ❌ Cannot change integrations
* ❌ Cannot modify automations
* ❌ Cannot delete dashboards
* ❌ Cannot manage users
**When to use?** For paid traffic professionals who need to manage campaigns without access to critical settings.
### Viewer
Read-only. No editing permissions or actions.
* ✅ View metrics and reports
* ❌ Cannot edit anything
* ❌ Cannot perform actions
* ❌ Cannot modify settings
**When to use?** For clients, stakeholders, or team members who only need to track results.
### Confirm the Invitation
After filling in the email and selecting the access level, click the **Add** button.
## What Happens After the Invitation?
### User Already Has a Nemu Account
If the email is already registered on the Nemu platform, the user will receive an email informing them that they have gained access to the new dashboard.
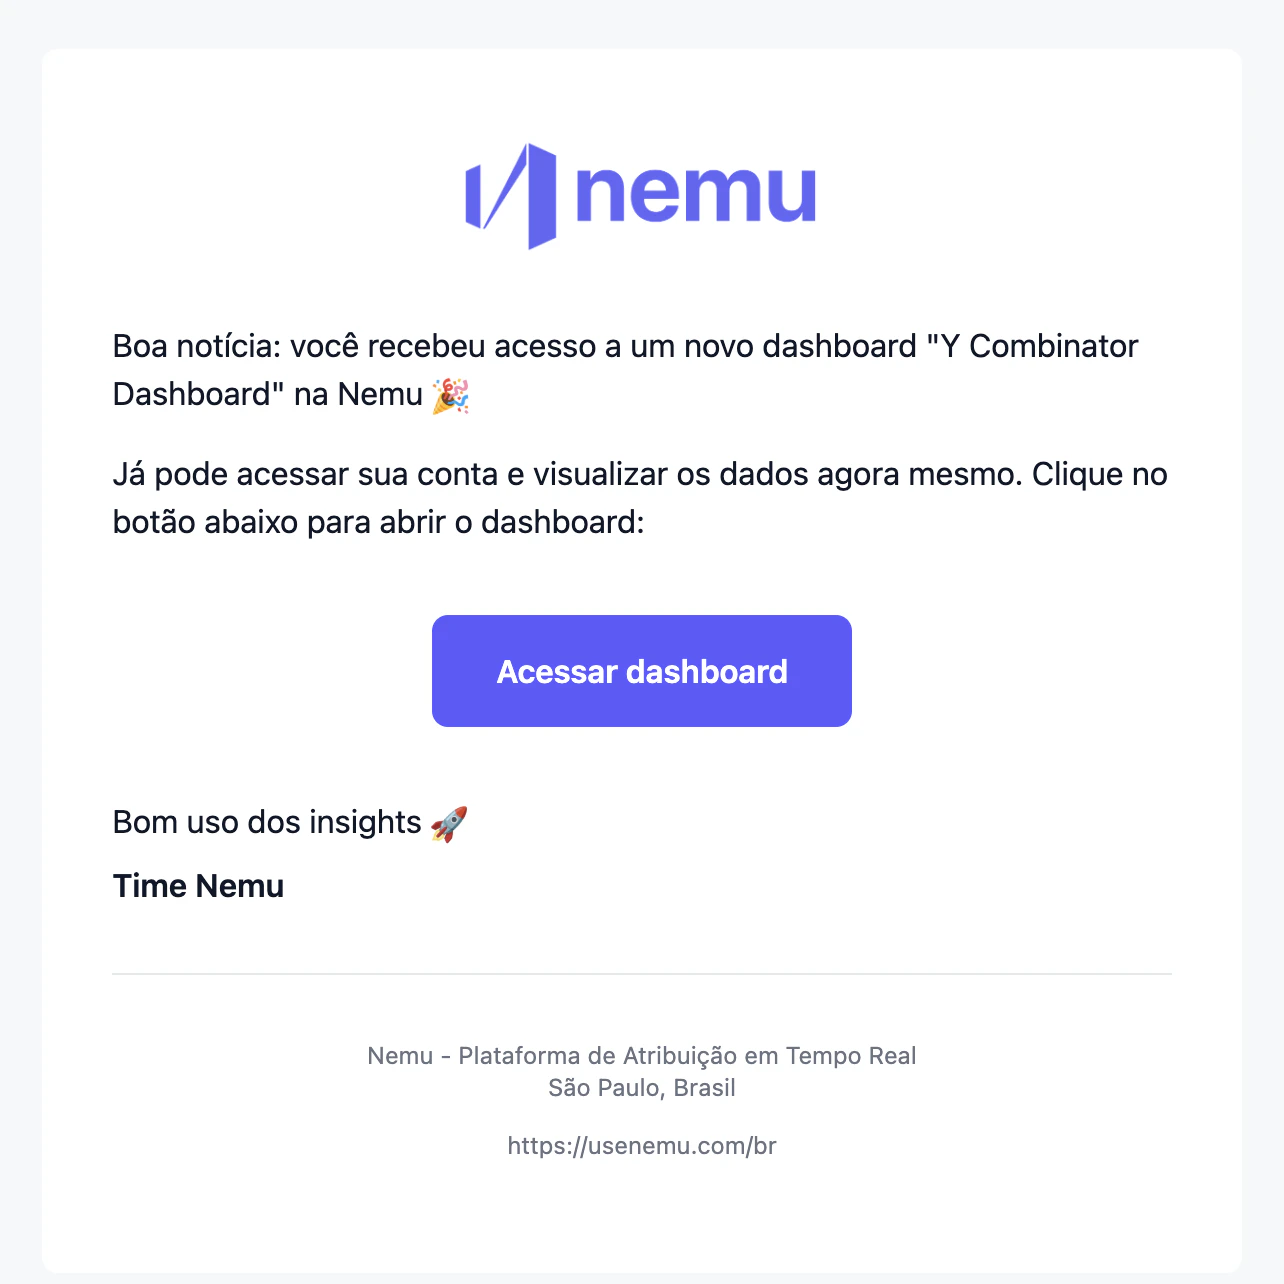 **What the user needs to do:**
1. Open the received email
2. Click the **Access dashboard** button
3. Done! The new dashboard will already be available in their account
The access link will be available in the email to facilitate direct access to the shared dashboard.
### User Does Not Have a Nemu Account Yet
If the email is not registered, the user will receive an invitation to create their account and set a password.
**What the user needs to do:**
1. Open the received email
2. Click the **Access dashboard** button
3. Done! The new dashboard will already be available in their account
The access link will be available in the email to facilitate direct access to the shared dashboard.
### User Does Not Have a Nemu Account Yet
If the email is not registered, the user will receive an invitation to create their account and set a password.
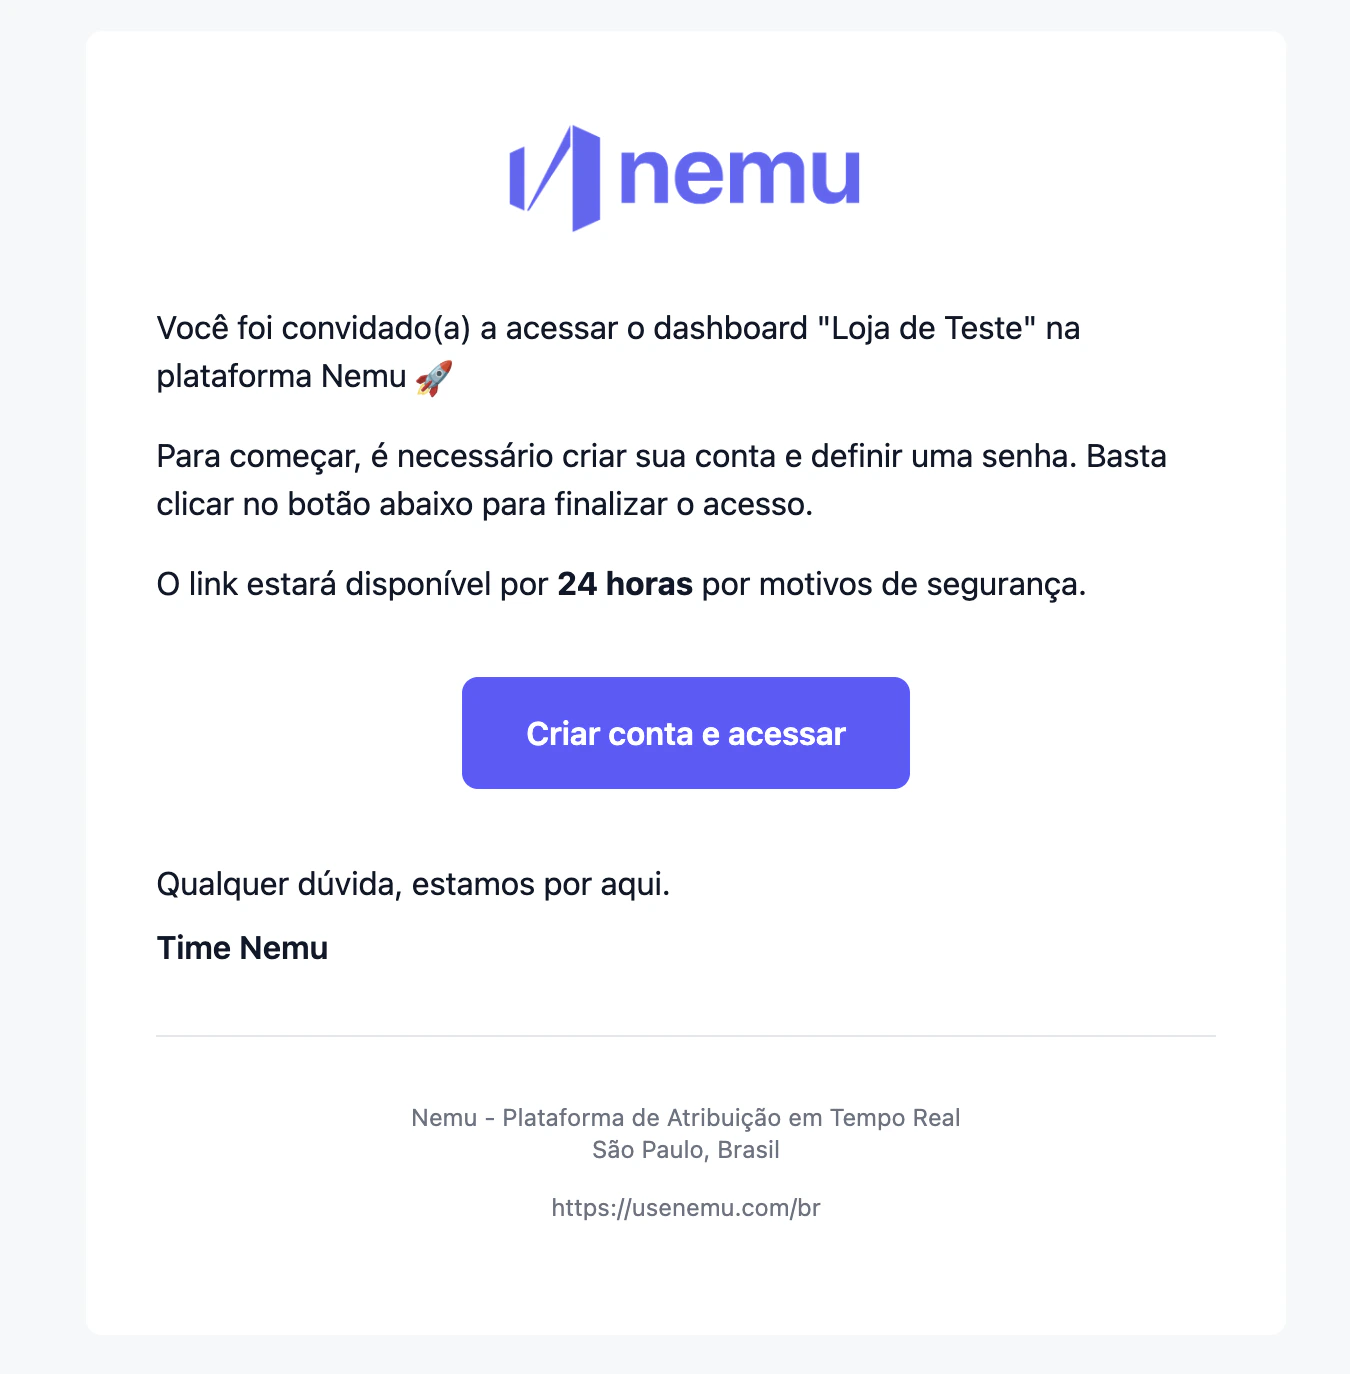 **What the user needs to do:**
1. Open the invitation email
2. Click the **Create account and access** button
3. Set a password for their new account
4. After creating the account, the dashboard will be available with the defined permissions
For security reasons, the invitation link will be available for **24 hours**. After this period, a new invitation will need to be sent.
## Managing Existing Users
### Filter by Permissions
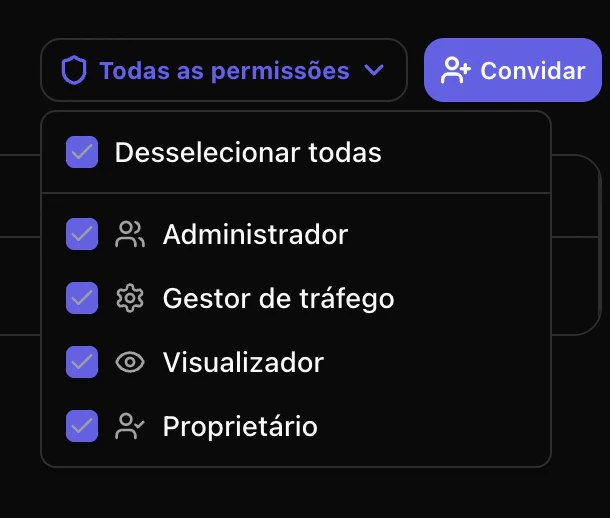
On the main screen, you can filter the user list by clicking on **All permissions** and selecting a specific level.
**What the user needs to do:**
1. Open the invitation email
2. Click the **Create account and access** button
3. Set a password for their new account
4. After creating the account, the dashboard will be available with the defined permissions
For security reasons, the invitation link will be available for **24 hours**. After this period, a new invitation will need to be sent.
## Managing Existing Users
### Filter by Permissions
On the main screen, you can filter the user list by clicking on **All permissions** and selecting a specific level.
 ### Search Users
Use the search bar to quickly find a specific user by entering their name or email.
### Available Actions
For each user in the list, click the three-dot icon (⋮) to access options such as:
* Edit permission level
* Remove access to dashboard
The dashboard owner (marked as **Owner**) has permanent access and cannot be removed.
### Search Users
Use the search bar to quickly find a specific user by entering their name or email.
### Available Actions
For each user in the list, click the three-dot icon (⋮) to access options such as:
* Edit permission level
* Remove access to dashboard
The dashboard owner (marked as **Owner**) has permanent access and cannot be removed.