> ## Documentation Index
> Fetch the complete documentation index at: https://docs.nemu.com.br/llms.txt
> Use this file to discover all available pages before exploring further.
# Custom Events - Experiments
> Create custom events to measure A/B tests and experience variations directly in Nemu
## What are Nemu Experiments?
The **Experiments** feature lets you create **custom events** that are read by the Nemu pixel. With it, you can measure, inside the platform itself, the performance of A/B tests and any experience variation applied to your site.
The logic is simple: you set up the experiment in Nemu, copy a code snippet (`script`), and fire that code in the **dataLayer** from your favorite A/B testing tool or from Google Tag Manager. From there, the Nemu pixel captures each firing and connects these events to your funnel, navigation, and attribution models.
Experiments turn tests that usually stay isolated in the A/B tool into data
connected to conversion, revenue, and channels — all inside Nemu.
## How it works
The end-to-end flow has four moments:
1. **Setup in Nemu** — you create the experiment and define the events you want to measure (context, action, and version).
2. **Script generation** — for each event, Nemu automatically generates a ready-to-use `dataLayer.push`.
3. **Firing on the site** — you implement this script in your A/B testing tool or in Google Tag Manager, making it fire at the right moment (e.g., when the banner is displayed or clicked).
4. **Reading and analysis** — the Nemu pixel reads the firings in the `dataLayer` and displays the results in the experiment tab.
Think of the experiment as an "umbrella" and the events as each thing you
want to measure inside it. In a banner A/B test, for example, you create
**one event for each variation** (banner A and banner B).
## Prerequisites
* **Nemu pixel installed** on the site. Without the active pixel, `dataLayer` firings will not be captured.
* Access to your **A/B testing tool** or to **Google Tag Manager** to insert the firing script.
## Where to access
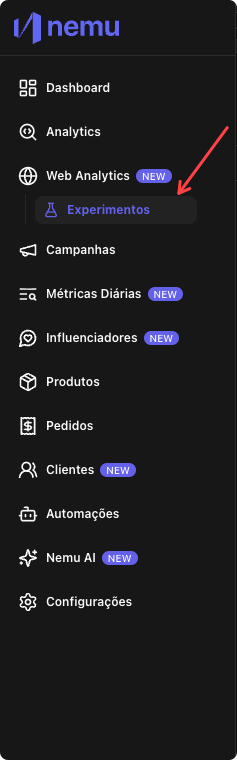
In the platform's side menu, go to the **Experiments** area. If no experiment exists yet, you will see the initial screen with the option to create the first one.
 ## Step by step
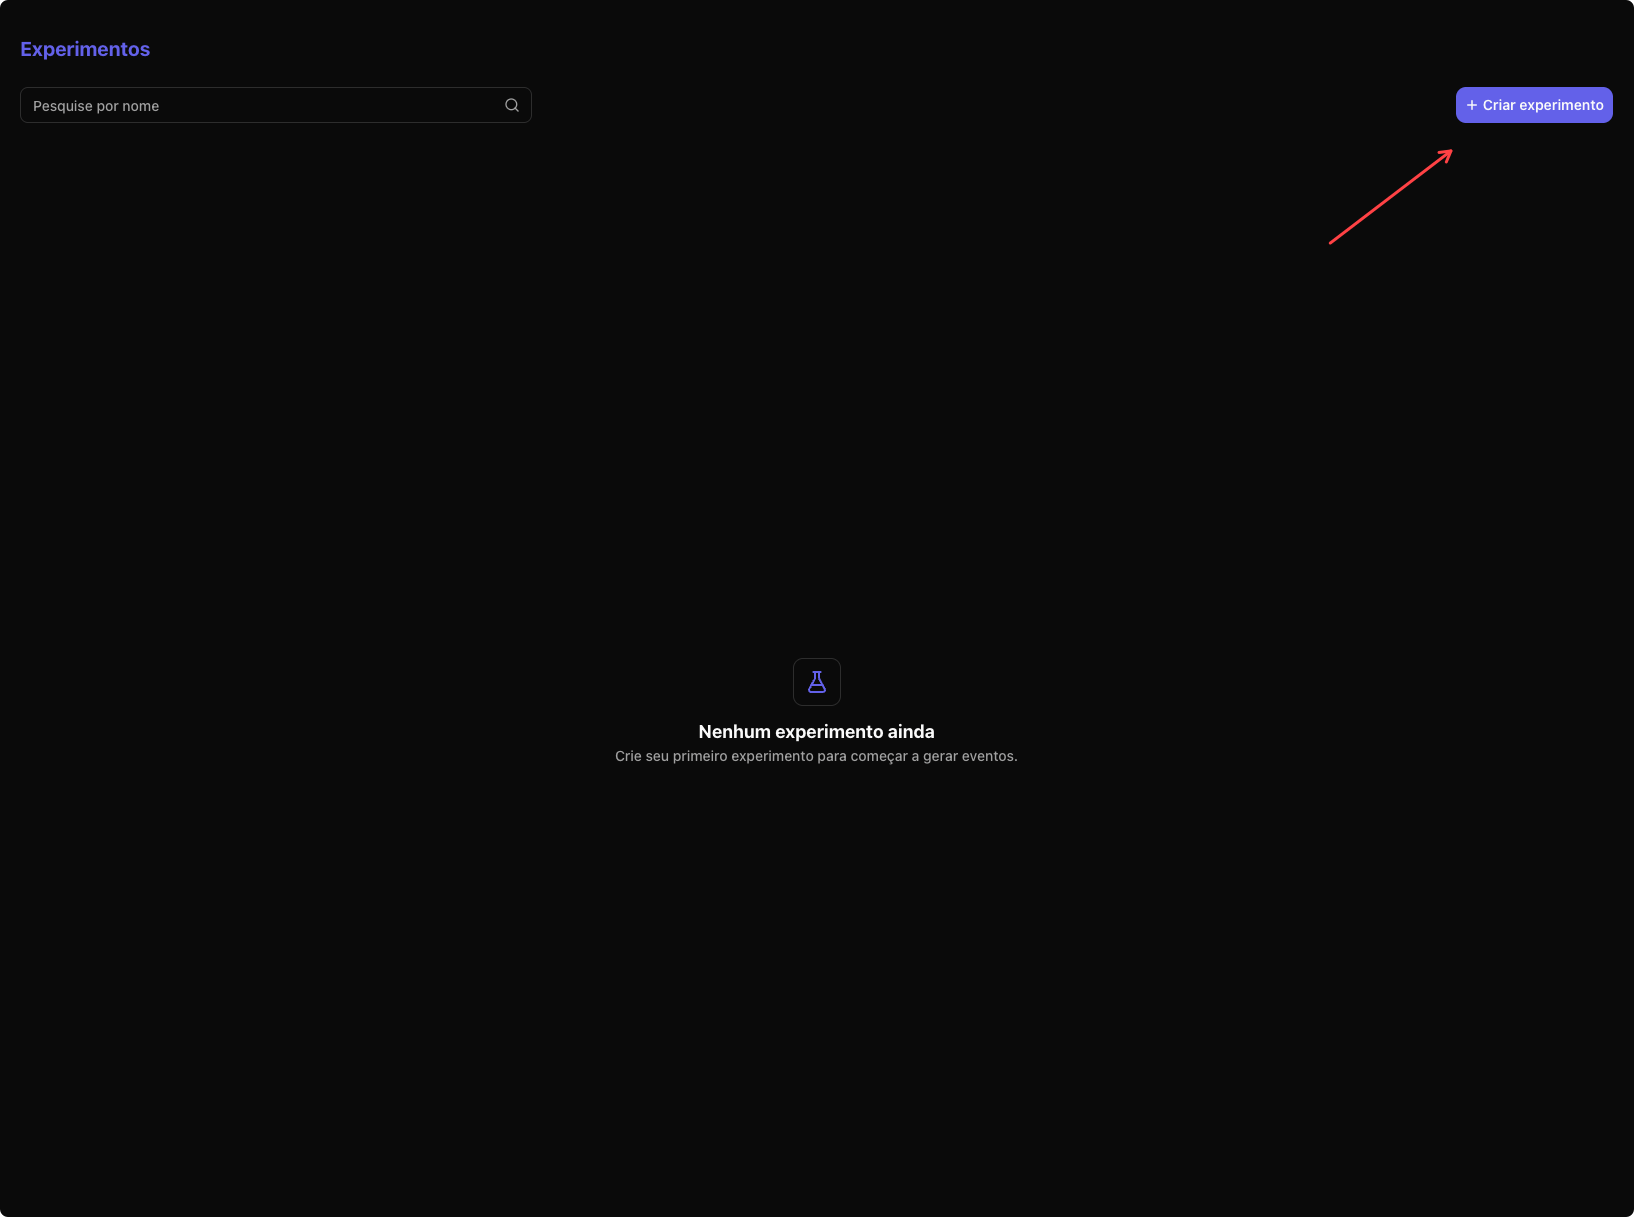
Click **Create experiment** in the top right corner. In the **Creating experiment** window, give the test an identifying name in **Experiment name** (e.g., `Test`) and confirm with **Create experiment**.
## Step by step
Click **Create experiment** in the top right corner. In the **Creating experiment** window, give the test an identifying name in **Experiment name** (e.g., `Test`) and confirm with **Create experiment**.
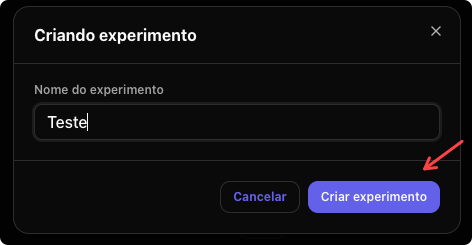 Click the **View Results** button to open it. Inside it there are two tabs:
* **View Results** — where the data appears after the events start firing.
* **Events** — where you create and manage the experiment's events.
Since there are no events yet, click **Create Event** (or **Add Event**, in the top right corner).
Click the **View Results** button to open it. Inside it there are two tabs:
* **View Results** — where the data appears after the events start firing.
* **Events** — where you create and manage the experiment's events.
Since there are no events yet, click **Create Event** (or **Add Event**, in the top right corner).

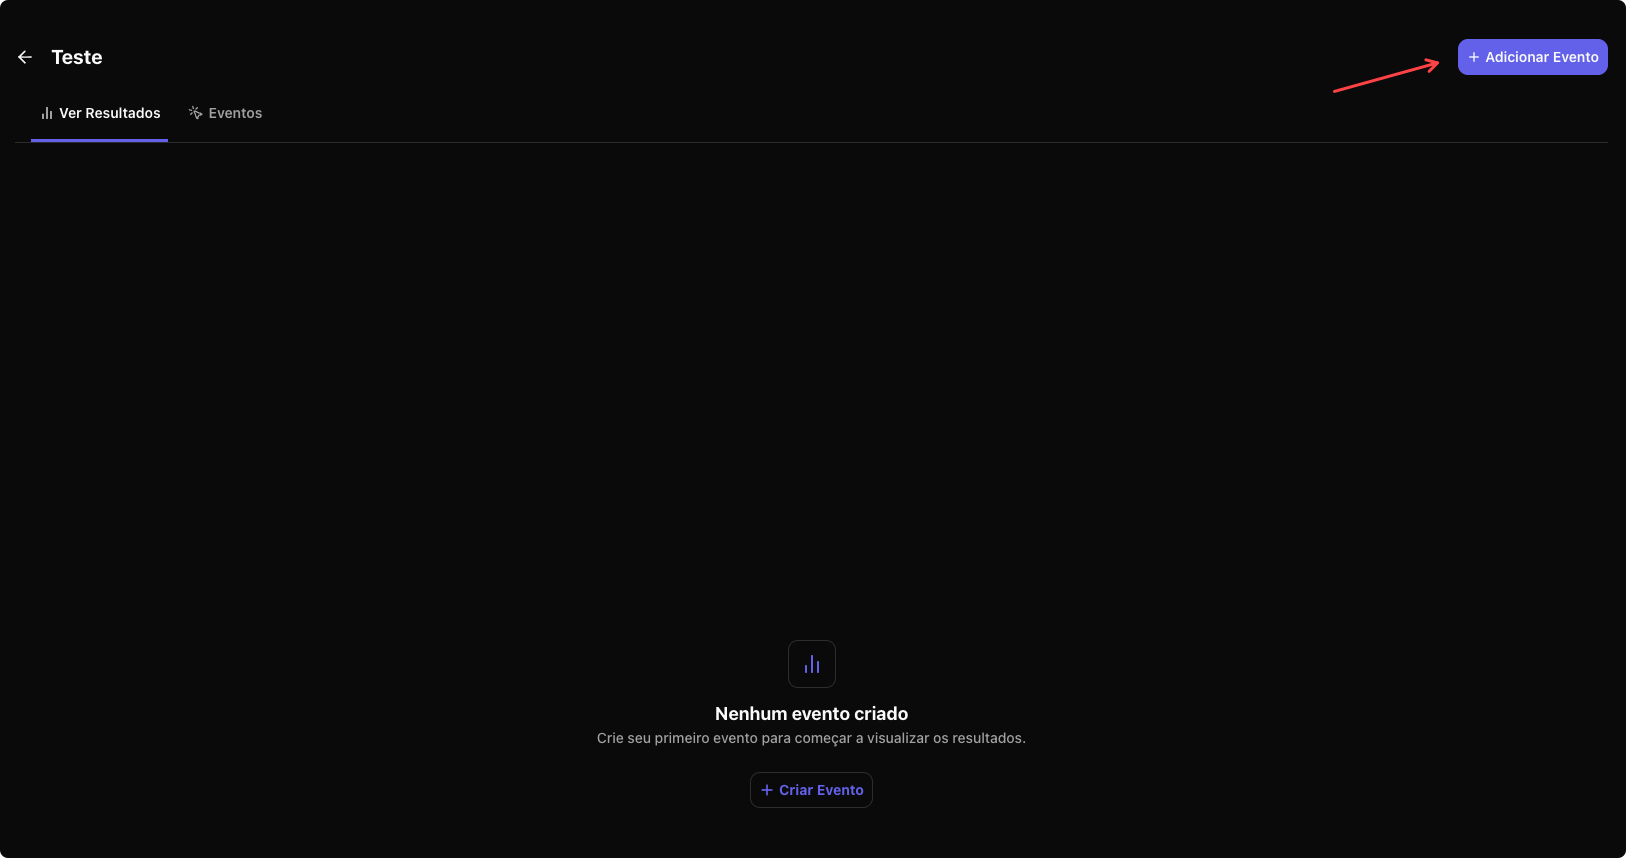
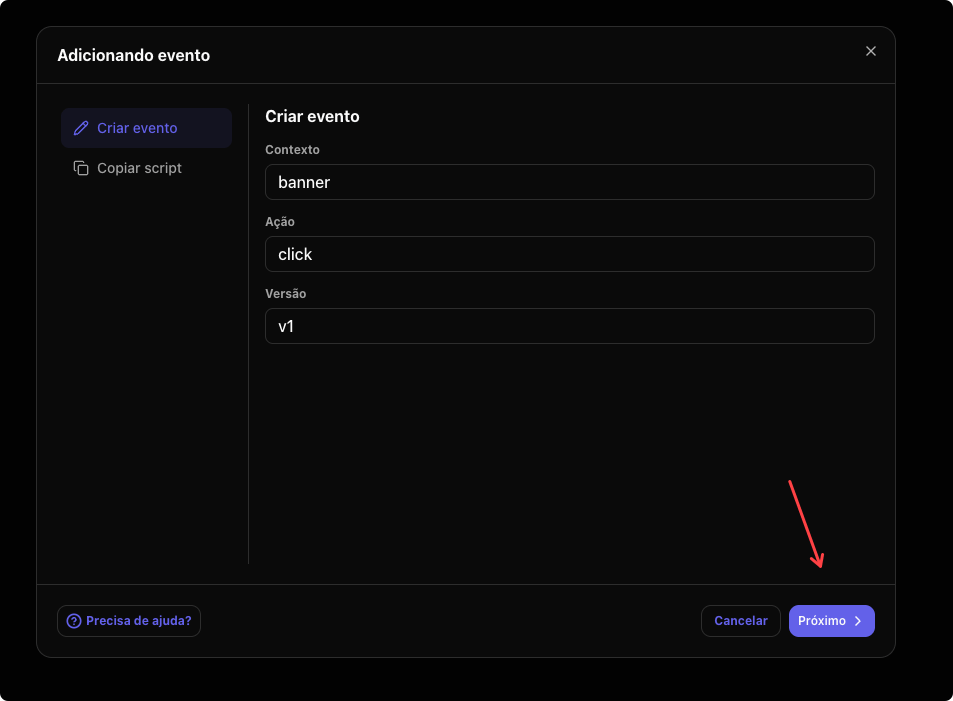 In the **Adding event** window, **Create event** tab, fill in the three fields that describe what will be measured:
| Field | What it is | Example |
| ----------- | ----------------------------------------------- | -------- |
| **Context** | Where / on which element the experiment happens | `Banner` |
| **Action** | Which interaction is being measured | `Click` |
| **Version** | Which test variation this event represents | `V1` |
Click **Next** to generate the script.
For an A/B test with two banners, create two events with the same **Context** (`Banner`) and the same **Action** (`Click`), changing only the **Version** (e.g., `V1` and `V2`). This way you compare the performance of each variation side by side.
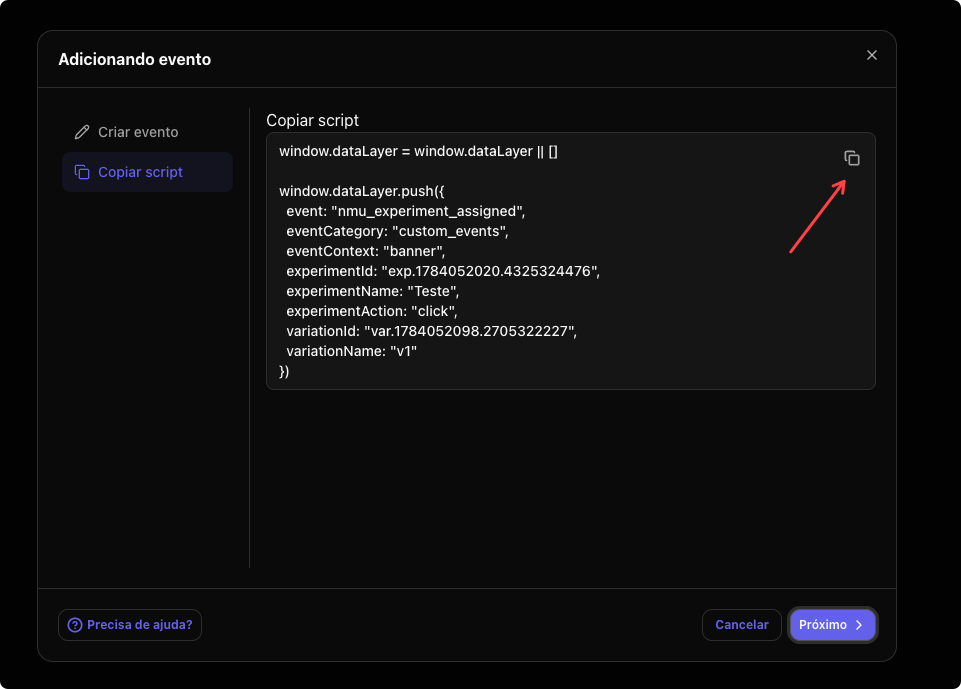
In the **Copy script** tab, Nemu displays the `dataLayer.push` already filled in with the experiment and variation data. Use the copy button to take the code to your tool.
In the **Adding event** window, **Create event** tab, fill in the three fields that describe what will be measured:
| Field | What it is | Example |
| ----------- | ----------------------------------------------- | -------- |
| **Context** | Where / on which element the experiment happens | `Banner` |
| **Action** | Which interaction is being measured | `Click` |
| **Version** | Which test variation this event represents | `V1` |
Click **Next** to generate the script.
For an A/B test with two banners, create two events with the same **Context** (`Banner`) and the same **Action** (`Click`), changing only the **Version** (e.g., `V1` and `V2`). This way you compare the performance of each variation side by side.
In the **Copy script** tab, Nemu displays the `dataLayer.push` already filled in with the experiment and variation data. Use the copy button to take the code to your tool.
 Paste the script into your **A/B testing tool** or into **Google Tag Manager**, configuring it to fire at the moment of the interaction you want to measure.
* **A/B testing tool:** insert the firing in the code of the corresponding variation, so that the `push` happens when that version is displayed or interacted with by the user.
* **Google Tag Manager:** create a **Custom HTML** tag with the script and associate it with a trigger that represents the action — for example, the banner click.
Each event must fire **only the correct variation** for the user. Make sure banner A fires the version A event and banner B fires the version B event, avoiding data contamination.
The created events are listed in the **Events** tab, identified by **Context**, **Action**, and **Version**, with the script available for reference and copying (including the **Copy all** button). As firings happen on the site, the **View Results** tab starts displaying the experiment data.
## Understanding the script
The generated script is a standard `dataLayer.push`. Some fields come from what **you filled in** on the form and some are **automatically generated** by Nemu:
| Field | Source | Description |
| ------------------ | ----------------- | ------------------------------------------------------------------------------------------------- |
| `event` | Automatic | Fixed name of the event the Nemu pixel listens for: `nmu_experiment_assigned`. **Do not change.** |
| `eventCategory` | Automatic | Fixed event category: `custom_events`. **Do not change.** |
| `eventContext` | **Context** field | Where the experiment happens (e.g., `Banner`). |
| `experimentId` | Automatic | Unique identifier of the experiment. |
| `experimentName` | Experiment name | Name given at creation (e.g., `Test`). |
| `experimentAction` | **Action** field | Measured interaction (e.g., `Click`). |
| `variationId` | Automatic | Unique identifier of the variation. |
| `variationName` | **Version** field | Variation this event represents (e.g., `V1`). |
Do not edit the values of `experimentId`, `variationId`, `event`, and
`eventCategory`. They are the "key" that connects the firing to the right
experiment inside Nemu — any change prevents the data from being read
correctly.
## Practical example: banner A/B test
Suppose a test with two banner versions on the home page:
1. Create an experiment named, for example, `Home Banner`.
2. Create **Event 1** — Context: `Banner`, Action: `Click`, Version: `A`.
3. Create **Event 2** — Context: `Banner`, Action: `Click`, Version: `B`.
4. Copy each event's script and fire it in the corresponding variation of your A/B tool.
5. Track in **View Results** which version generates more clicks — and, combined with Nemu's funnel and attribution, which one converts more.
## Best practices
* **Standardize the naming** of Context, Action, and Version across experiments to make future comparisons easier.
* **Use one version per variation** and keep Context and Action the same within the same test.
* **Validate the firing** in the `dataLayer` (e.g., via the browser console or GTM preview mode) before pushing the test to production.
* **Keep the Nemu pixel always active** on the pages where the experiment runs.
## Why use Experiments
* Measures A/B tests and experience variations without leaving Nemu.
* Connects each variation to the funnel, conversion, and revenue — not just the click.
* Leverages Nemu's own attribution models to understand the real impact of each version.
* Centralizes data that usually stays fragmented between the A/B tool and analytics.
## Next steps
* Combine experiment results with the **conversion funnel** to understand where each variation makes an impact.
* Cross-reference variation performance with the **attribution models** (First Click, Last Click, Assisted).
* Standardize an internal experiment naming guide to scale tests over time.
Paste the script into your **A/B testing tool** or into **Google Tag Manager**, configuring it to fire at the moment of the interaction you want to measure.
* **A/B testing tool:** insert the firing in the code of the corresponding variation, so that the `push` happens when that version is displayed or interacted with by the user.
* **Google Tag Manager:** create a **Custom HTML** tag with the script and associate it with a trigger that represents the action — for example, the banner click.
Each event must fire **only the correct variation** for the user. Make sure banner A fires the version A event and banner B fires the version B event, avoiding data contamination.
The created events are listed in the **Events** tab, identified by **Context**, **Action**, and **Version**, with the script available for reference and copying (including the **Copy all** button). As firings happen on the site, the **View Results** tab starts displaying the experiment data.
## Understanding the script
The generated script is a standard `dataLayer.push`. Some fields come from what **you filled in** on the form and some are **automatically generated** by Nemu:
| Field | Source | Description |
| ------------------ | ----------------- | ------------------------------------------------------------------------------------------------- |
| `event` | Automatic | Fixed name of the event the Nemu pixel listens for: `nmu_experiment_assigned`. **Do not change.** |
| `eventCategory` | Automatic | Fixed event category: `custom_events`. **Do not change.** |
| `eventContext` | **Context** field | Where the experiment happens (e.g., `Banner`). |
| `experimentId` | Automatic | Unique identifier of the experiment. |
| `experimentName` | Experiment name | Name given at creation (e.g., `Test`). |
| `experimentAction` | **Action** field | Measured interaction (e.g., `Click`). |
| `variationId` | Automatic | Unique identifier of the variation. |
| `variationName` | **Version** field | Variation this event represents (e.g., `V1`). |
Do not edit the values of `experimentId`, `variationId`, `event`, and
`eventCategory`. They are the "key" that connects the firing to the right
experiment inside Nemu — any change prevents the data from being read
correctly.
## Practical example: banner A/B test
Suppose a test with two banner versions on the home page:
1. Create an experiment named, for example, `Home Banner`.
2. Create **Event 1** — Context: `Banner`, Action: `Click`, Version: `A`.
3. Create **Event 2** — Context: `Banner`, Action: `Click`, Version: `B`.
4. Copy each event's script and fire it in the corresponding variation of your A/B tool.
5. Track in **View Results** which version generates more clicks — and, combined with Nemu's funnel and attribution, which one converts more.
## Best practices
* **Standardize the naming** of Context, Action, and Version across experiments to make future comparisons easier.
* **Use one version per variation** and keep Context and Action the same within the same test.
* **Validate the firing** in the `dataLayer` (e.g., via the browser console or GTM preview mode) before pushing the test to production.
* **Keep the Nemu pixel always active** on the pages where the experiment runs.
## Why use Experiments
* Measures A/B tests and experience variations without leaving Nemu.
* Connects each variation to the funnel, conversion, and revenue — not just the click.
* Leverages Nemu's own attribution models to understand the real impact of each version.
* Centralizes data that usually stays fragmented between the A/B tool and analytics.
## Next steps
* Combine experiment results with the **conversion funnel** to understand where each variation makes an impact.
* Cross-reference variation performance with the **attribution models** (First Click, Last Click, Assisted).
* Standardize an internal experiment naming guide to scale tests over time.