Changing Nemu’s Pixel for Shopify
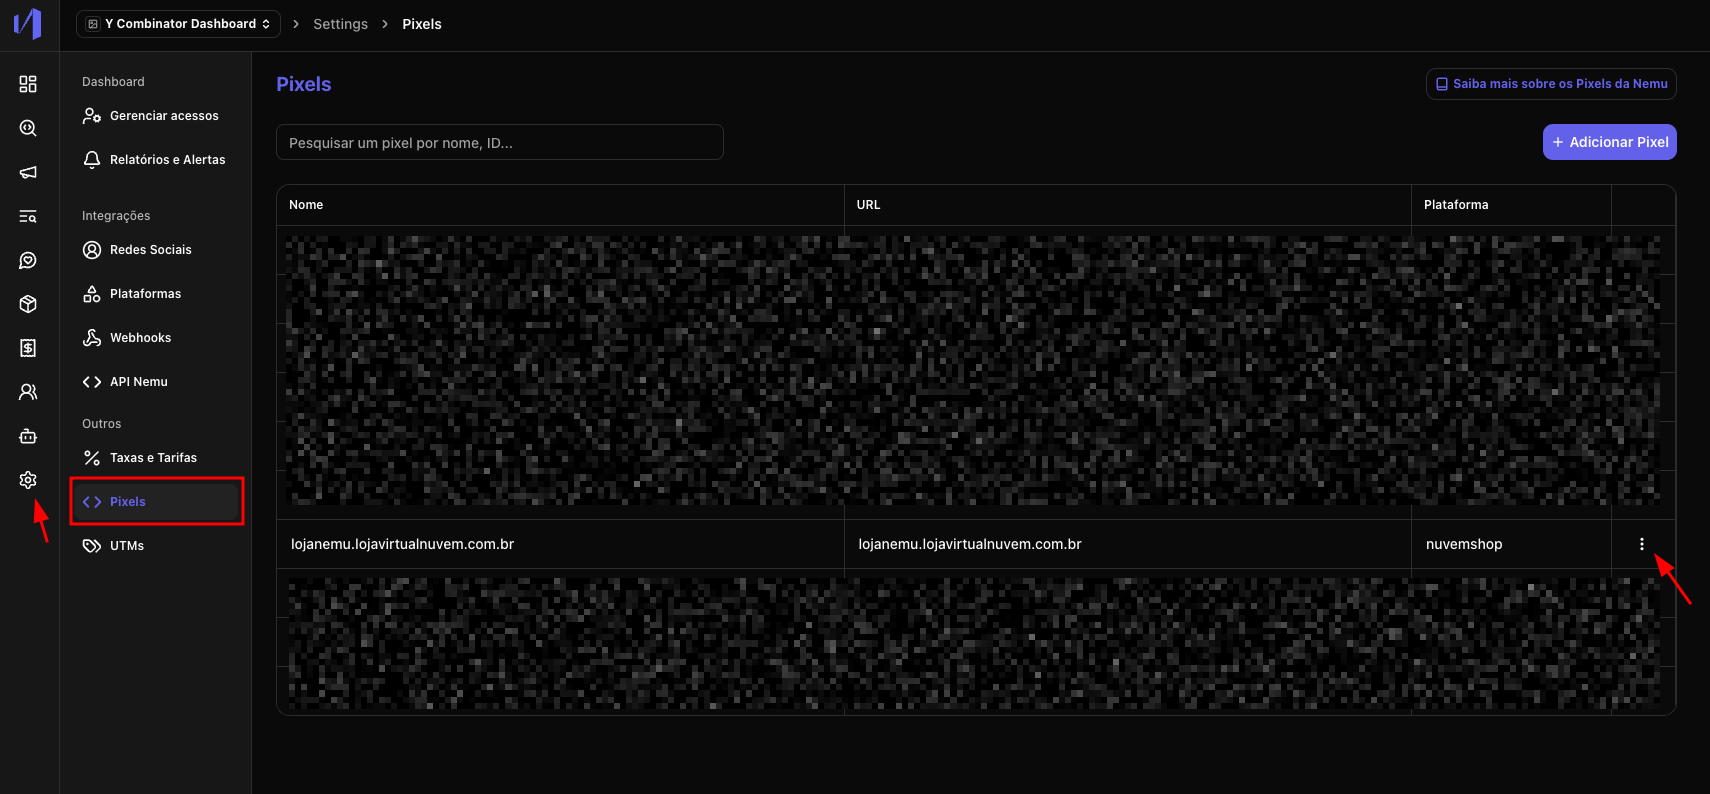
- Access the Nemu dashboard and go to Settings -> Pixel
- Click on the action button in the table to edit Nemu’s Pixel.
- Click on Edit

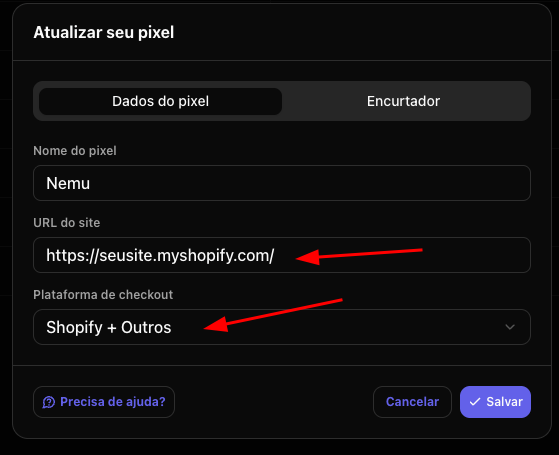
- Update the Site URL and Checkout Platform fields
- Example of Site URL:
https://yoursite.myshopify.comor your current domain already migrated to Shopify. - Checkout Platform: Shopify + Others
- Save the changes
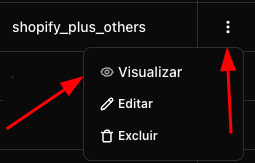
- Click on the action button again and then on Preview
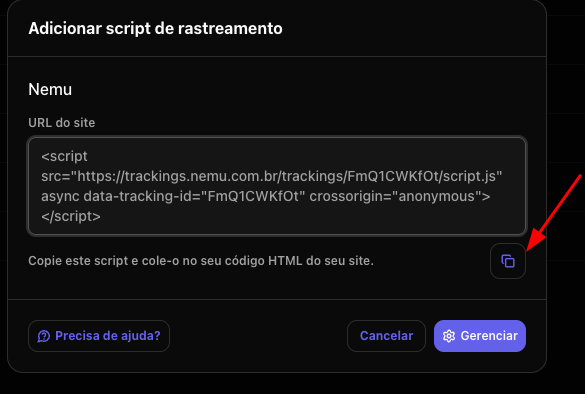
- Click on the button to copy Nemu’s Pixel code, it will be needed in the next steps.
Important information before starting
- If a Shopify Partner (Agency) is managing your store, you will need to ask the Organization Owner / Store Owner to follow the steps in this guide.
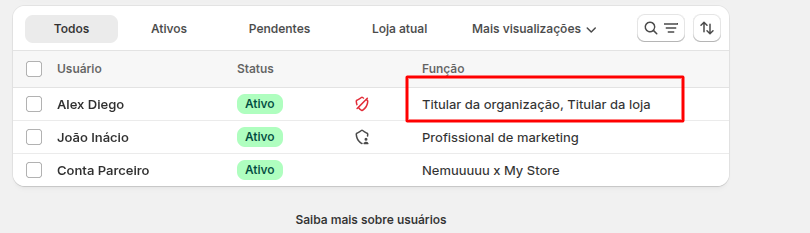
- Check your permissions on Shopify. You will need to have Owner access to be able to follow all the steps in this guide. Learn more about user management on Shopify.
Integrating Nemu’s Pixel on Shopify
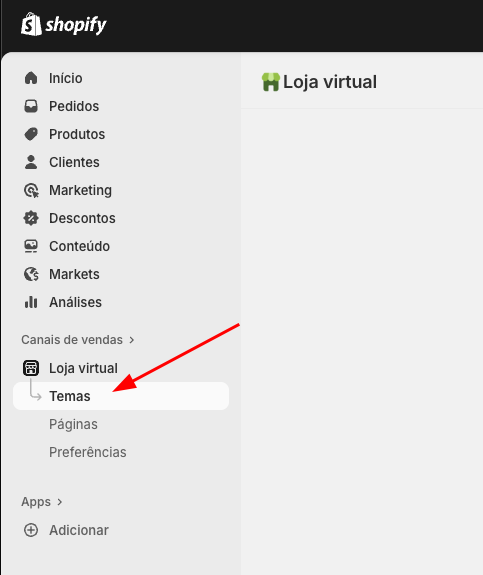
- In the Shopify dashboard, click on Sales channels in the sidebar and then on Themes
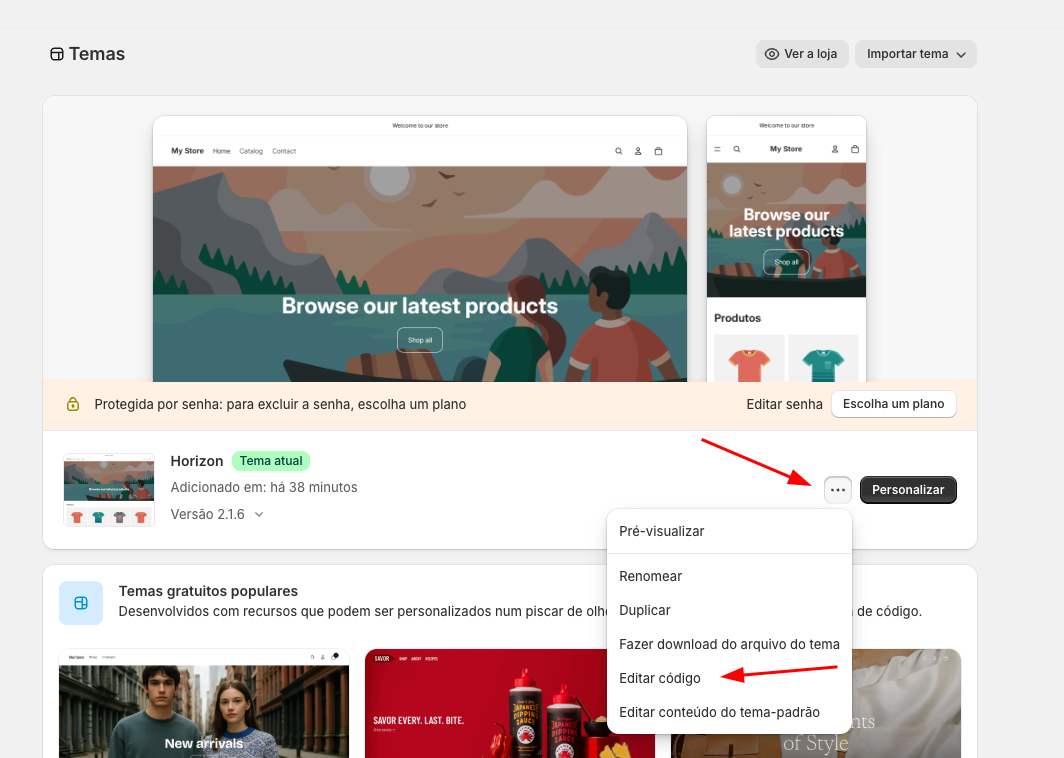
- In your Current Theme, click on the button and then on Edit code
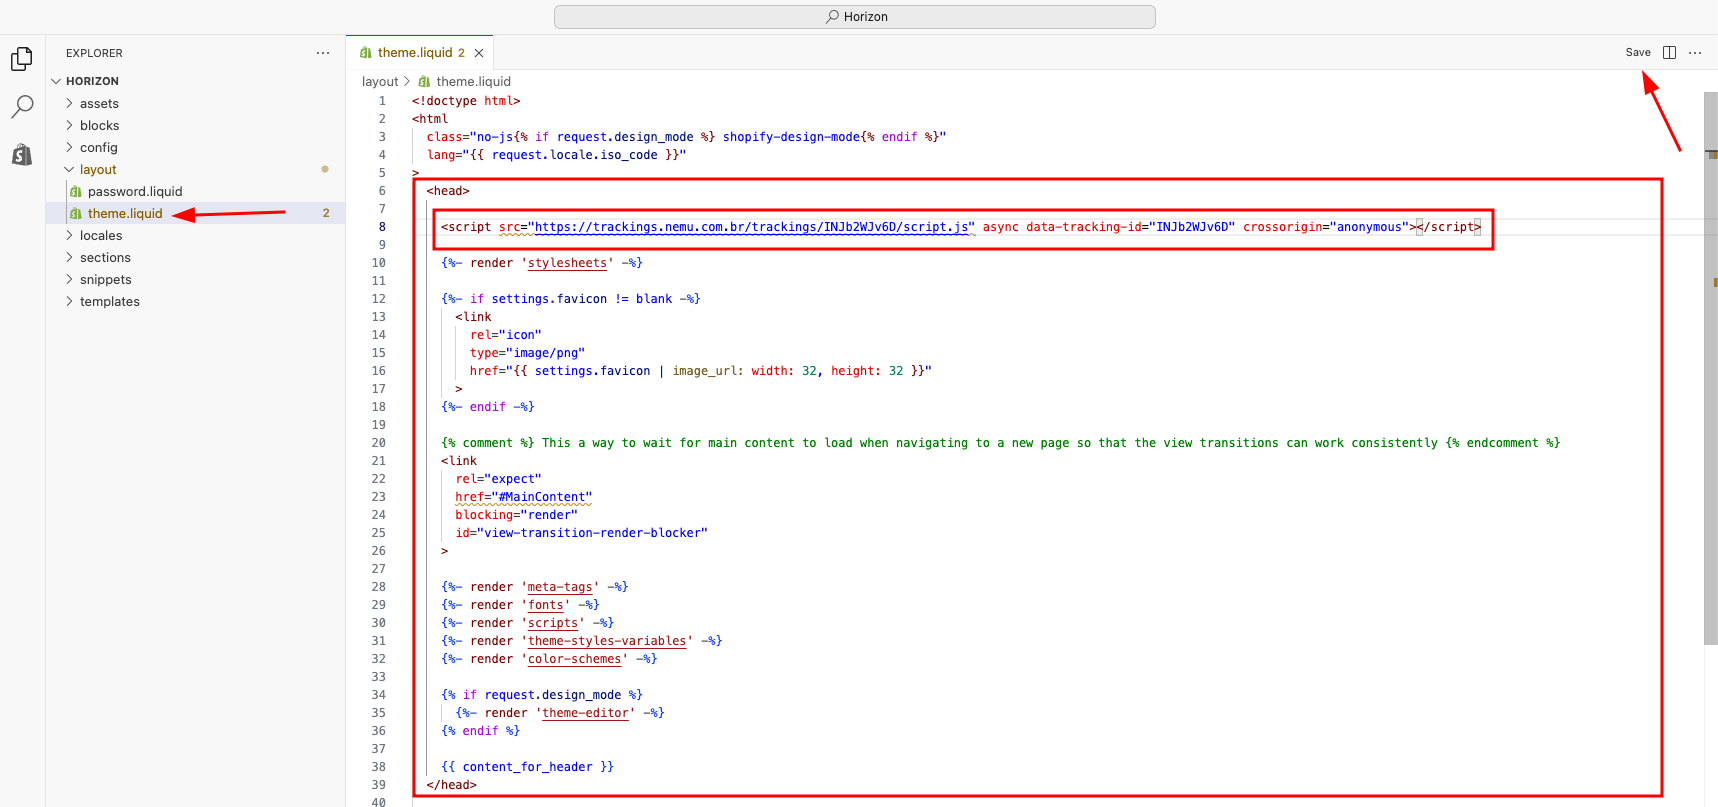
- Open the layout folder and select the theme.liquid file
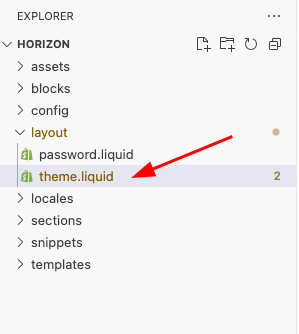
- Paste the code copied in the previous step of onboarding inside the
<head>tag and click on Save
Configuring Webhooks on Shopify
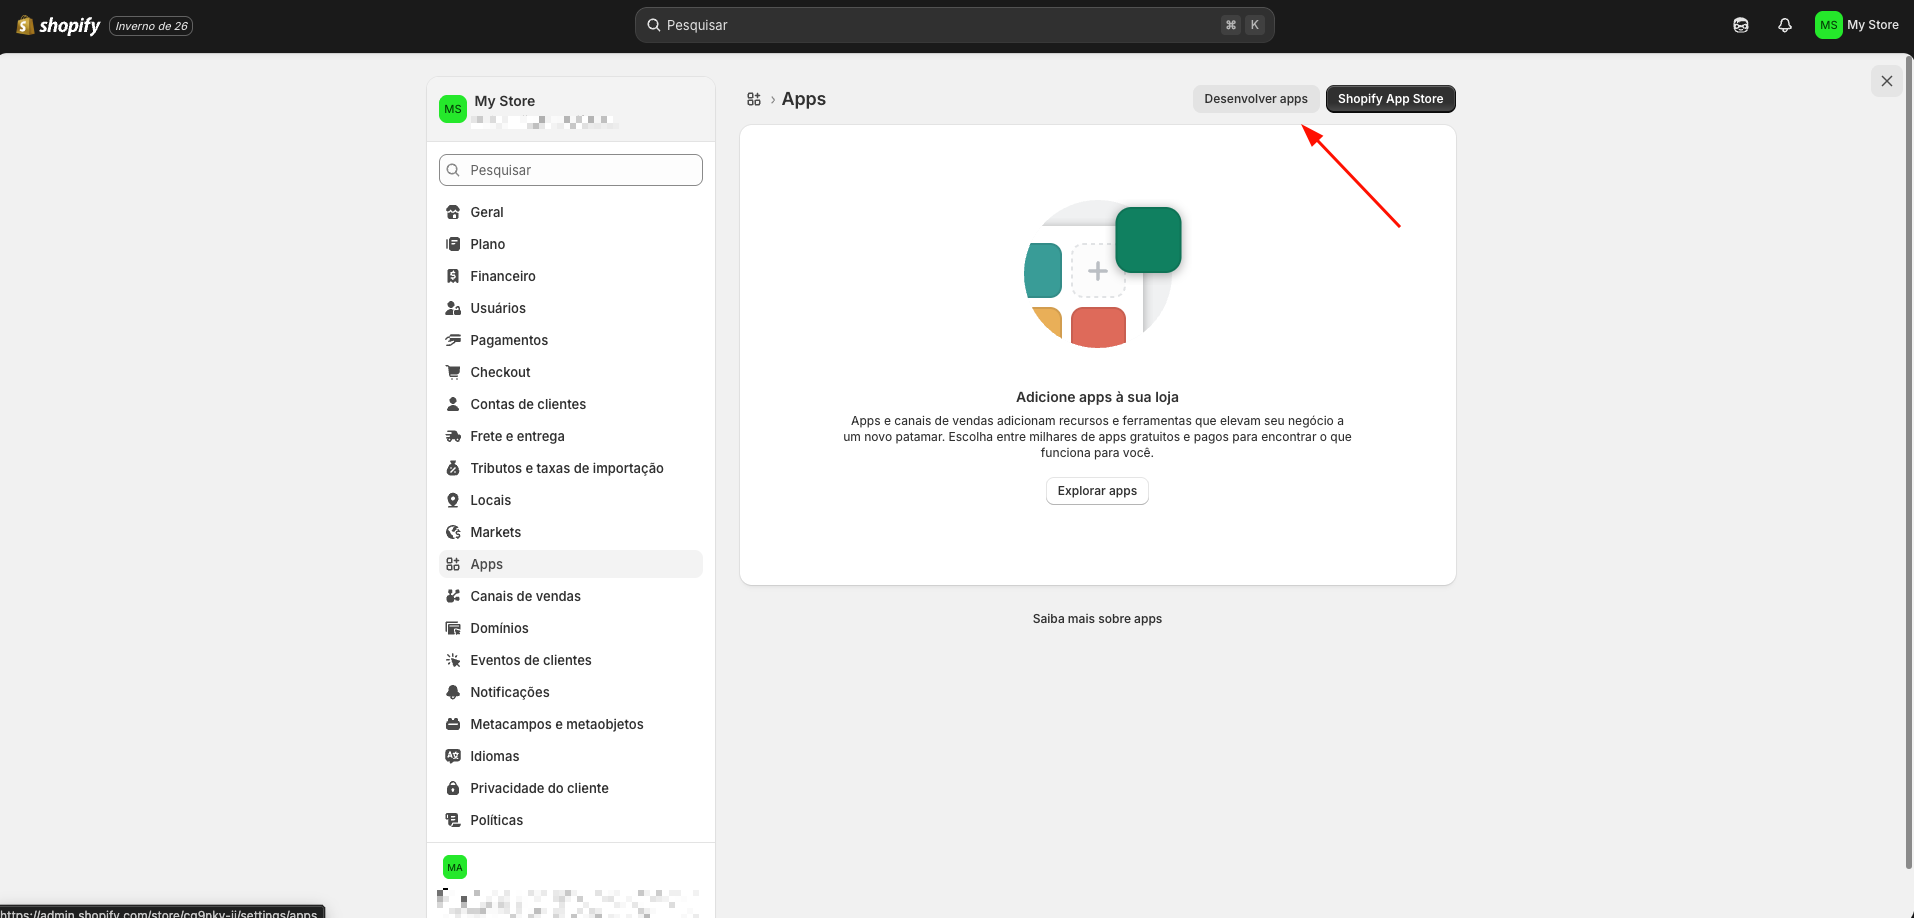
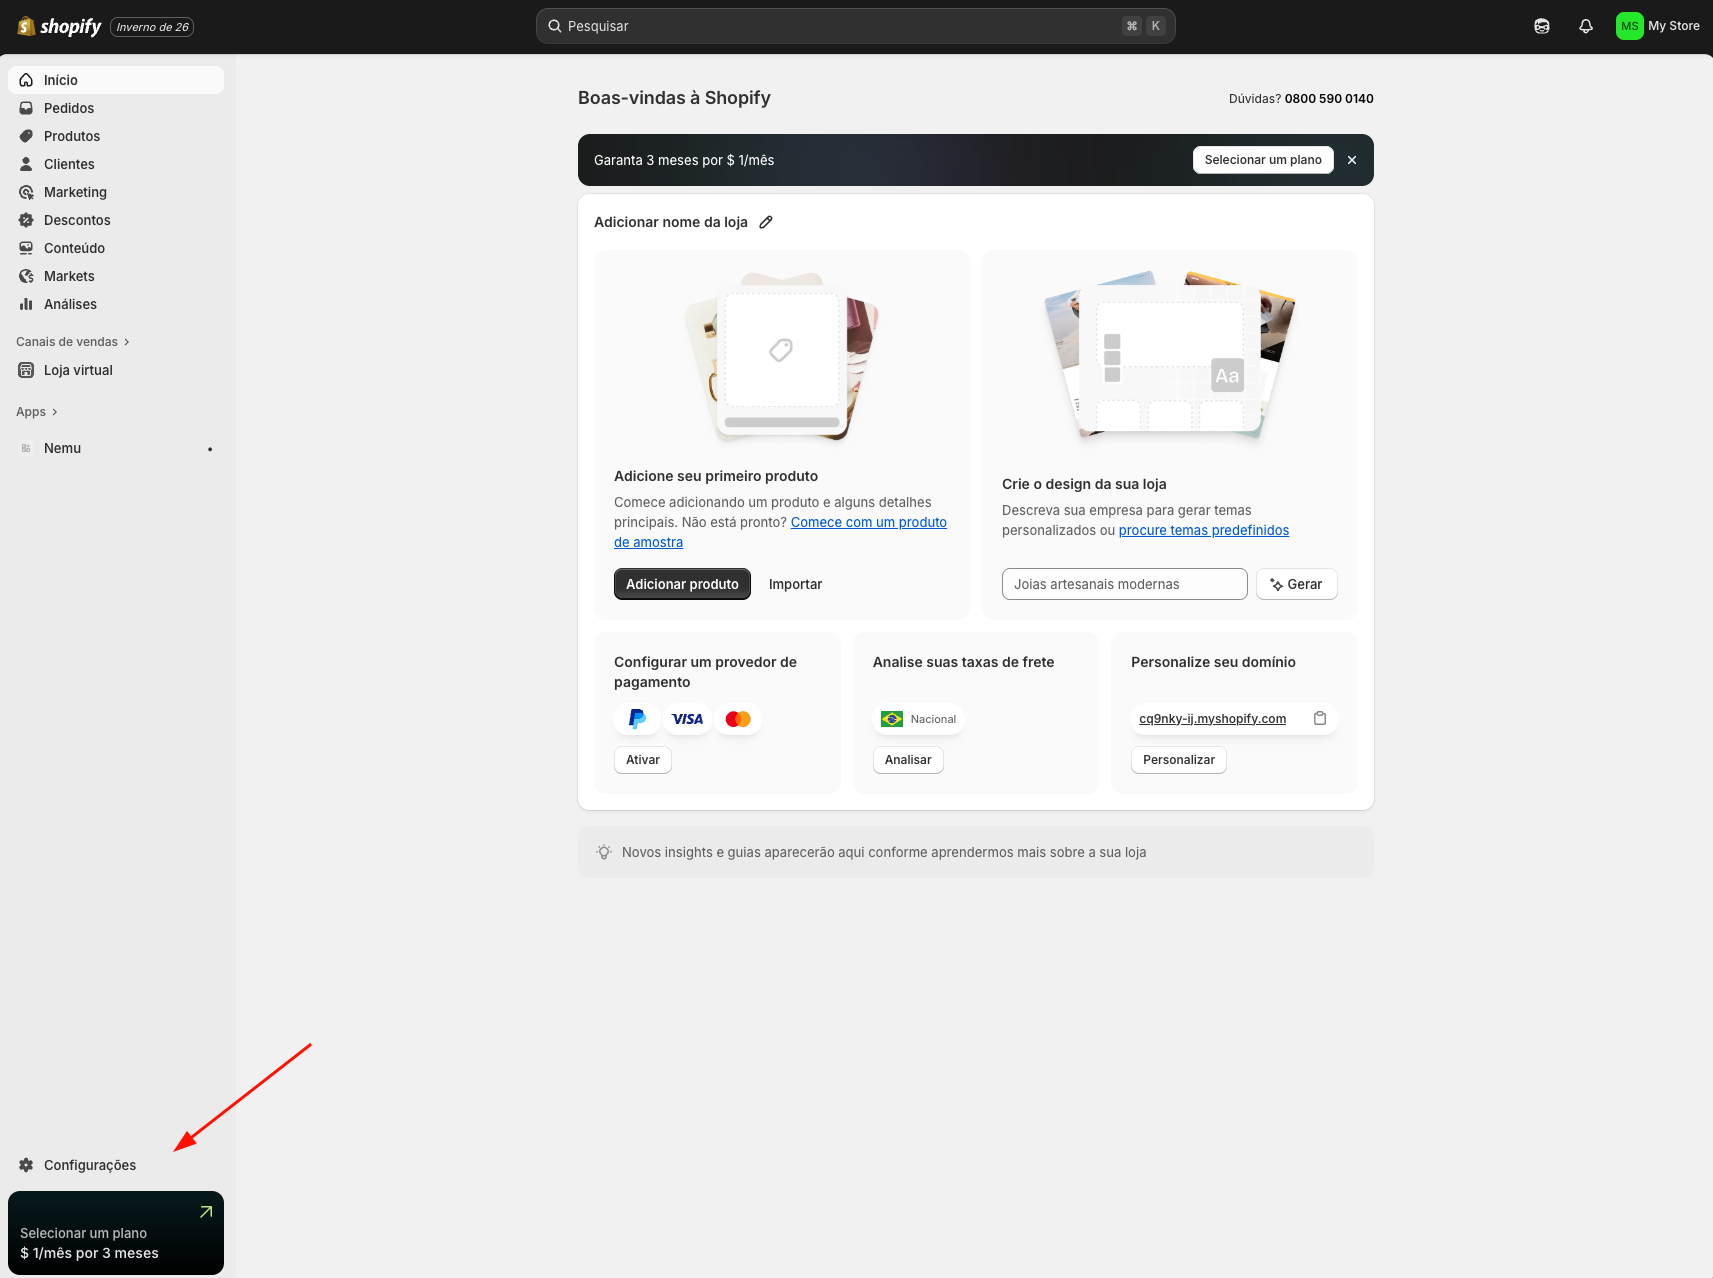
- In the Shopify dashboard, click on Settings in the sidebar
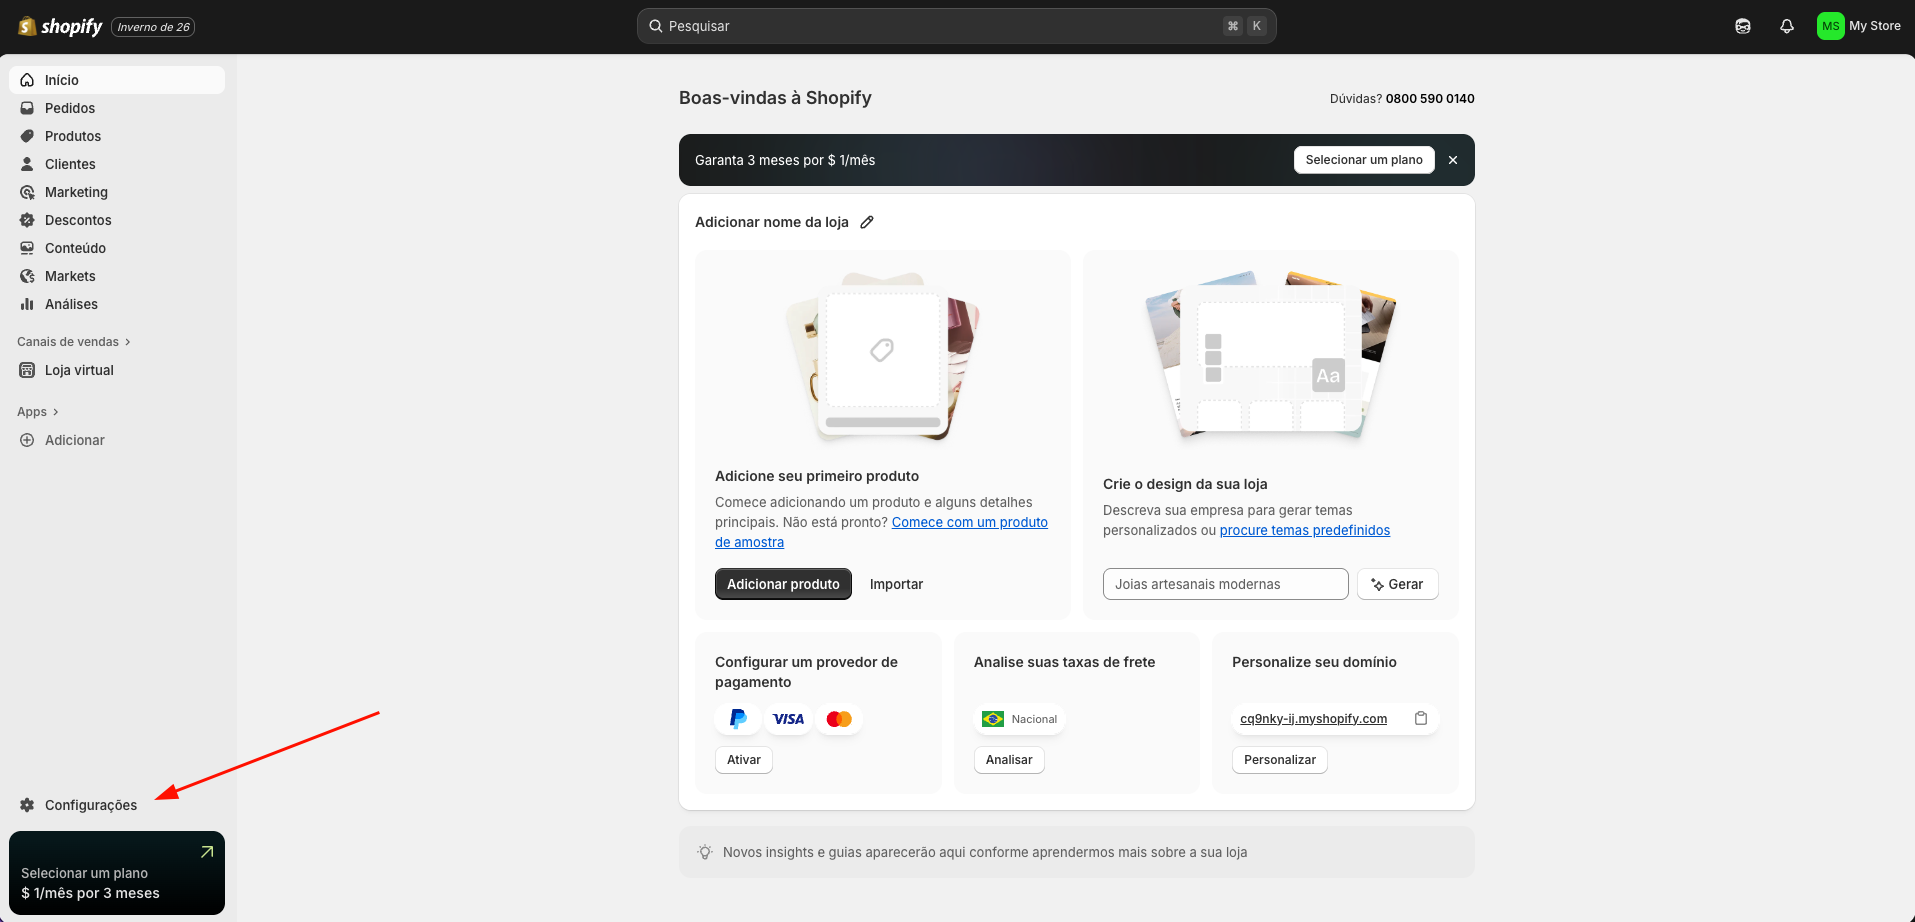
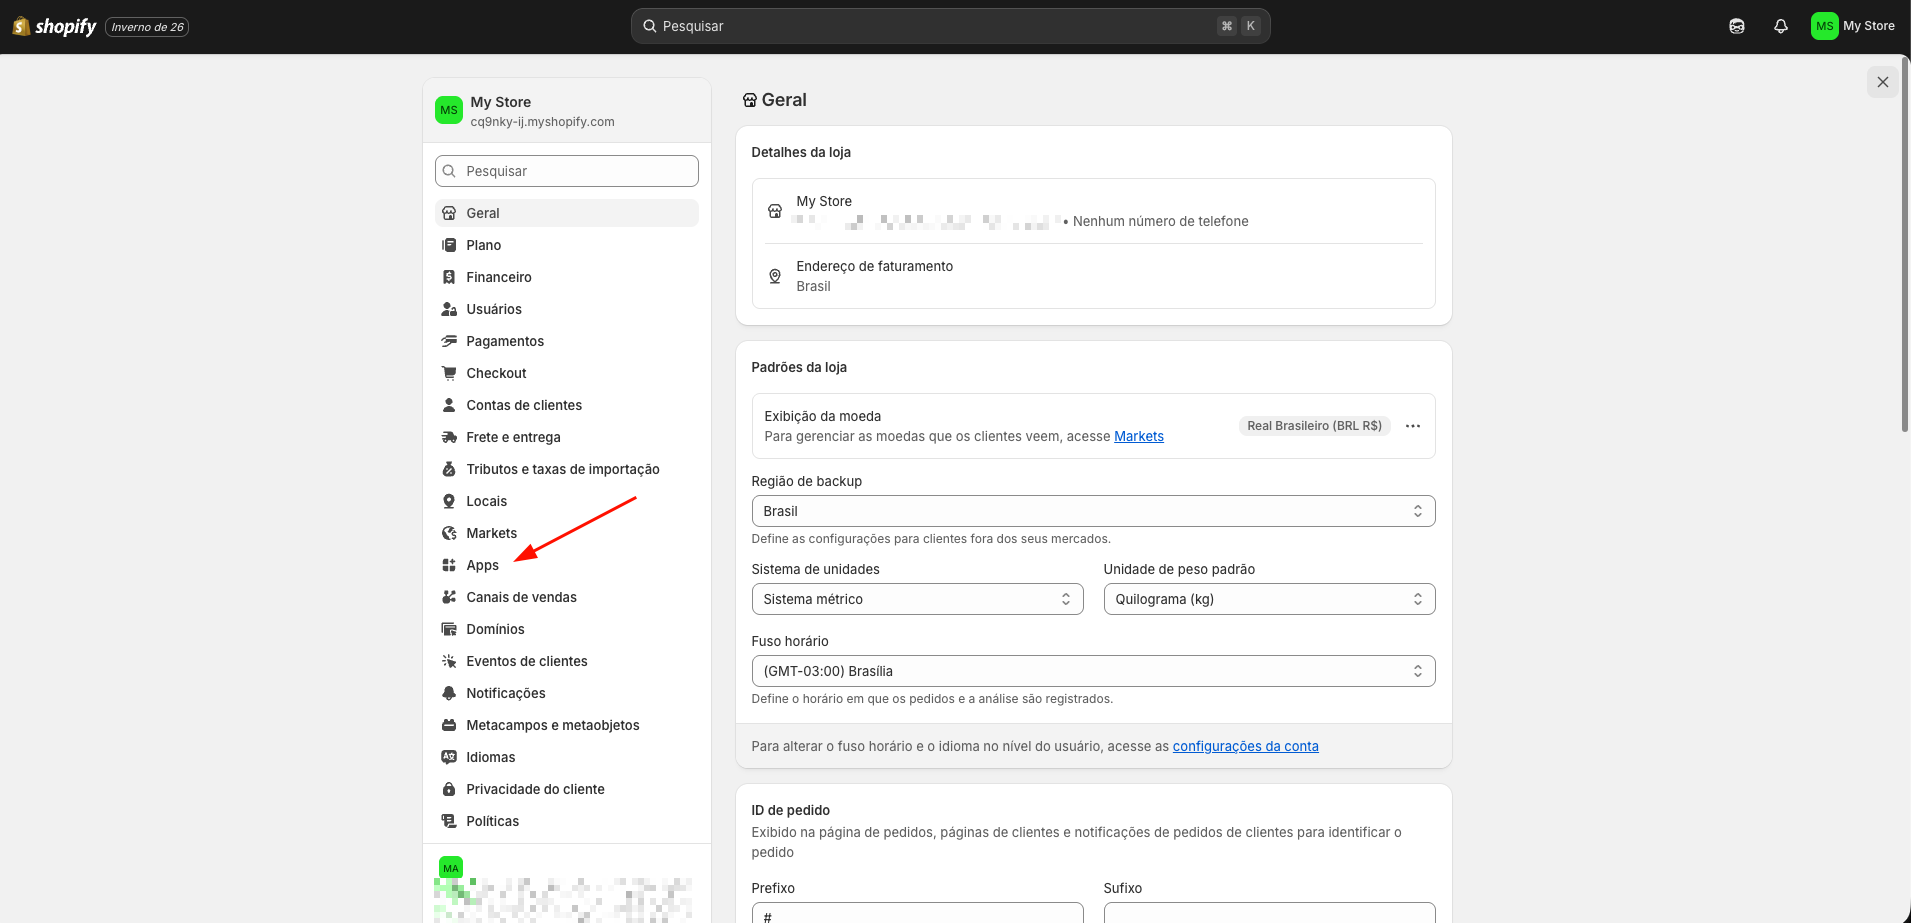
- In the sidebar, click on Apps
- Click on Develop apps
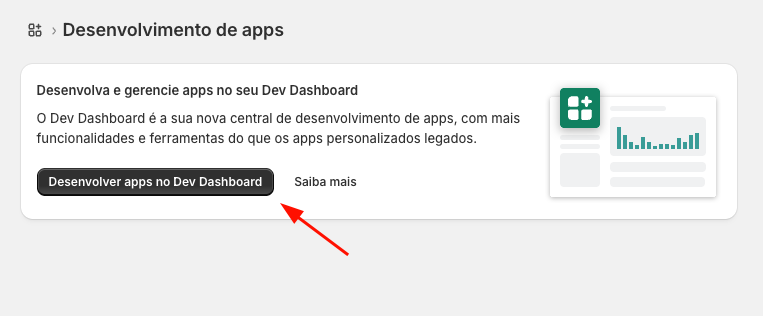
- Click on Develop apps in Dev Dashboard
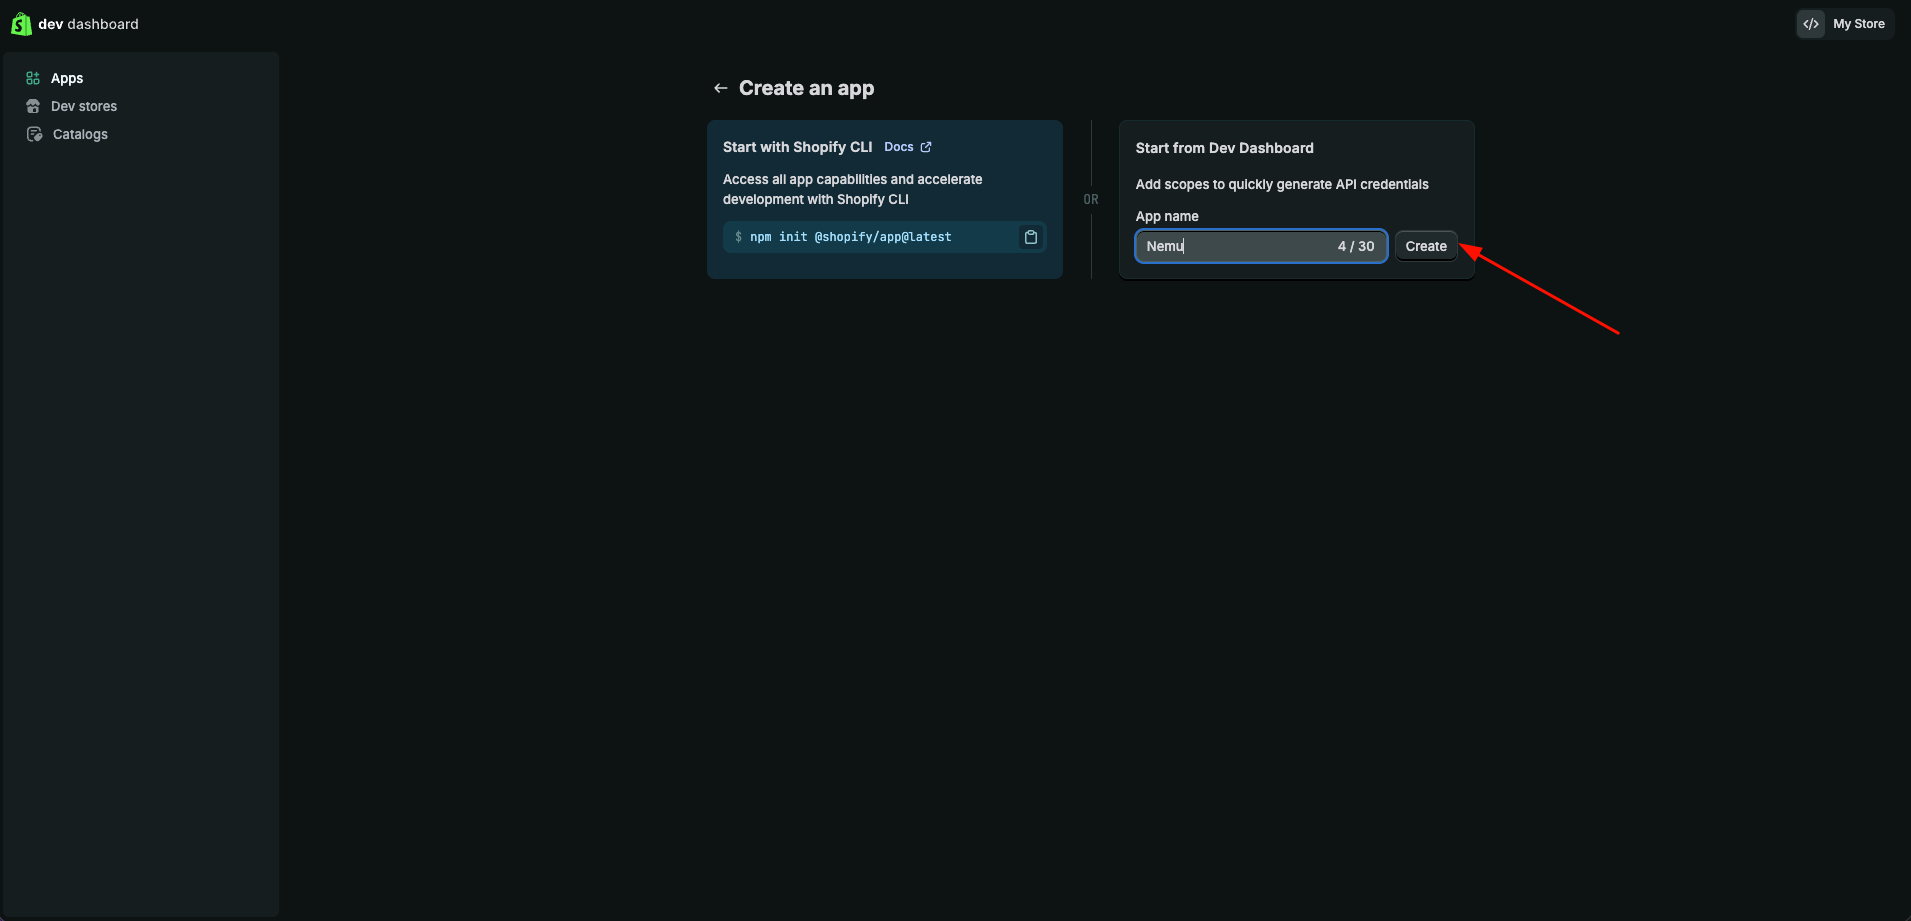
- You will be redirected to the app development screen, click on Create app

- Define a name for your app and click on Create
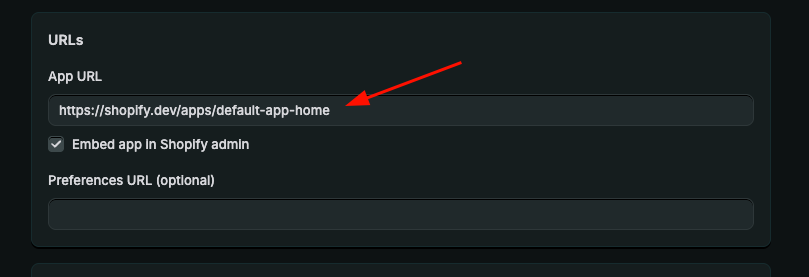
- Copy the URL and paste it in the App URL field
- In Webhooks API Version, select version 2026-01

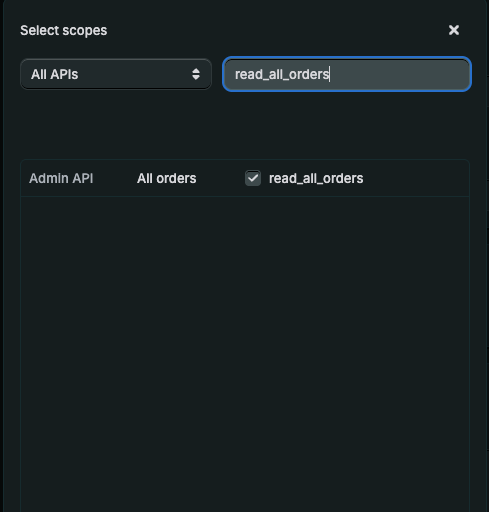
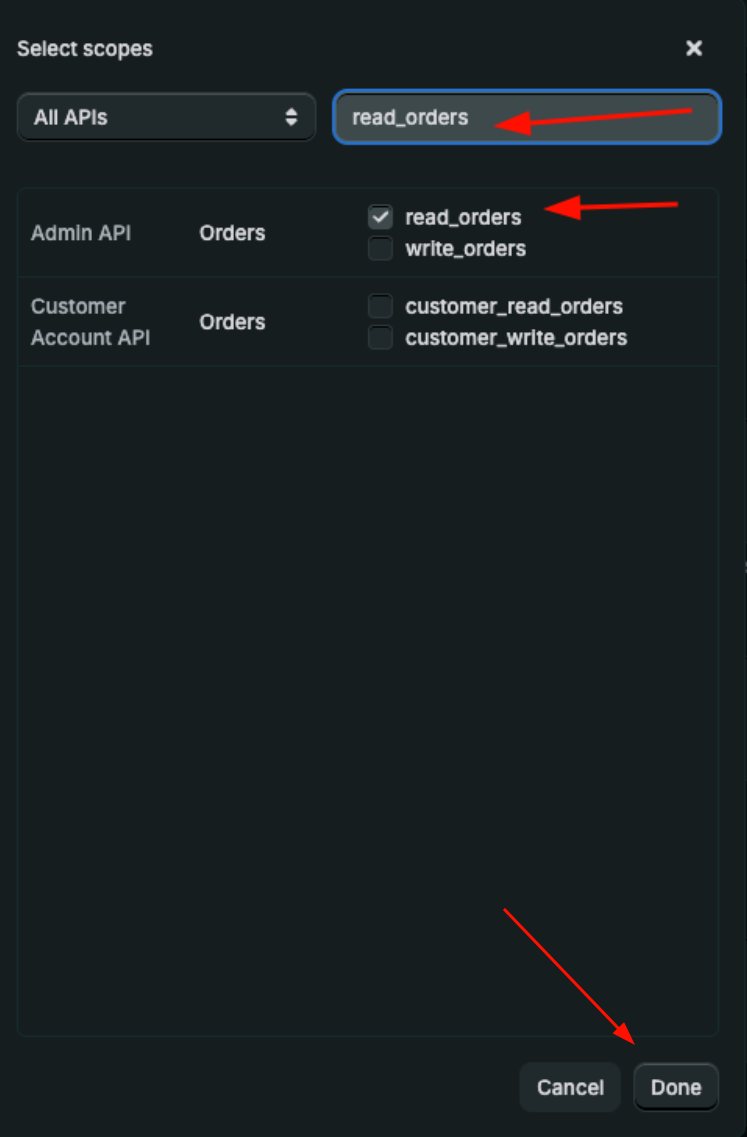
- Click on Select scopes
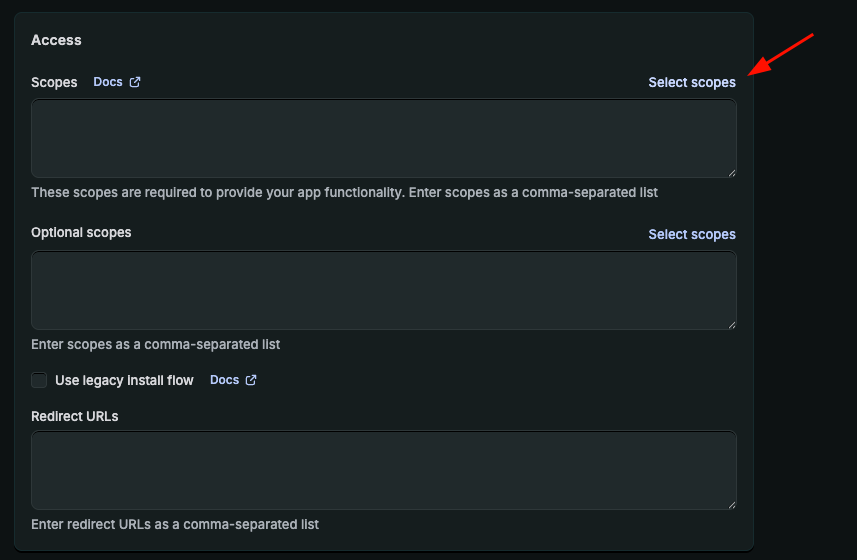
- Search for:
read_all_ordersread_orders
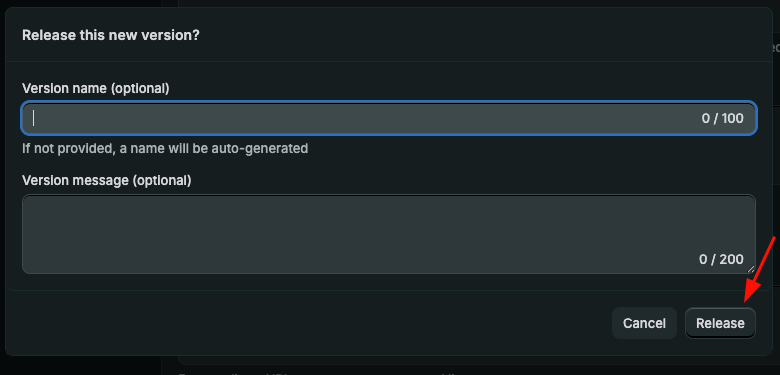
- Scroll down to the bottom of the page and click on Release
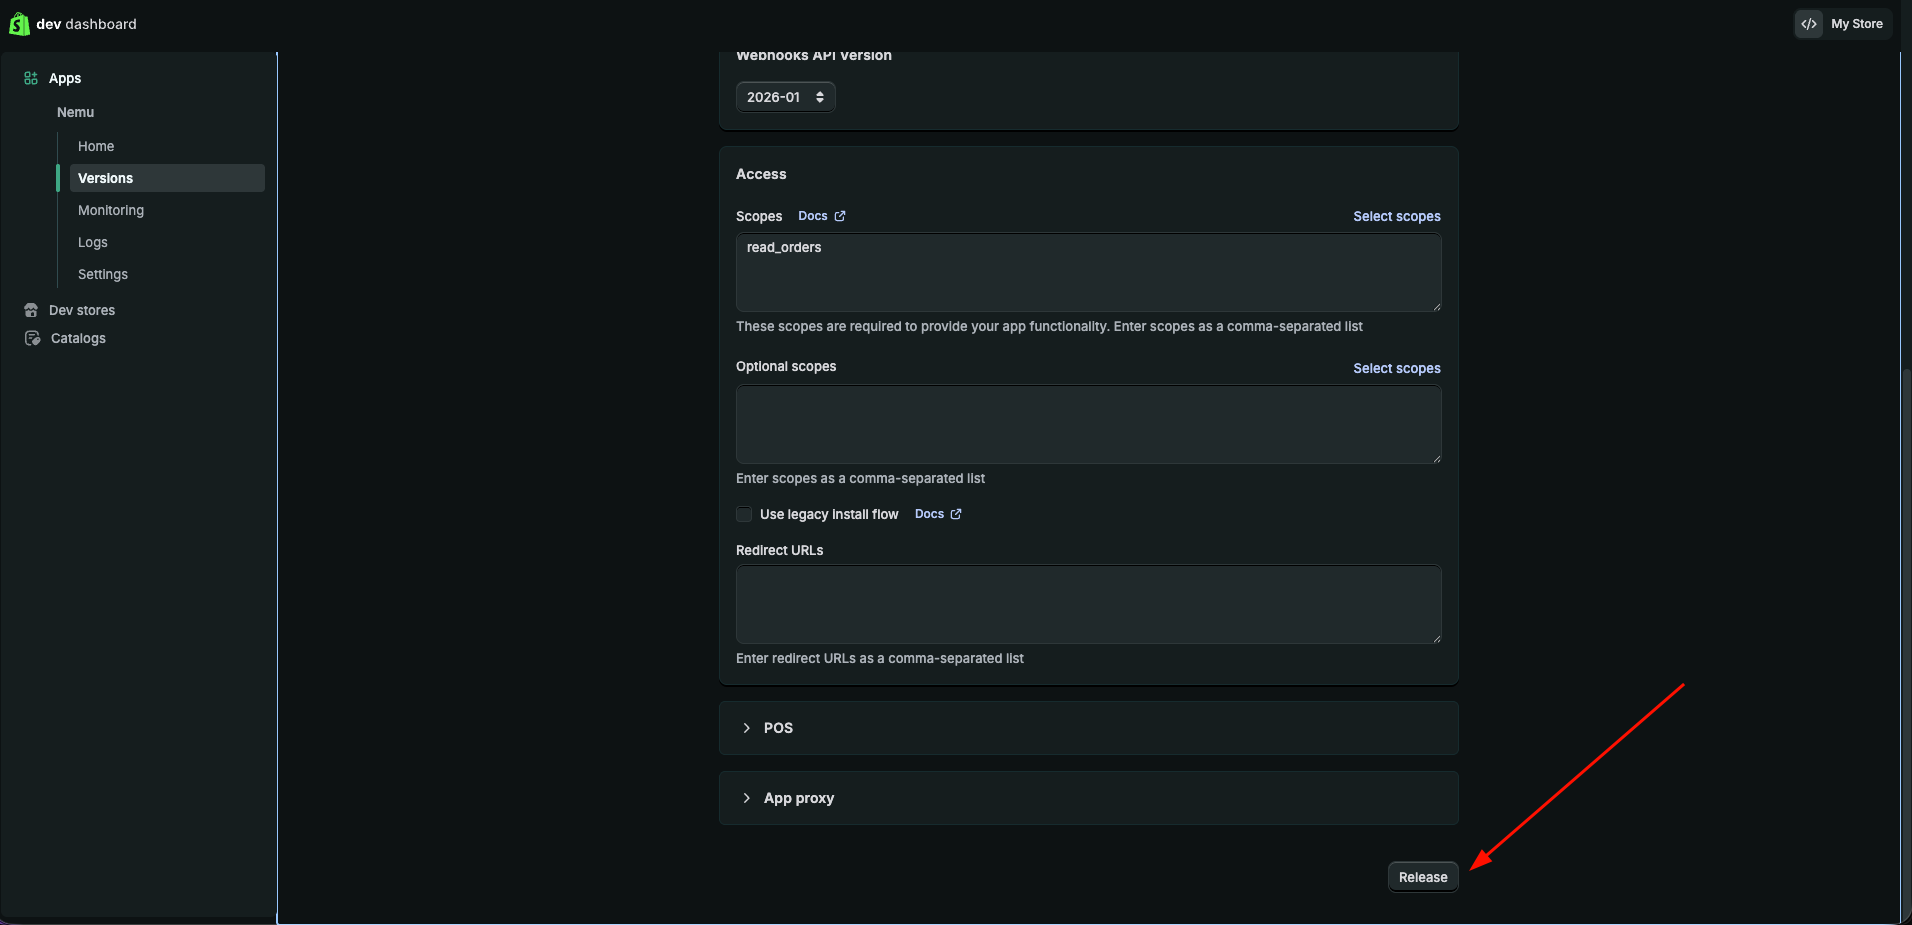
- In Version name, you can leave it blank and click on Release
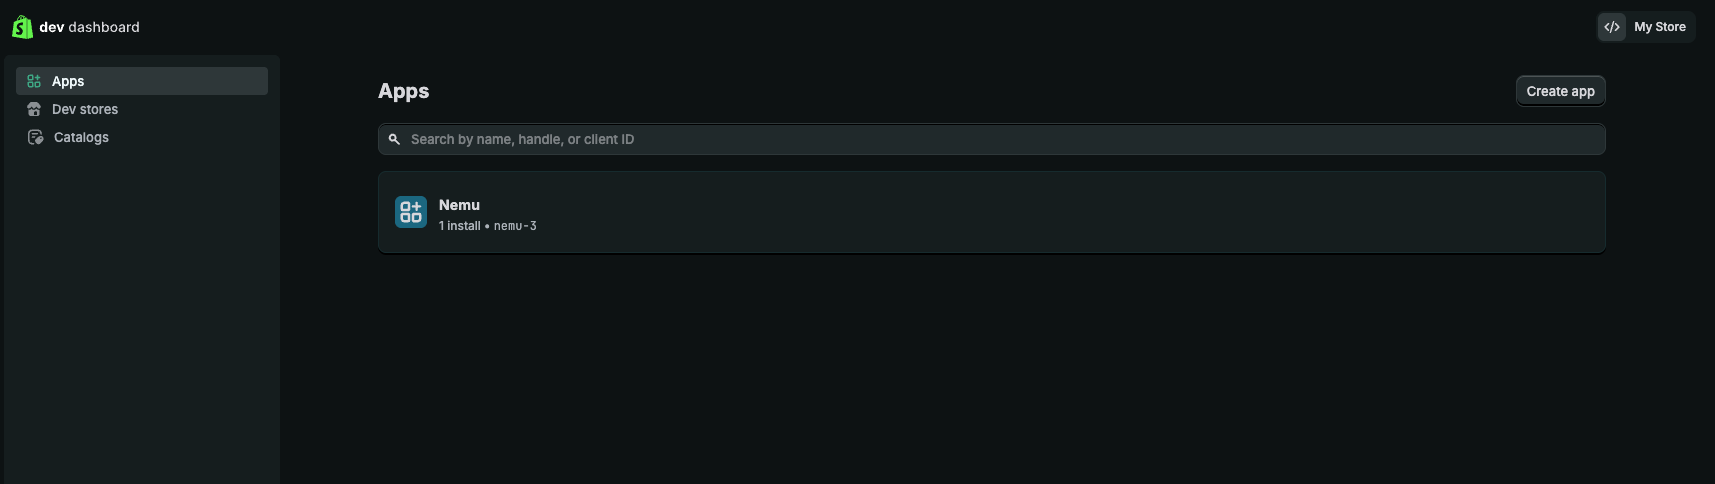
Installing the app on Shopify
- In the sidebar, click on Home
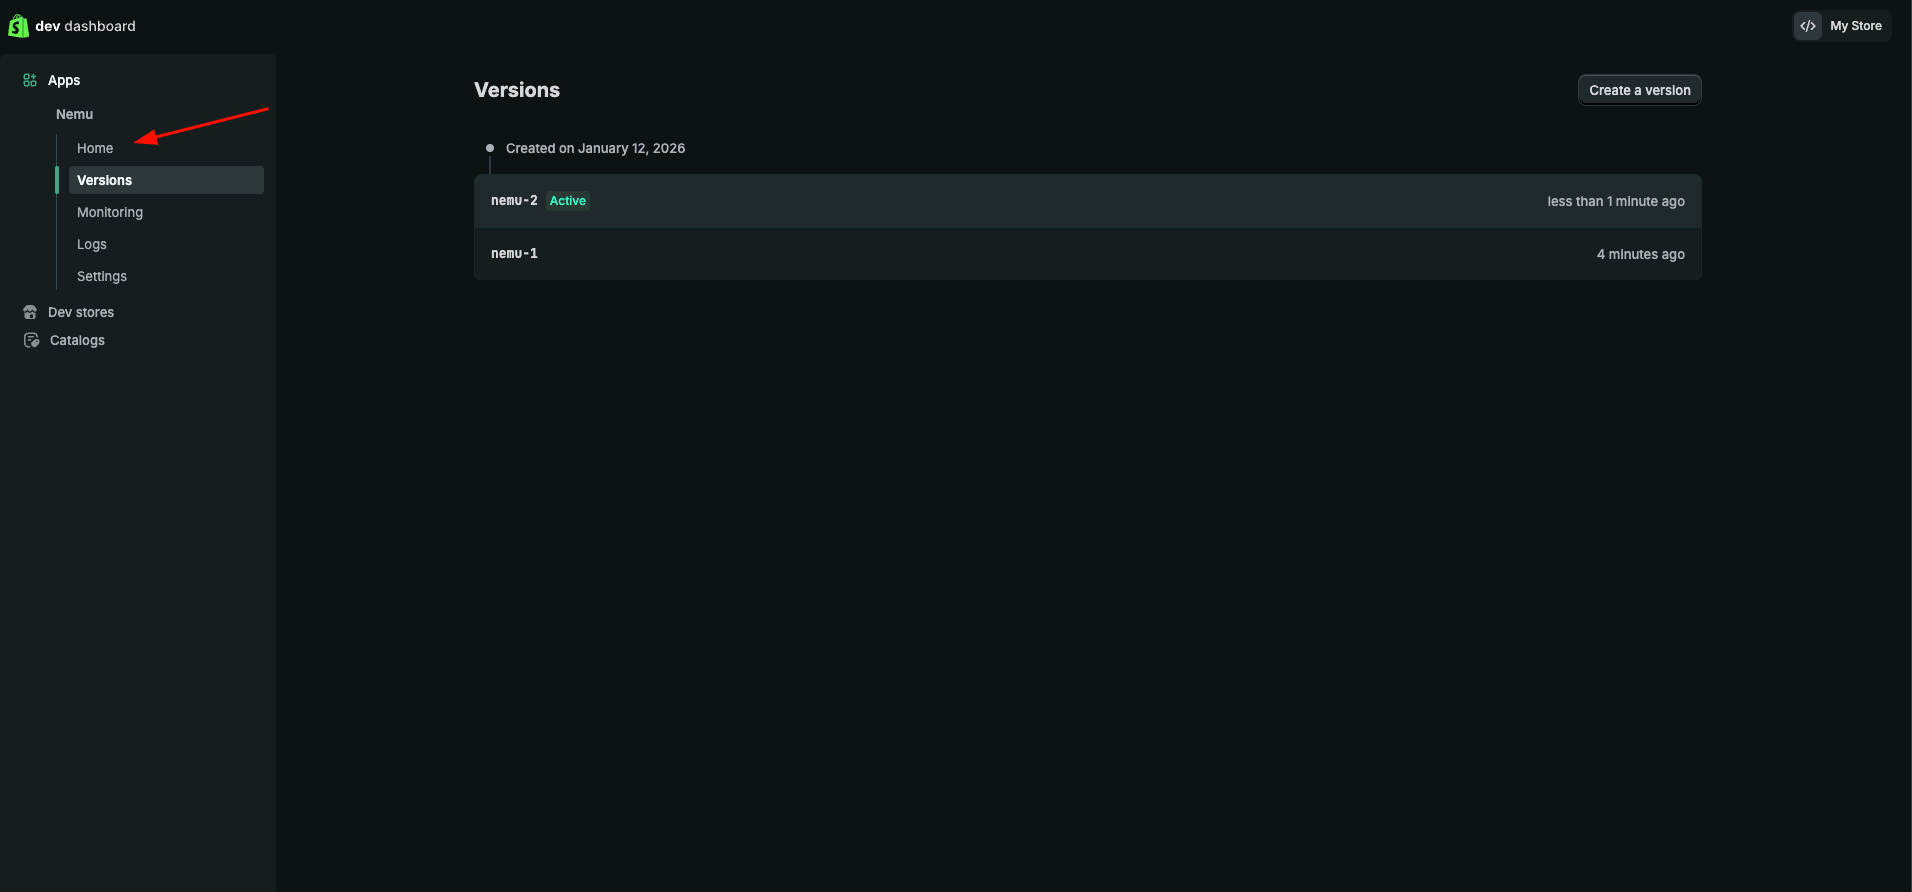
- Click on Install app
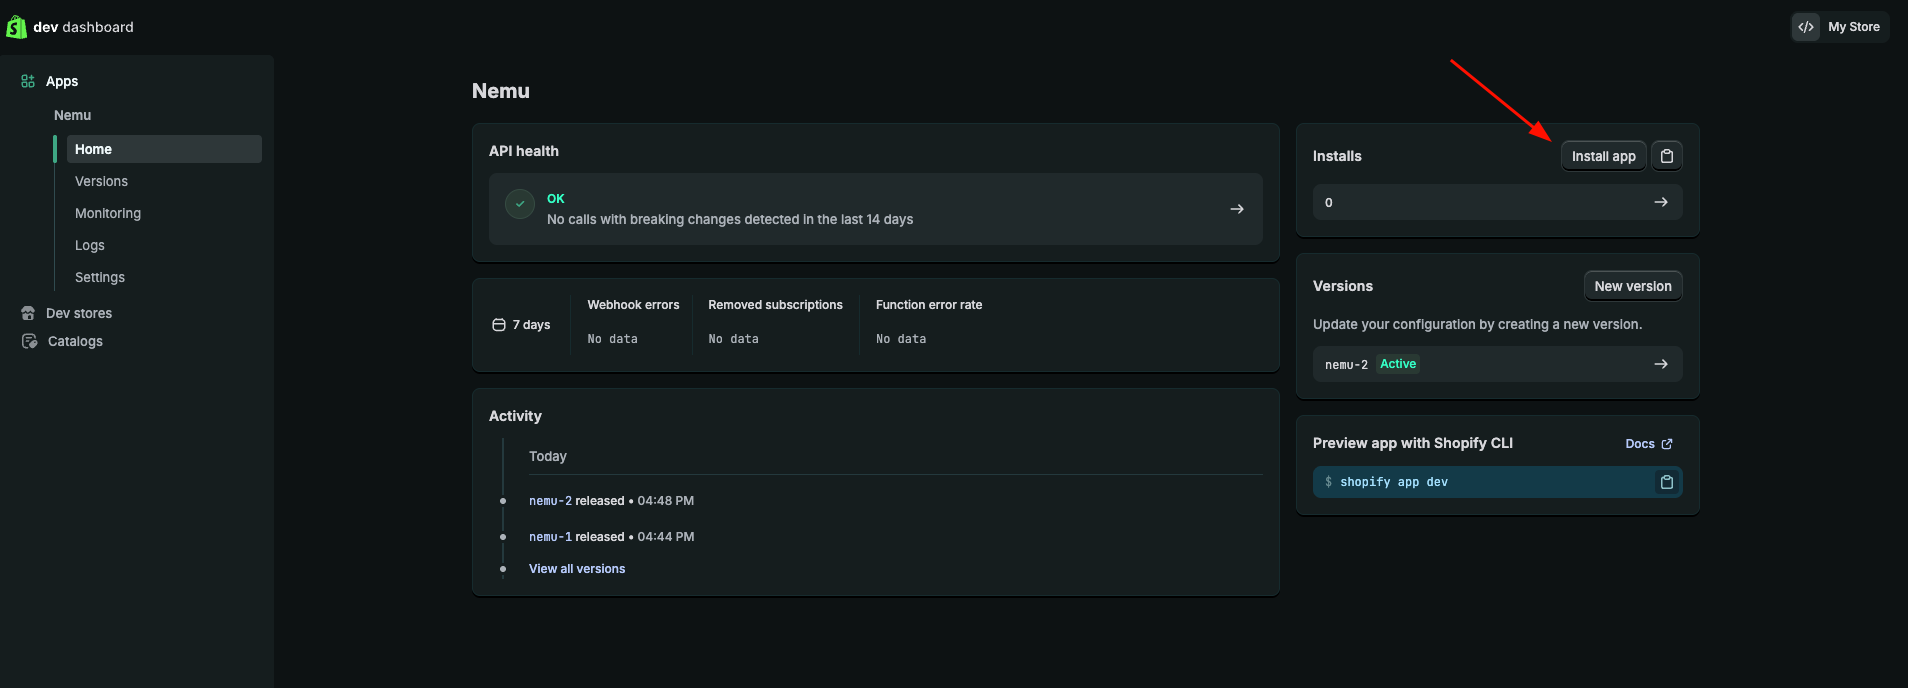
Keep this page open, as we will need the Client ID and Client Secret for the next steps.
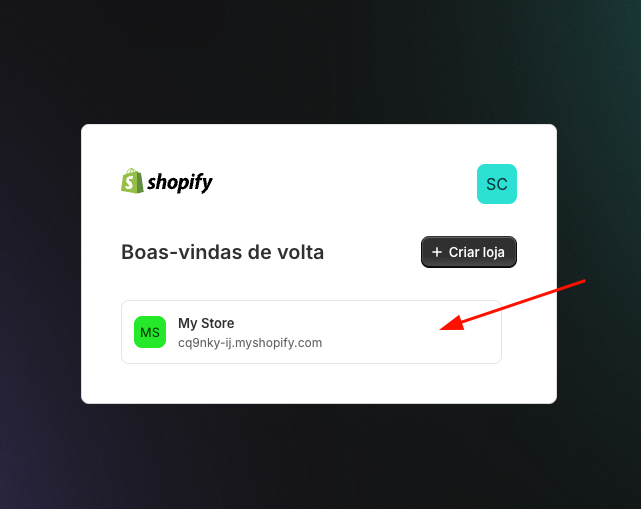
- Click on the store card where you want to install the app
- Click on the Install button

Configuring Webhooks in Nemu
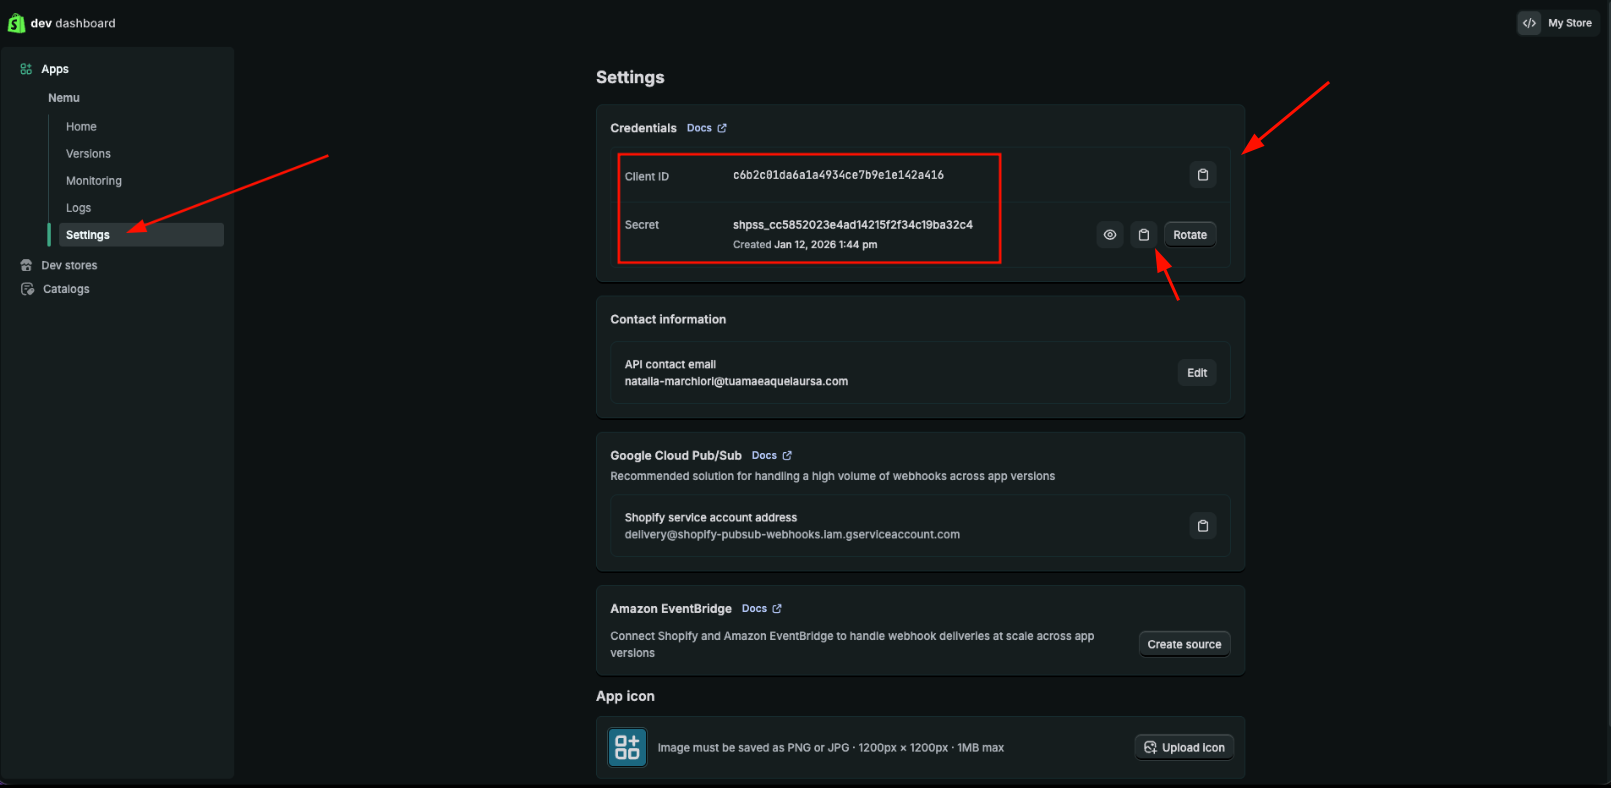
- Access the Shopify dev dashboard by clicking here
- Click on the app card that we created in the step configuring webhooks on Shopify
- In the sidebar, click on Settings and copy the Client ID and Client Secret
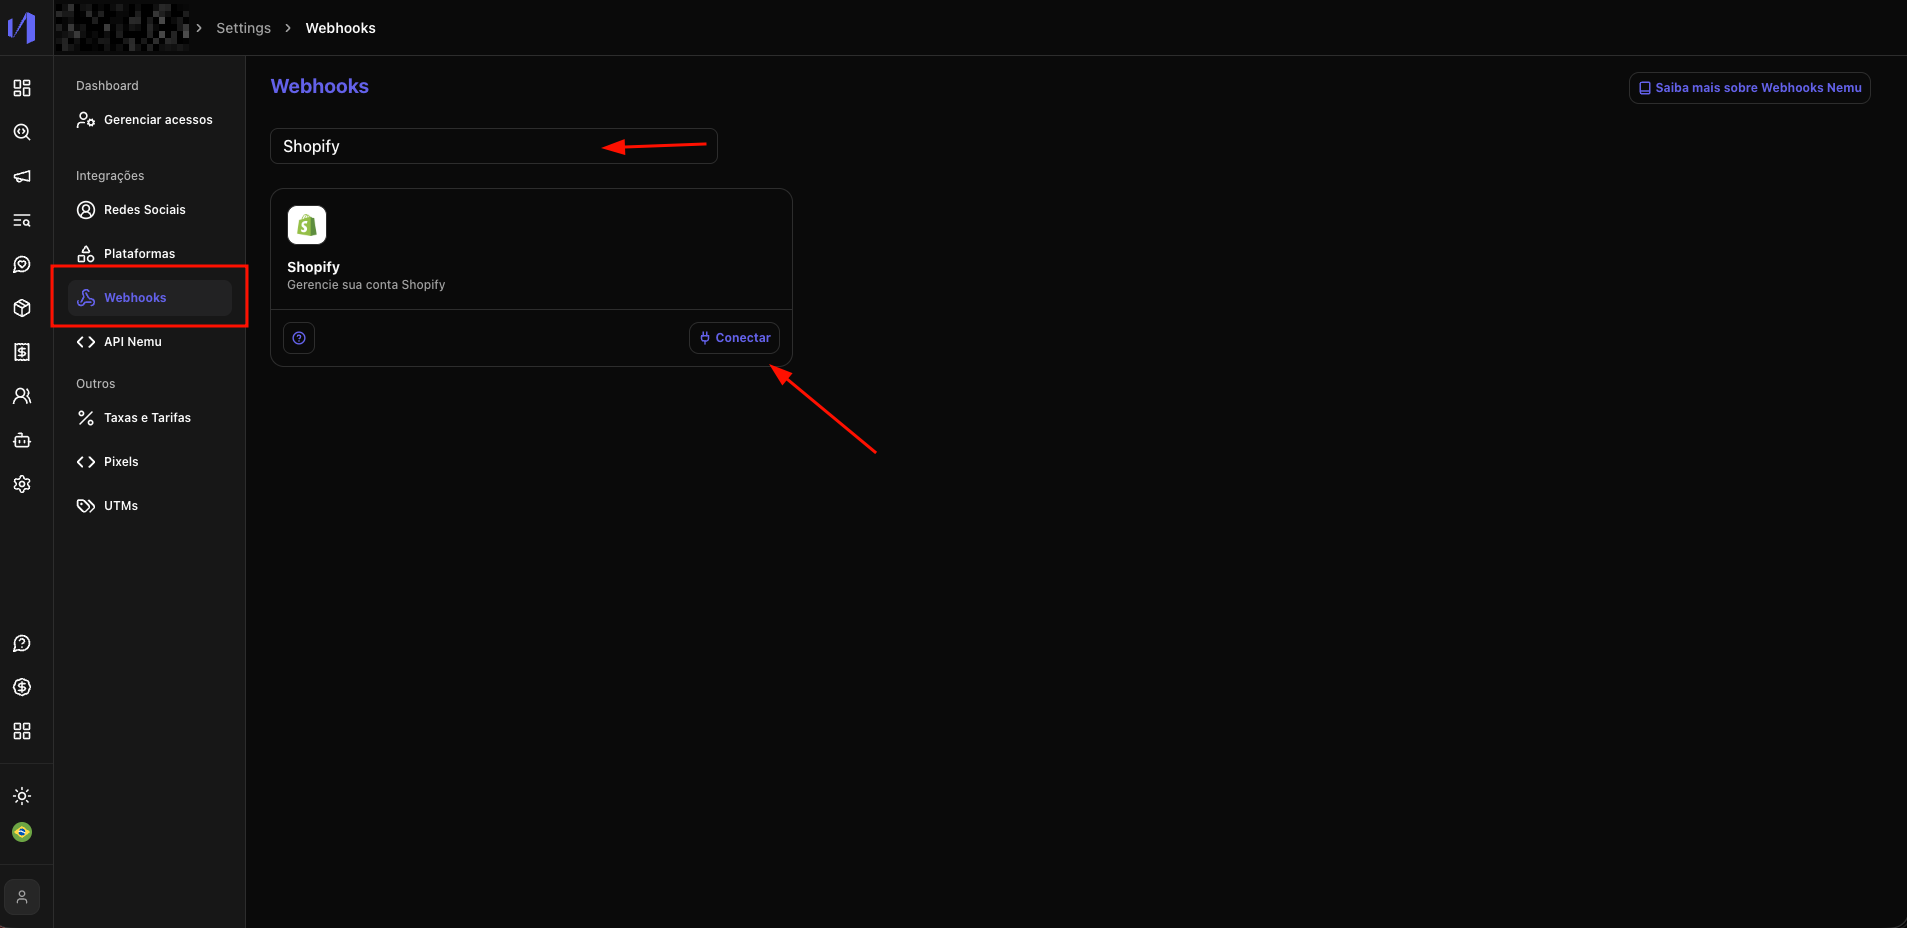
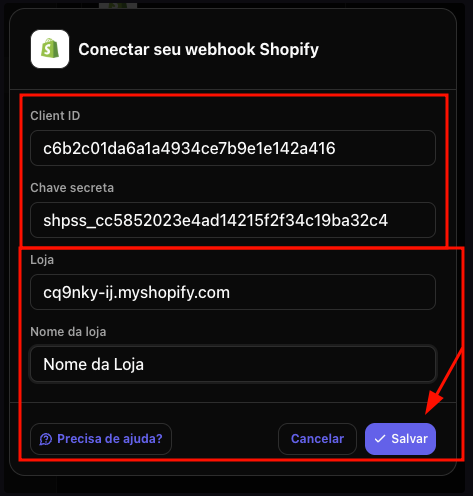
- In Nemu, go to Settings > Webhooks, search for Shopify and click on Connect
- Paste the Client ID and Client Secret in their respective fields
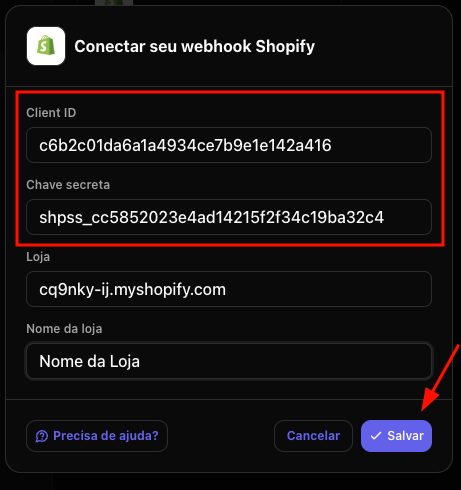
- Fill in the Store data and click on Save
Configuring Custom Pixel on Shopify
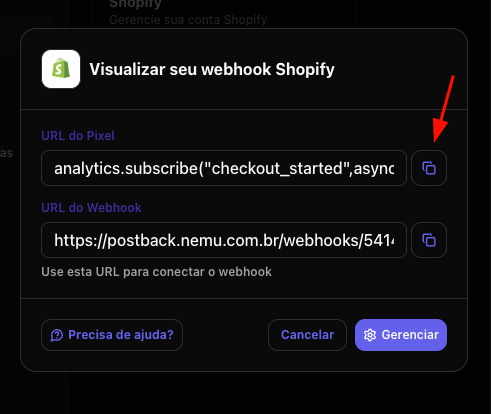
- Copy the Pixel URL, we will use it in step 7 of this section to configure the Custom Pixel on Shopify.
- In the sidebar, click on Settings
- Then, a new page will open, click on Customer Events

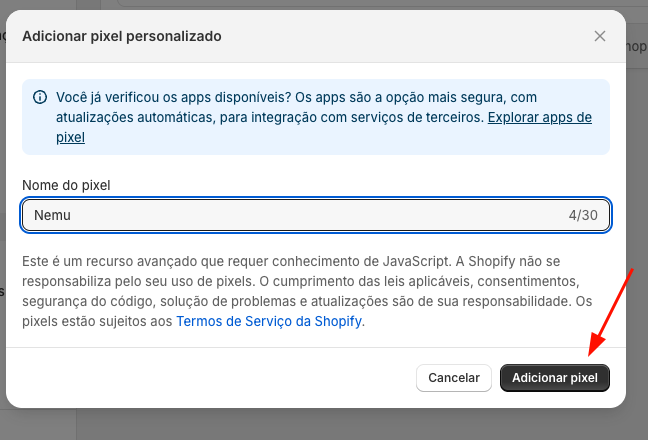
- Click on the Custom Pixels tab and click on Add custom pixel
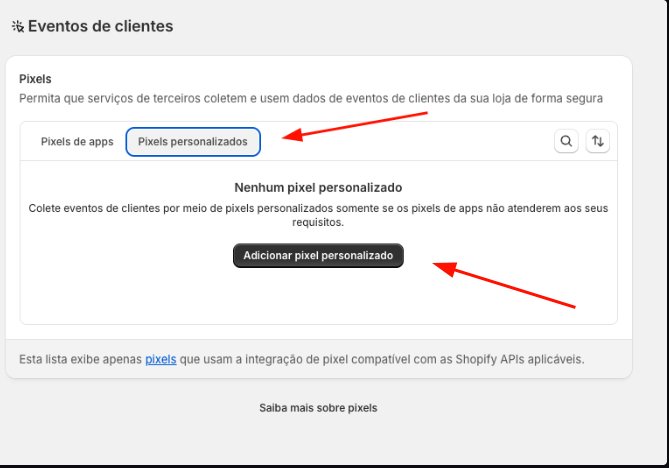
- Define a name for the Pixel and click on Add pixel
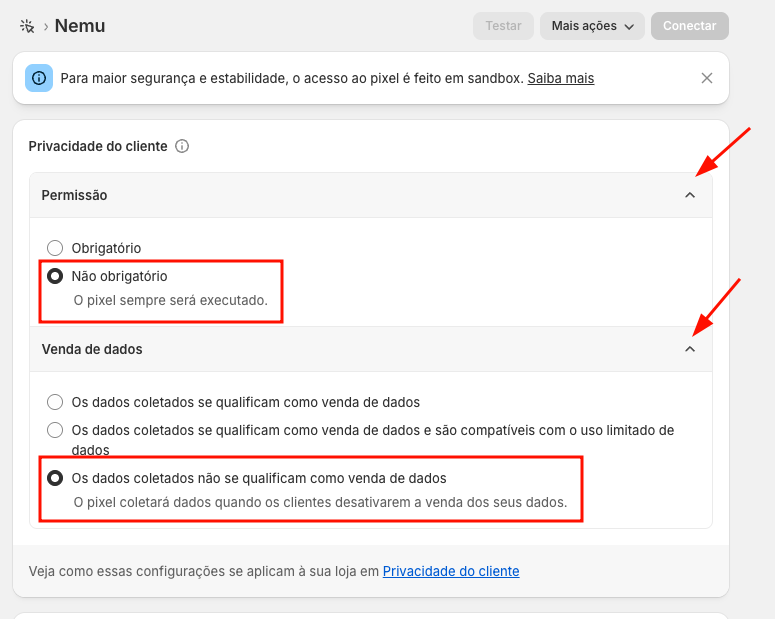
- Expand the Customer Privacy section and configure:
- Permission: Not required
- Data sale select: The collected data does not qualify as data sale
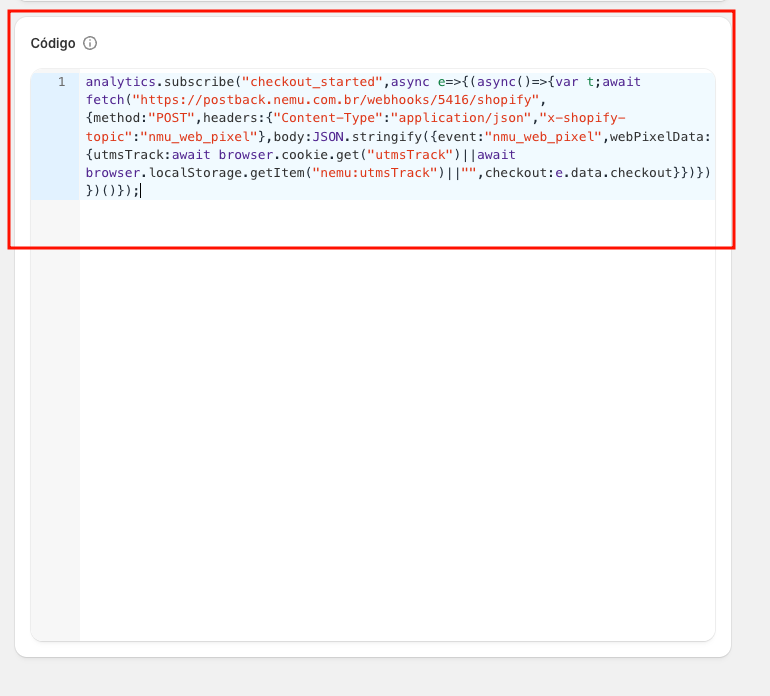
- Paste the code copied in step 1
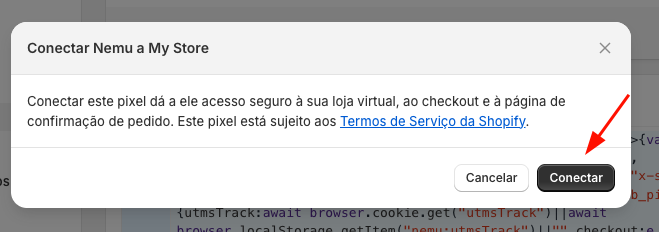
- At the top of the page, after pasting the code, the Save button will appear and then click on Connect
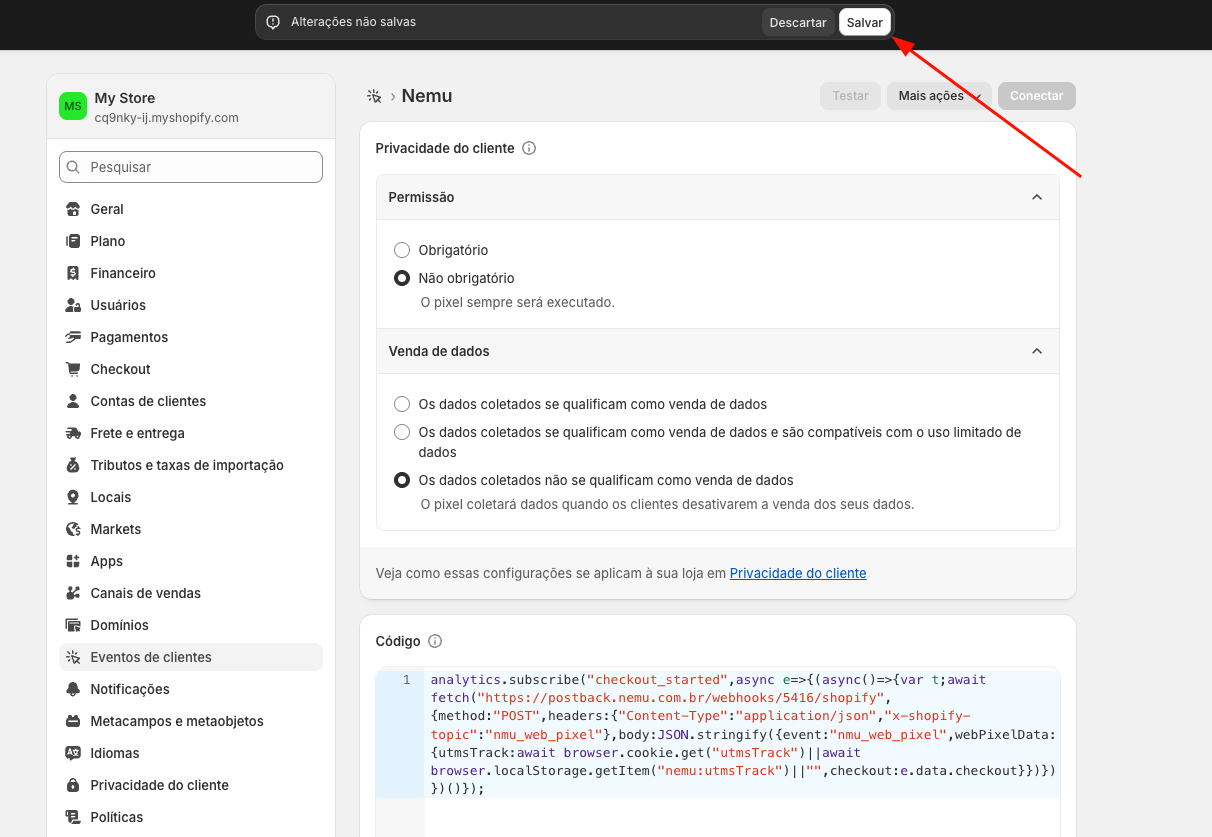
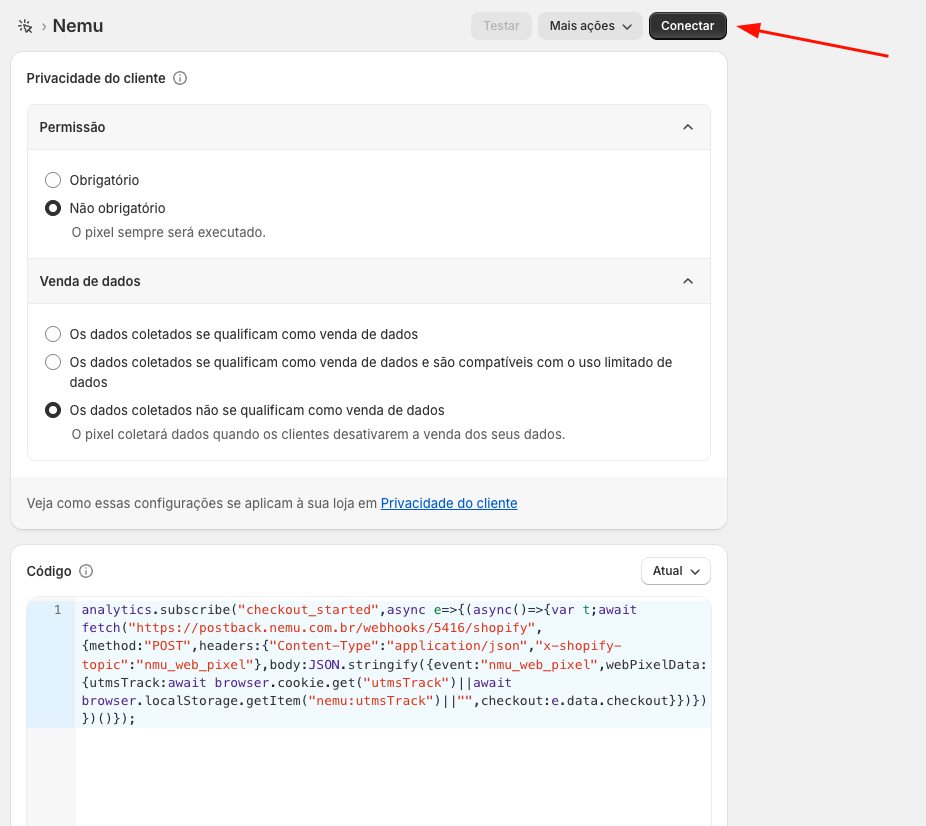
- Confirm again on Connect