Important Information Before You Start
- If a Shopify Partner (Agency) is managing your store, you’ll need to ask the Organization Owner / Store Owner to follow the steps in this guide.
- Check your account permissions on Shopify. You’ll need Owner access to follow all steps in this guide. Learn more about user management on Shopify.
Integrating Nemu Pixel on Shopify
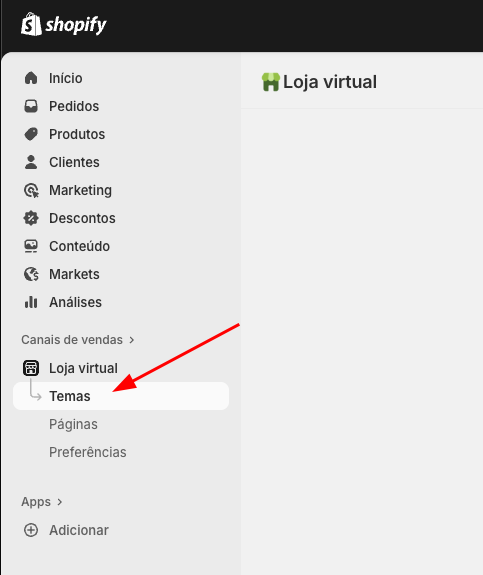
- In the Shopify panel, click on Sales channels in the sidebar, then click on Themes
- In your Current Theme, click the button and then click on Edit code
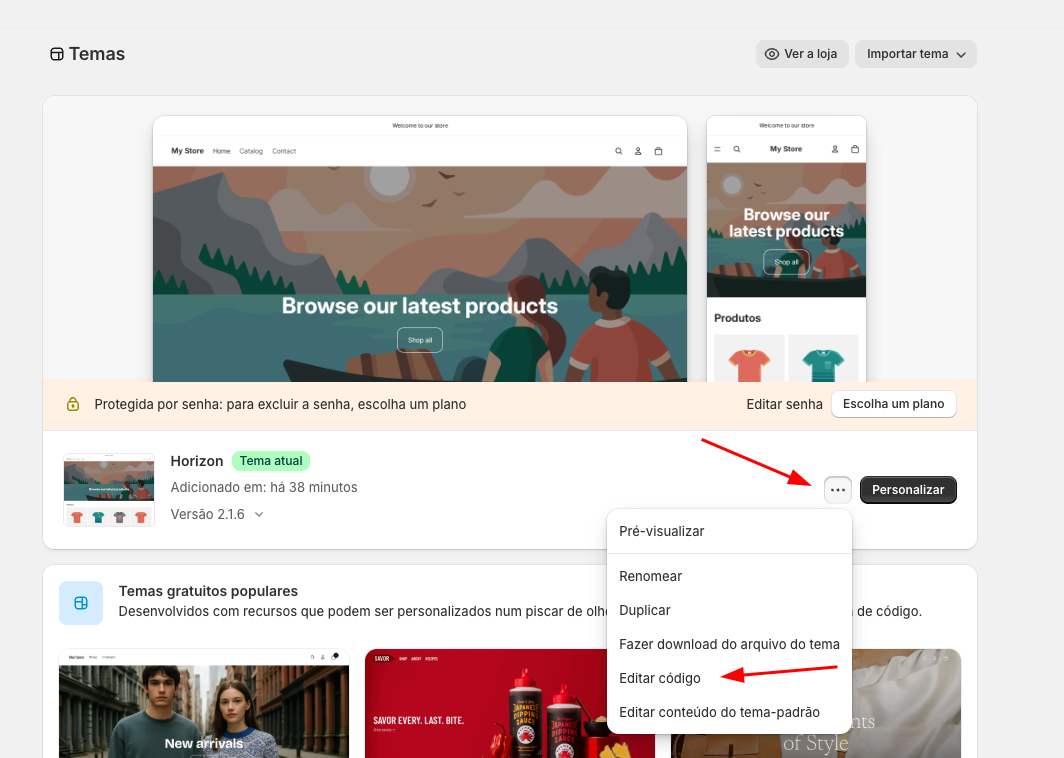
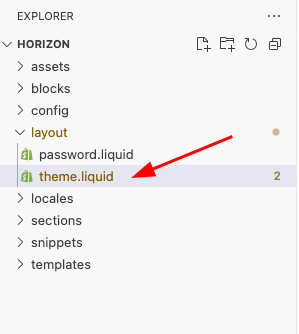
- Open the layout folder and select the theme.liquid file
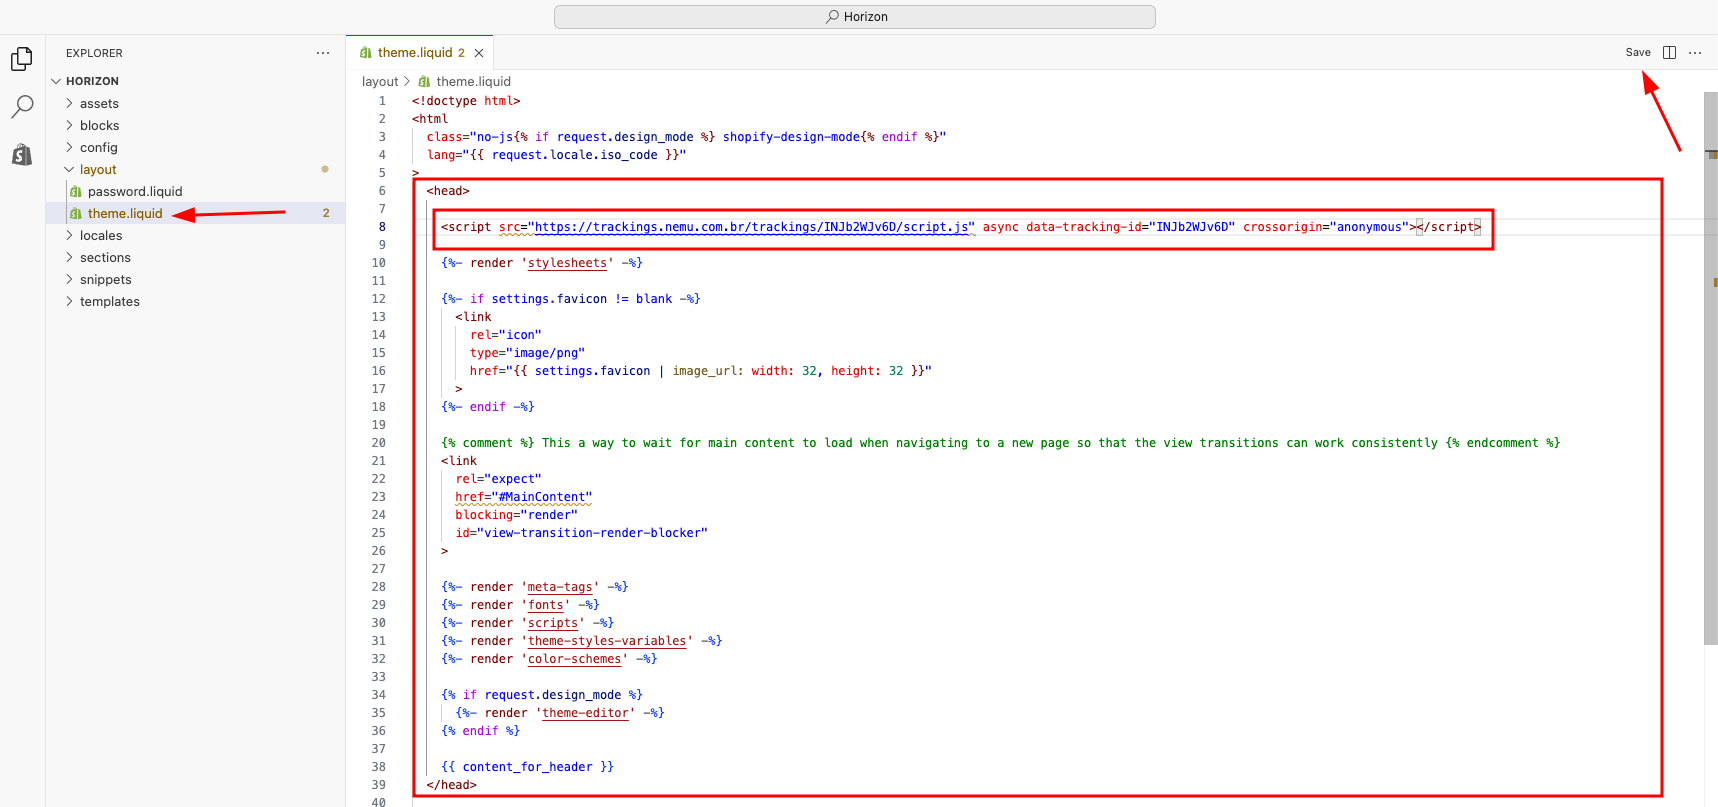
- Paste the code copied in the previous onboarding step inside the
<head>tag and click Save
Setting Up Webhooks on Shopify
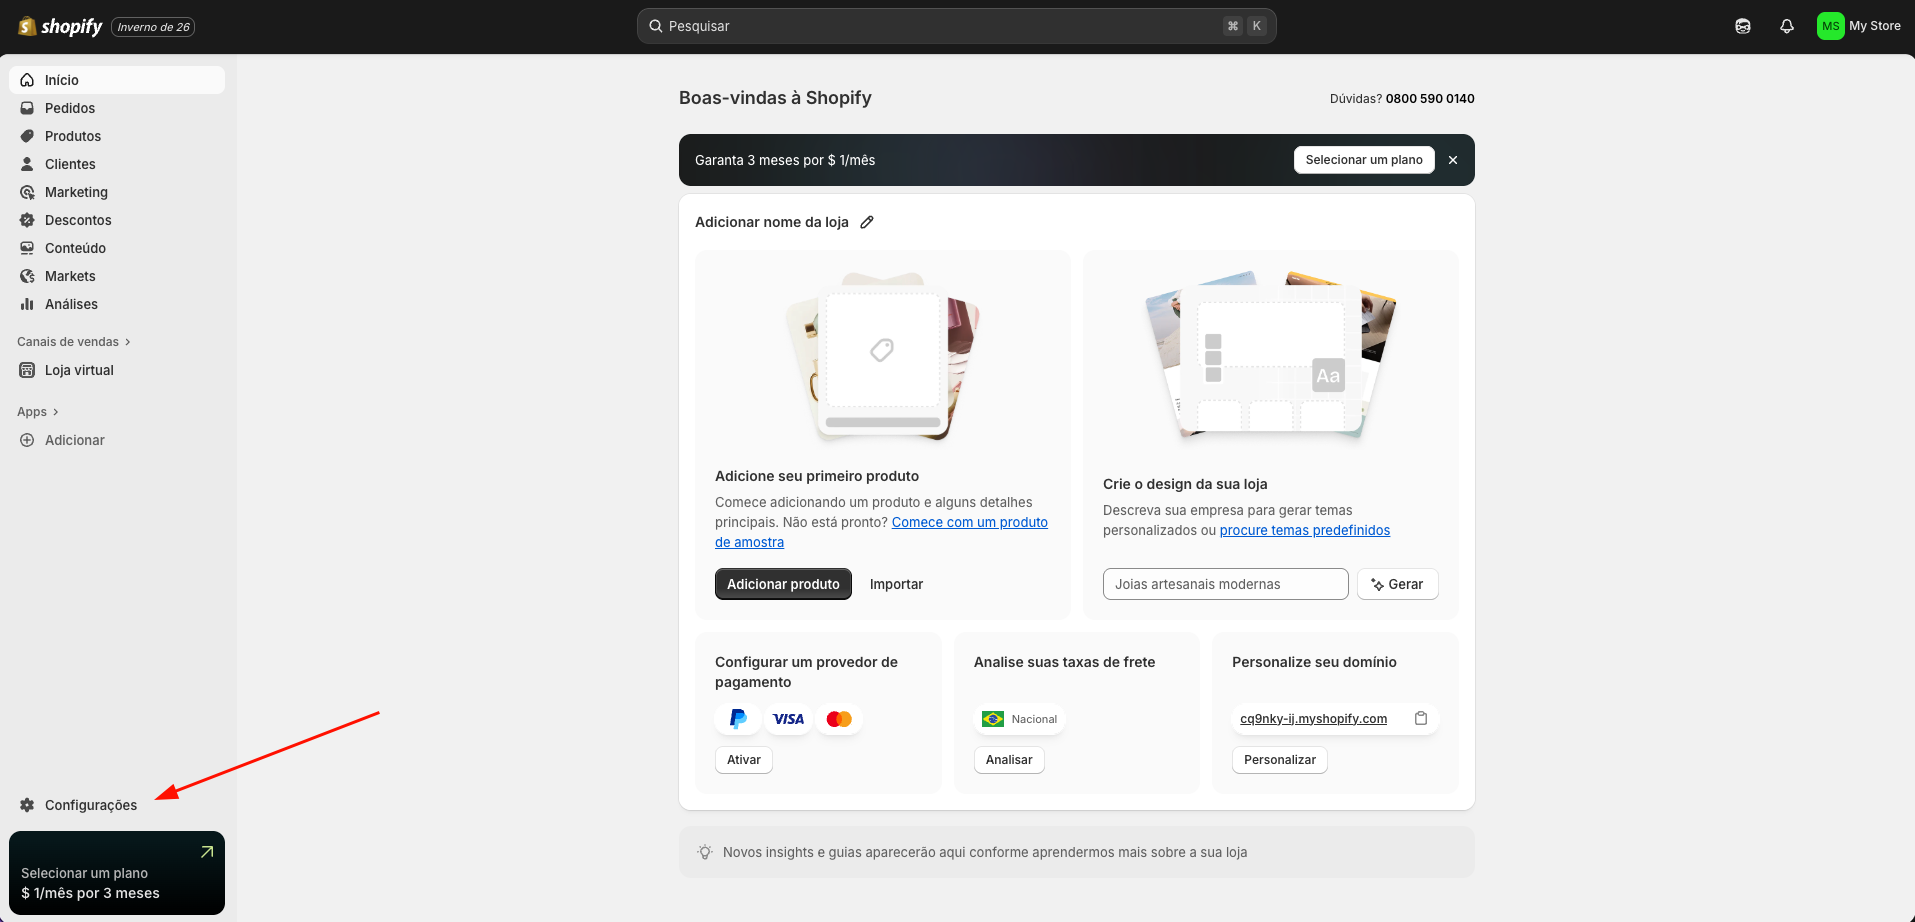
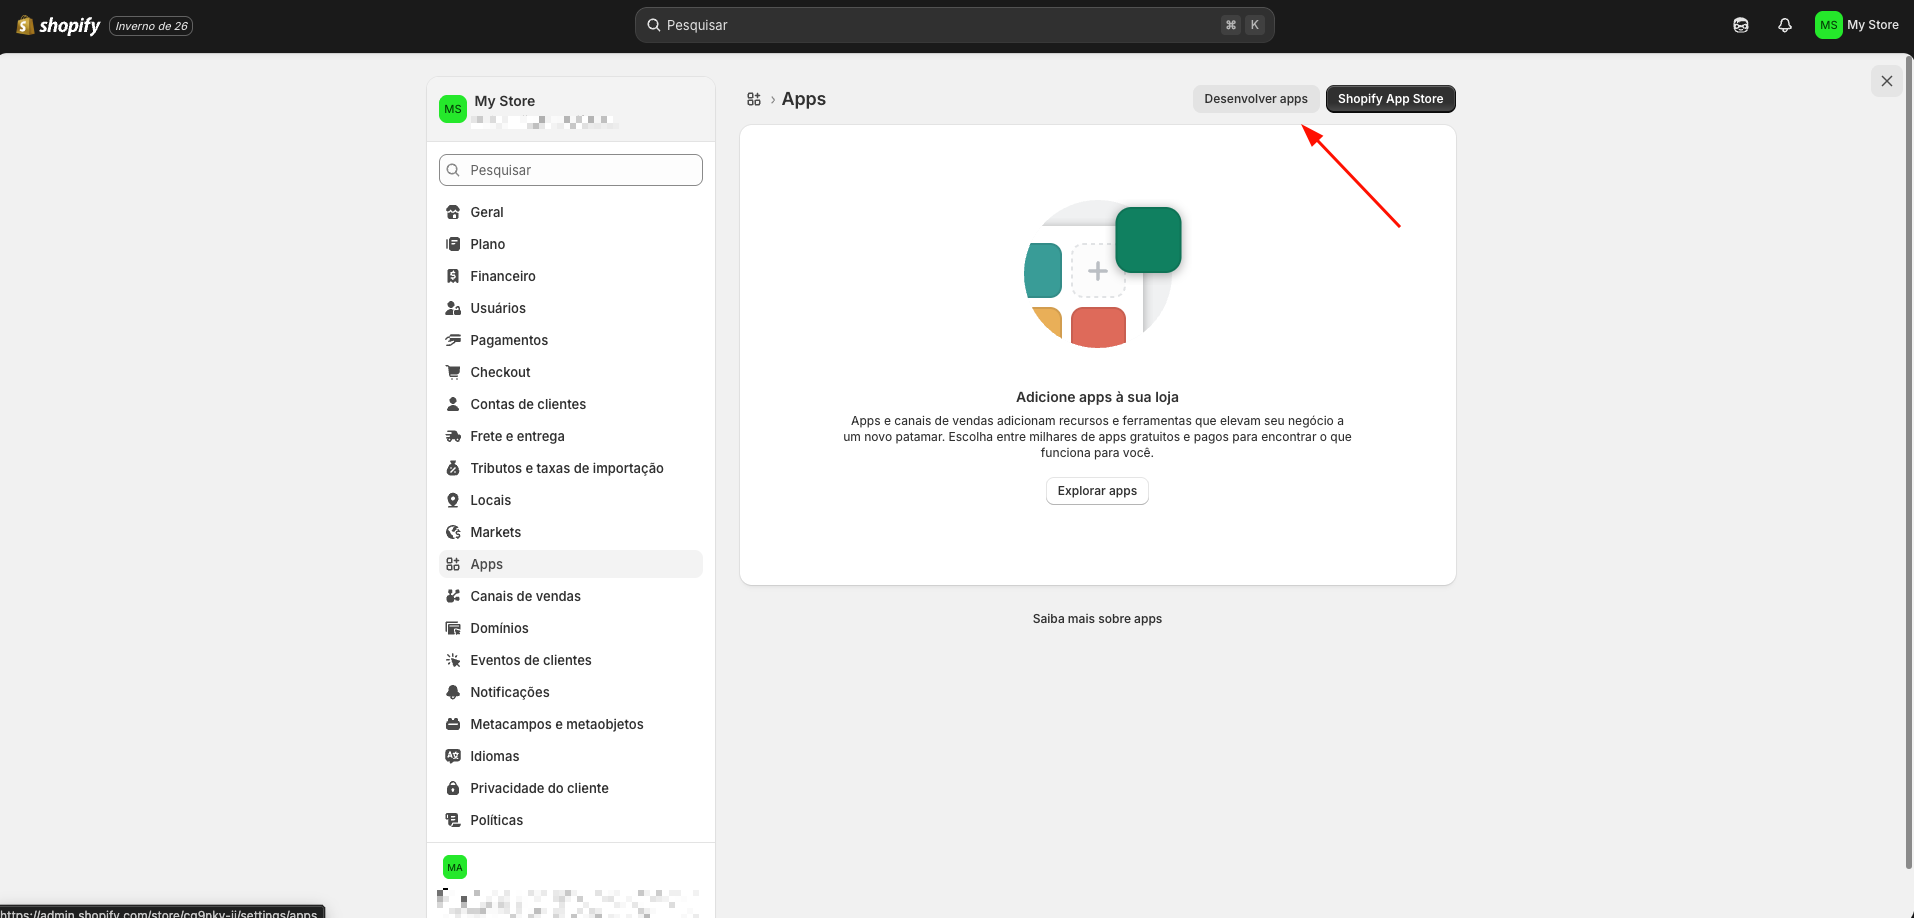
- In the Shopify panel, click on Settings in the sidebar
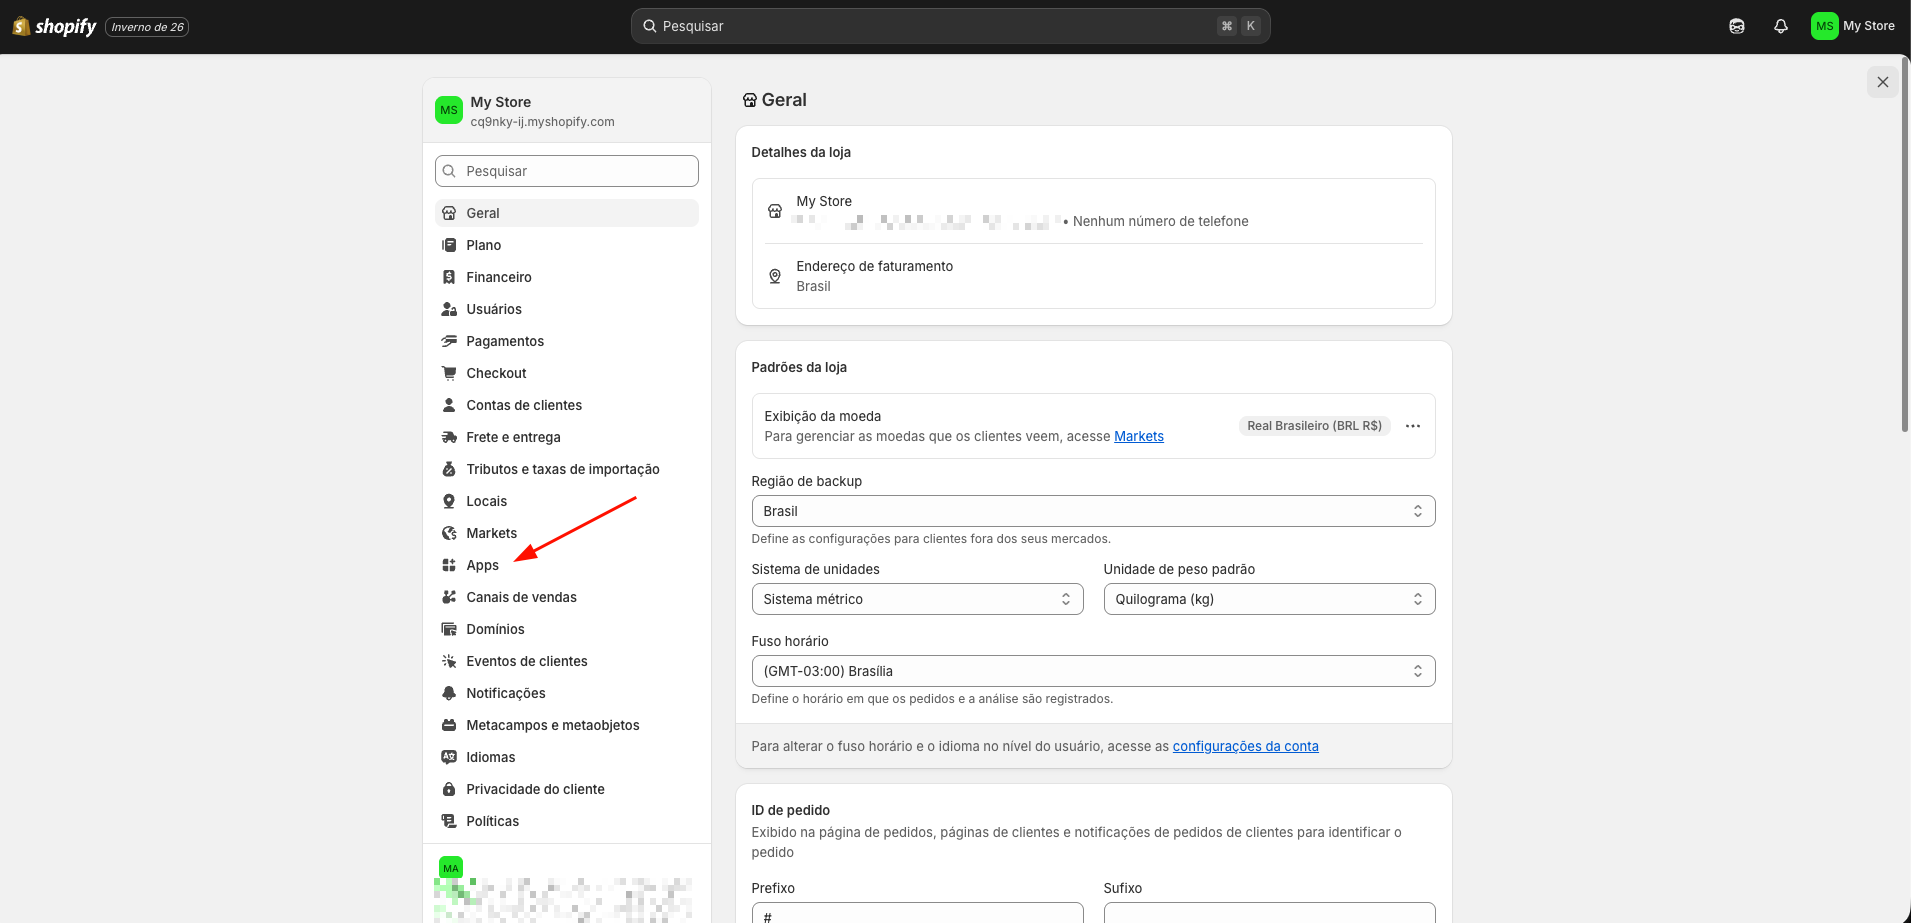
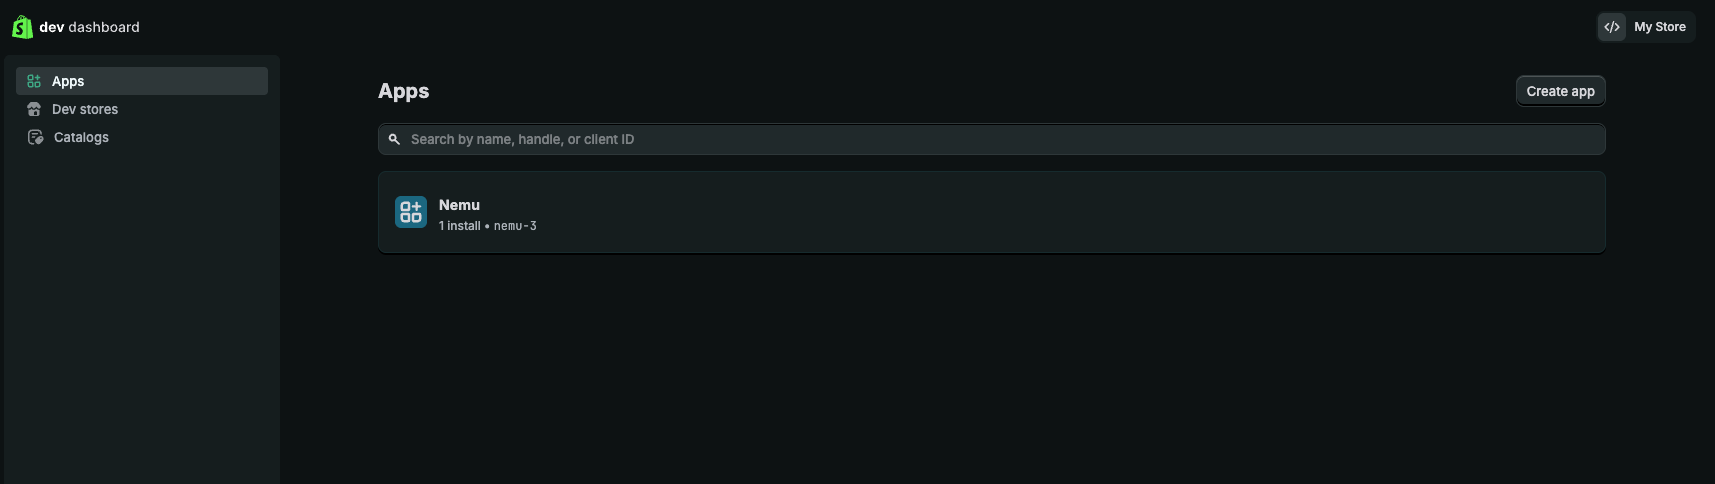
- In the sidebar, click on Apps
- Click on the Develop apps button
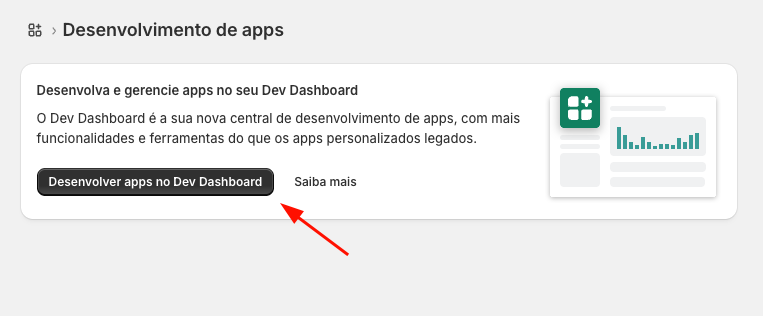
- Click on Develop apps in the Dev Dashboard
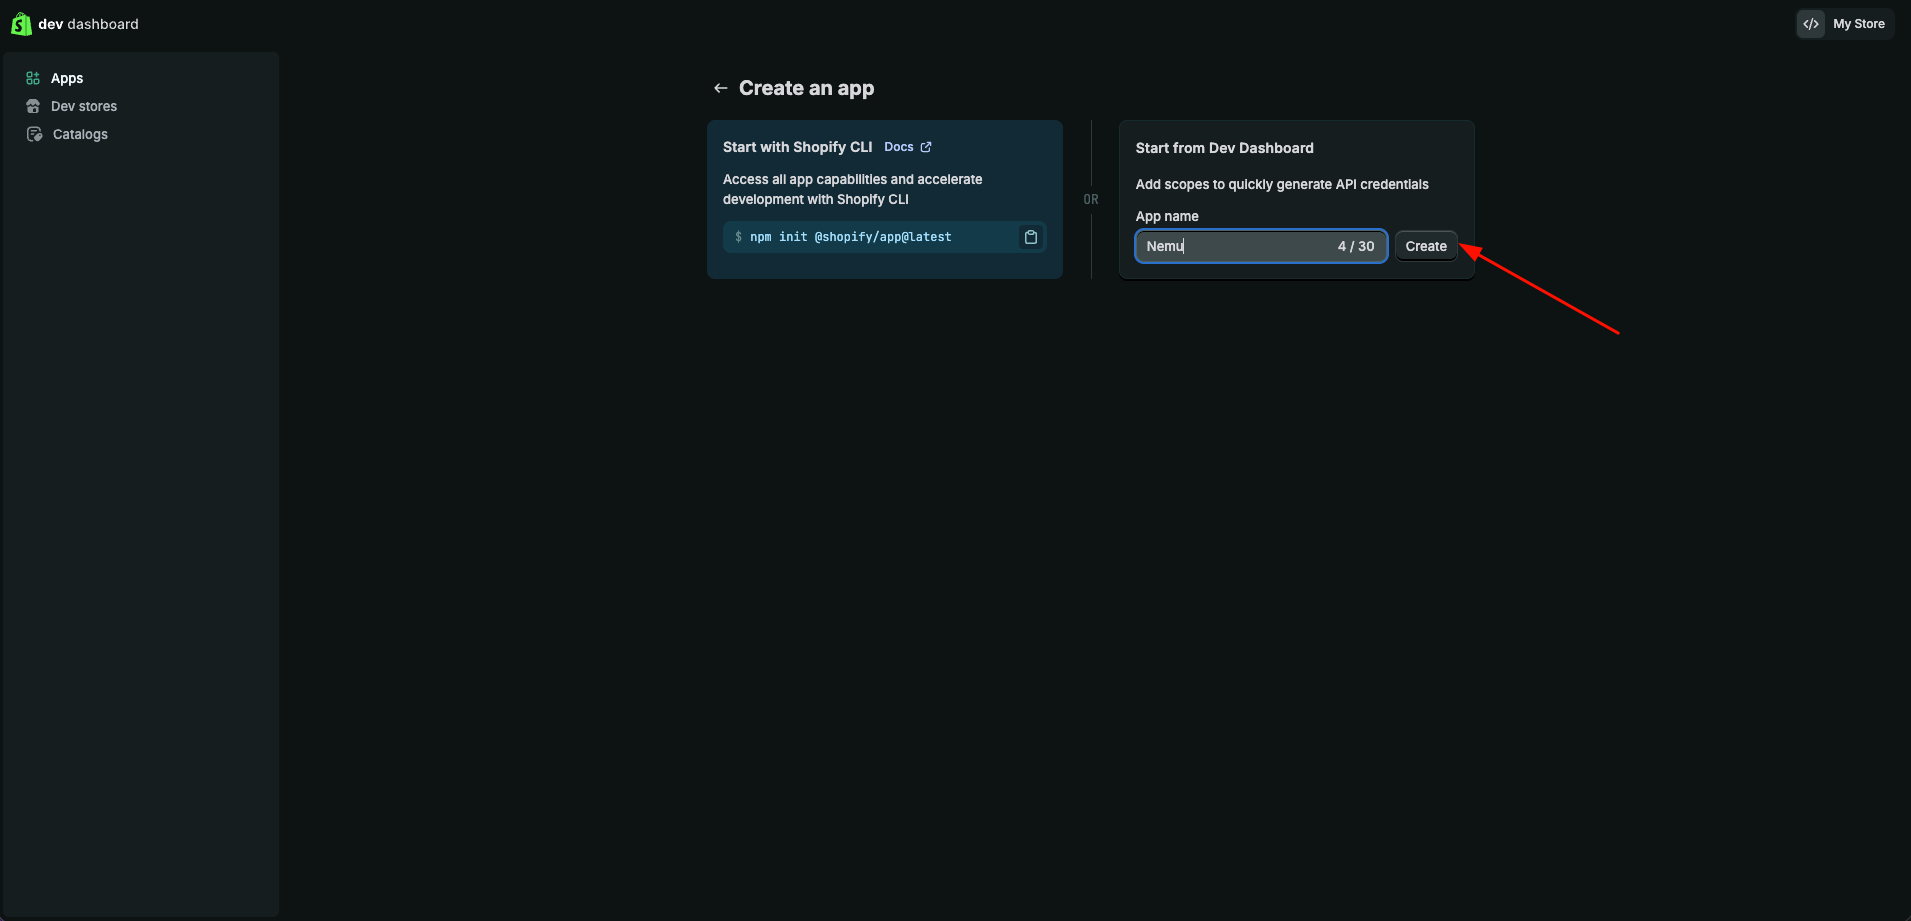
- You will be redirected to the app development screen, click on Create app

- Define a name for your app and click on Create
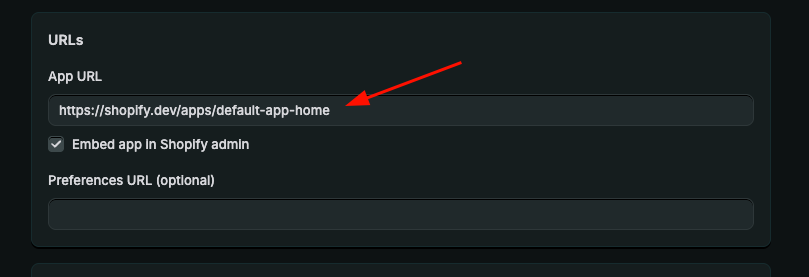
- Copy the URL and paste it into the App URL field
- In Webhooks API Version, select version 2026-01

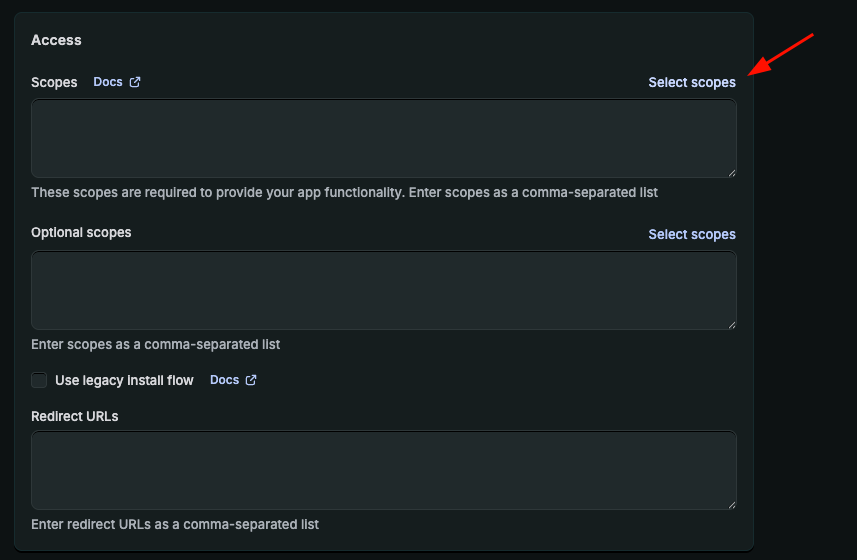
- Click on Select scopes
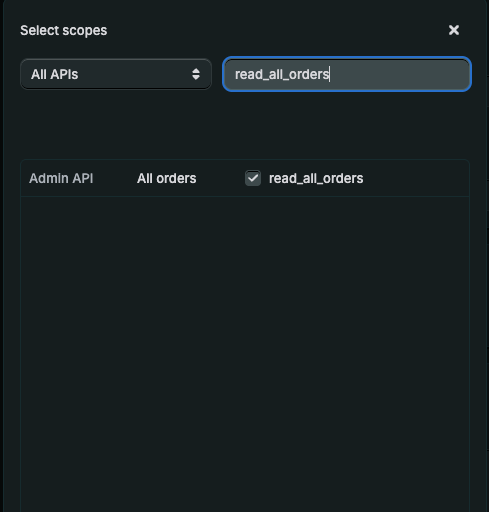
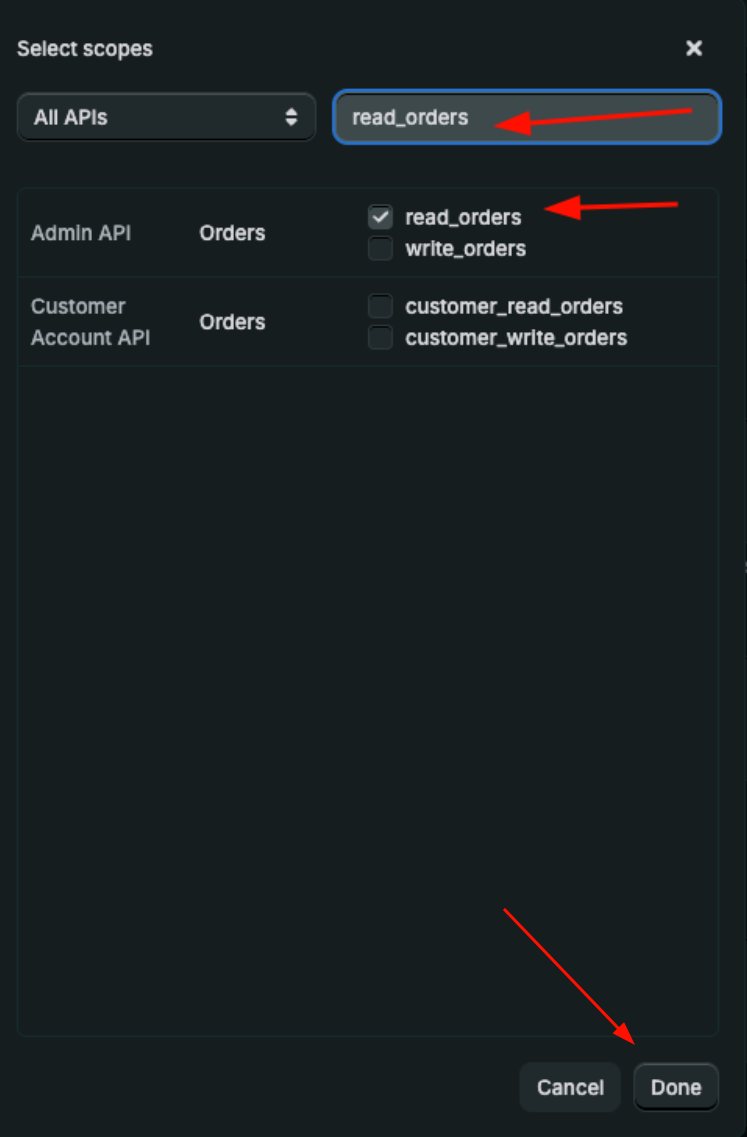
- Search for:
read_all_ordersread_orders
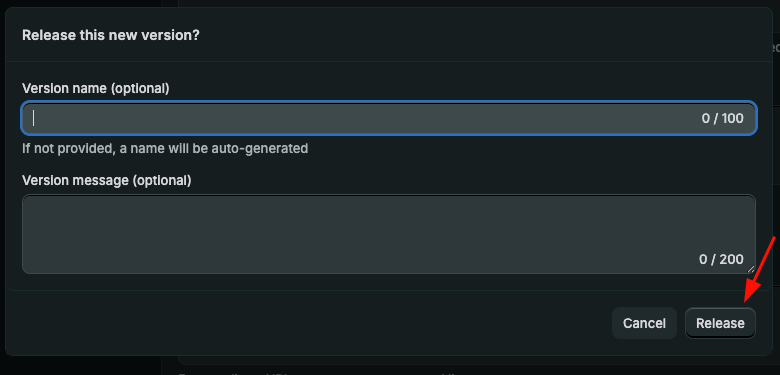
- Scroll down to the bottom of the page and click on Release
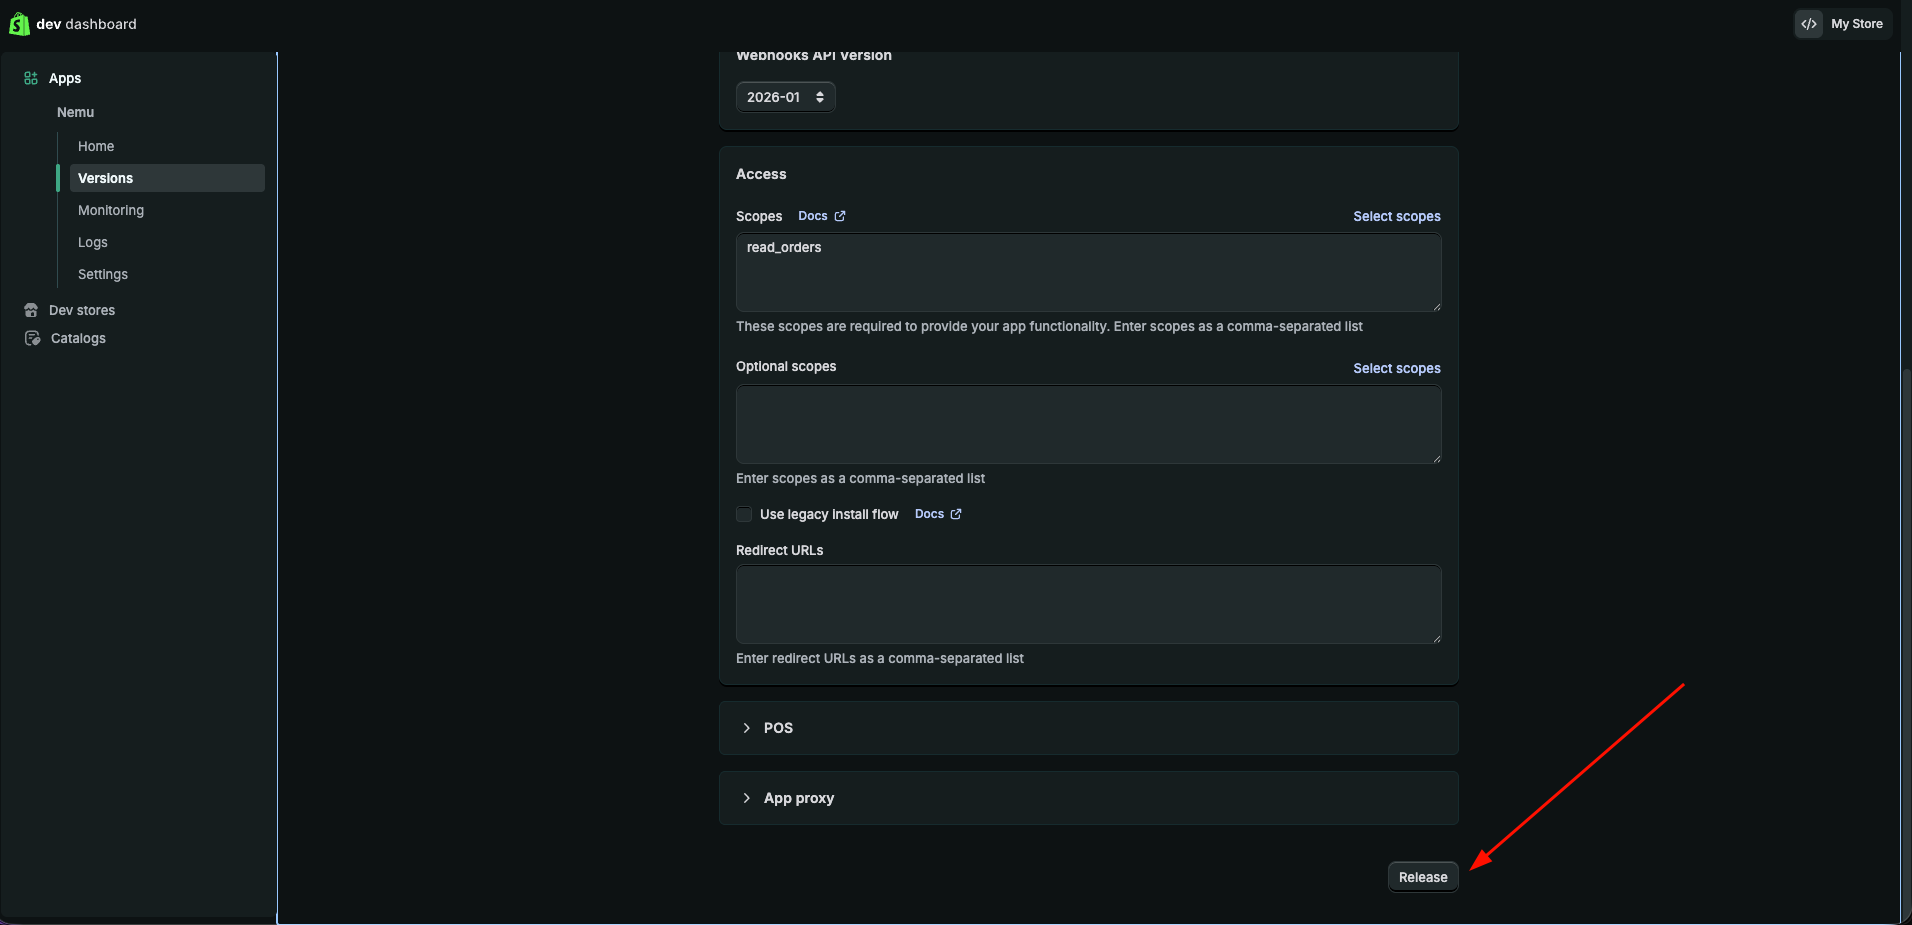
- In Version name, you can leave it blank and click on Release
Installing the App on Shopify
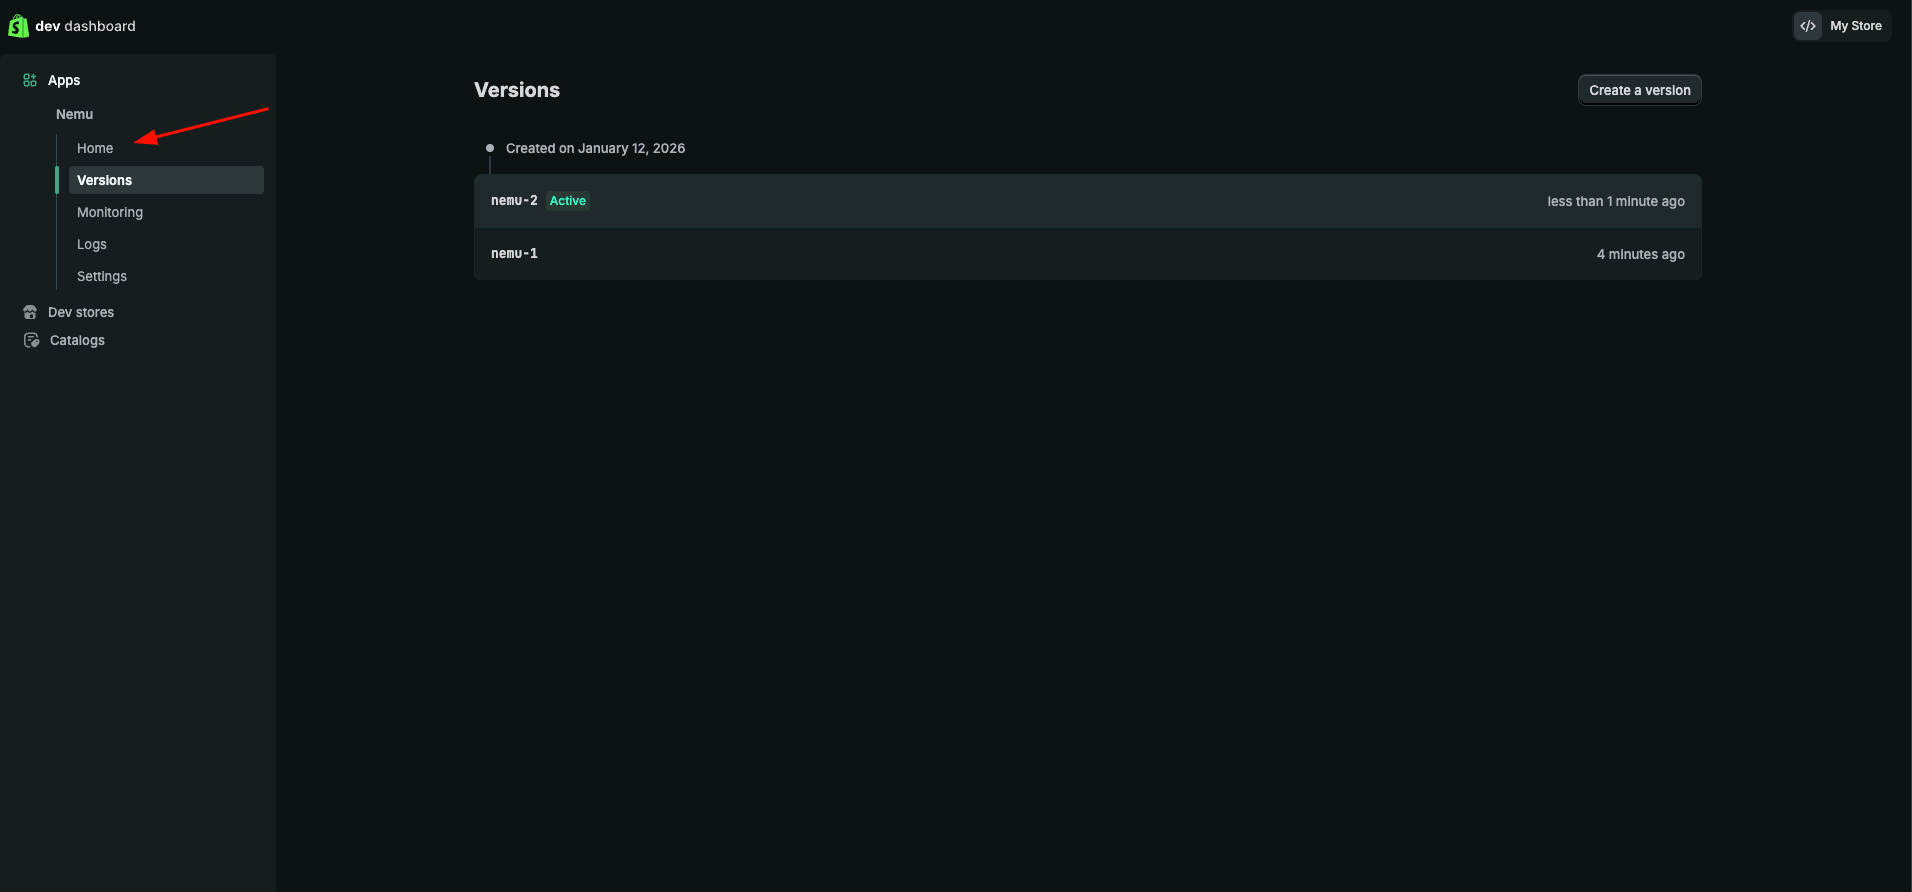
- In the sidebar, click on Home
- Click on the Install app button
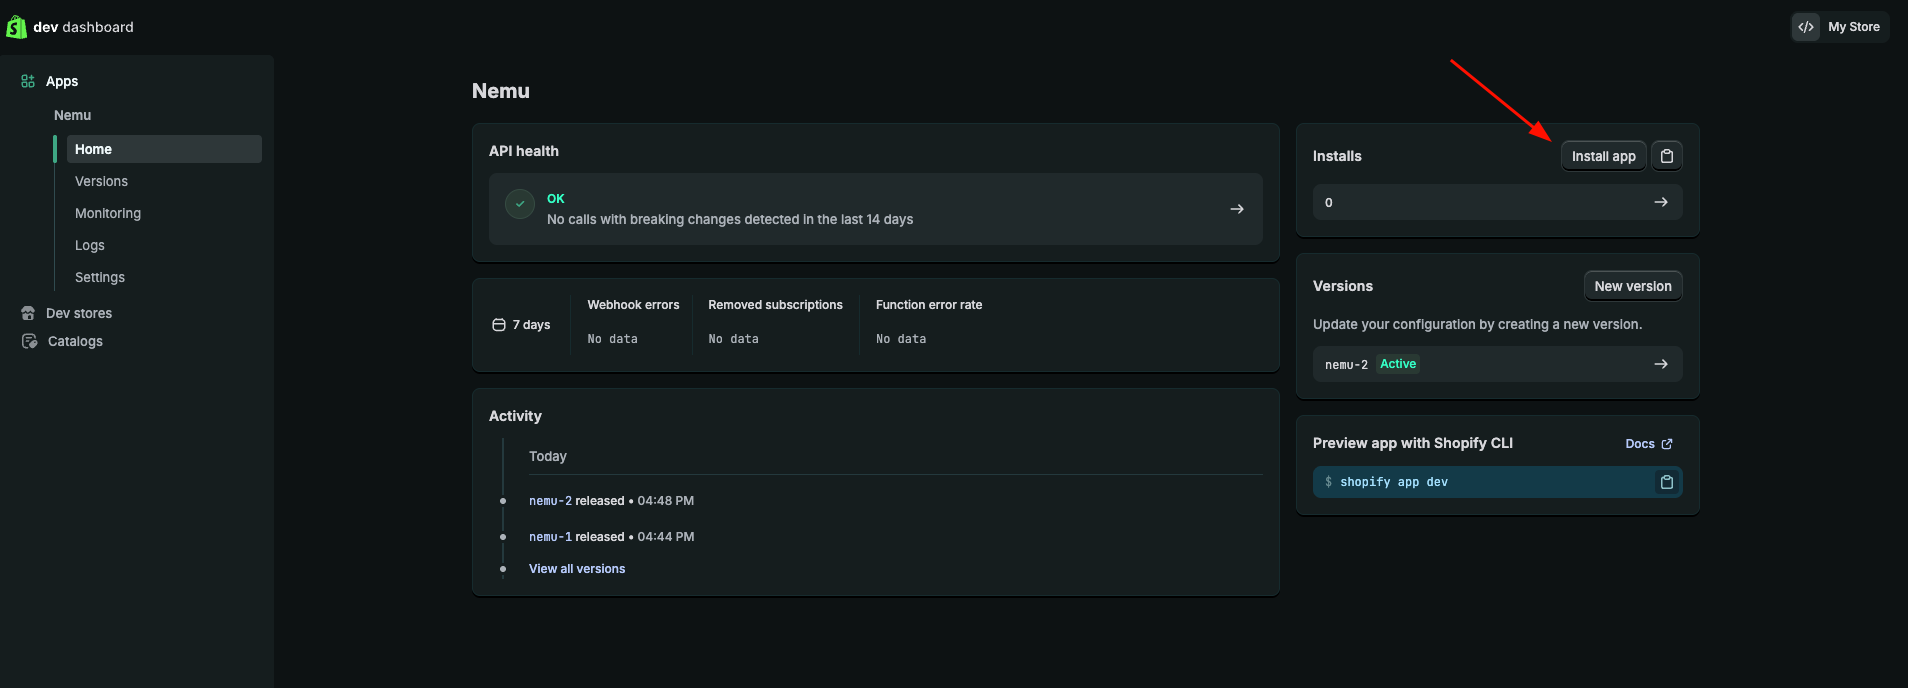
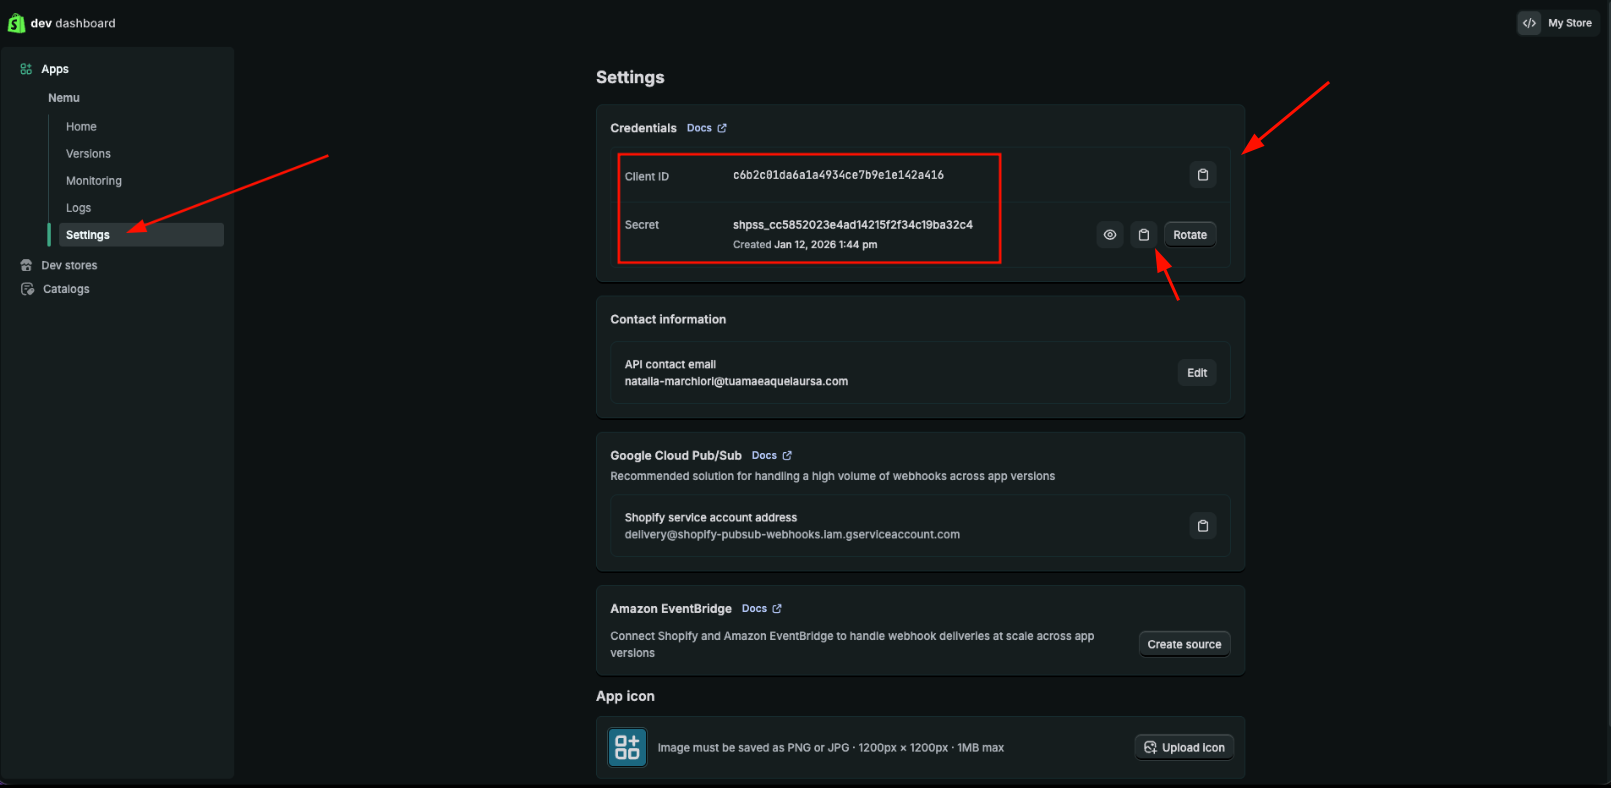
Keep this page open, as we will need the Client ID and Client Secret for the next steps.
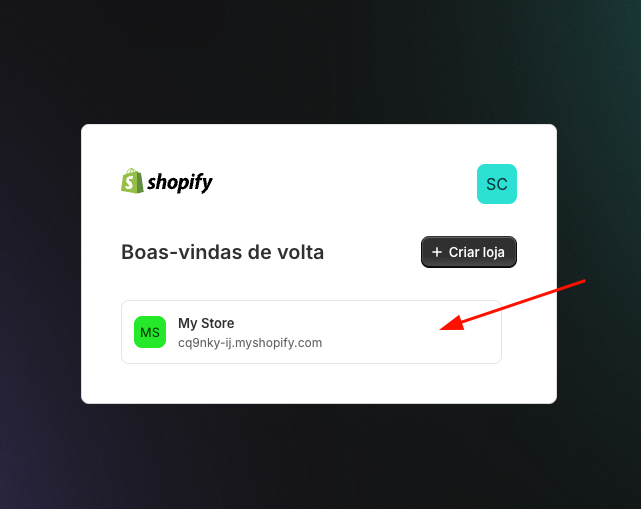
- Click on the store card where you want to install the app
- Click on the Install button

Setting Up Webhooks in Nemu
- Access the Shopify dev dashboard by clicking here
- Click on the app card that we created in the setting up webhooks on Shopify step
- In the sidebar, click on Settings and copy the Client ID and Client Secret
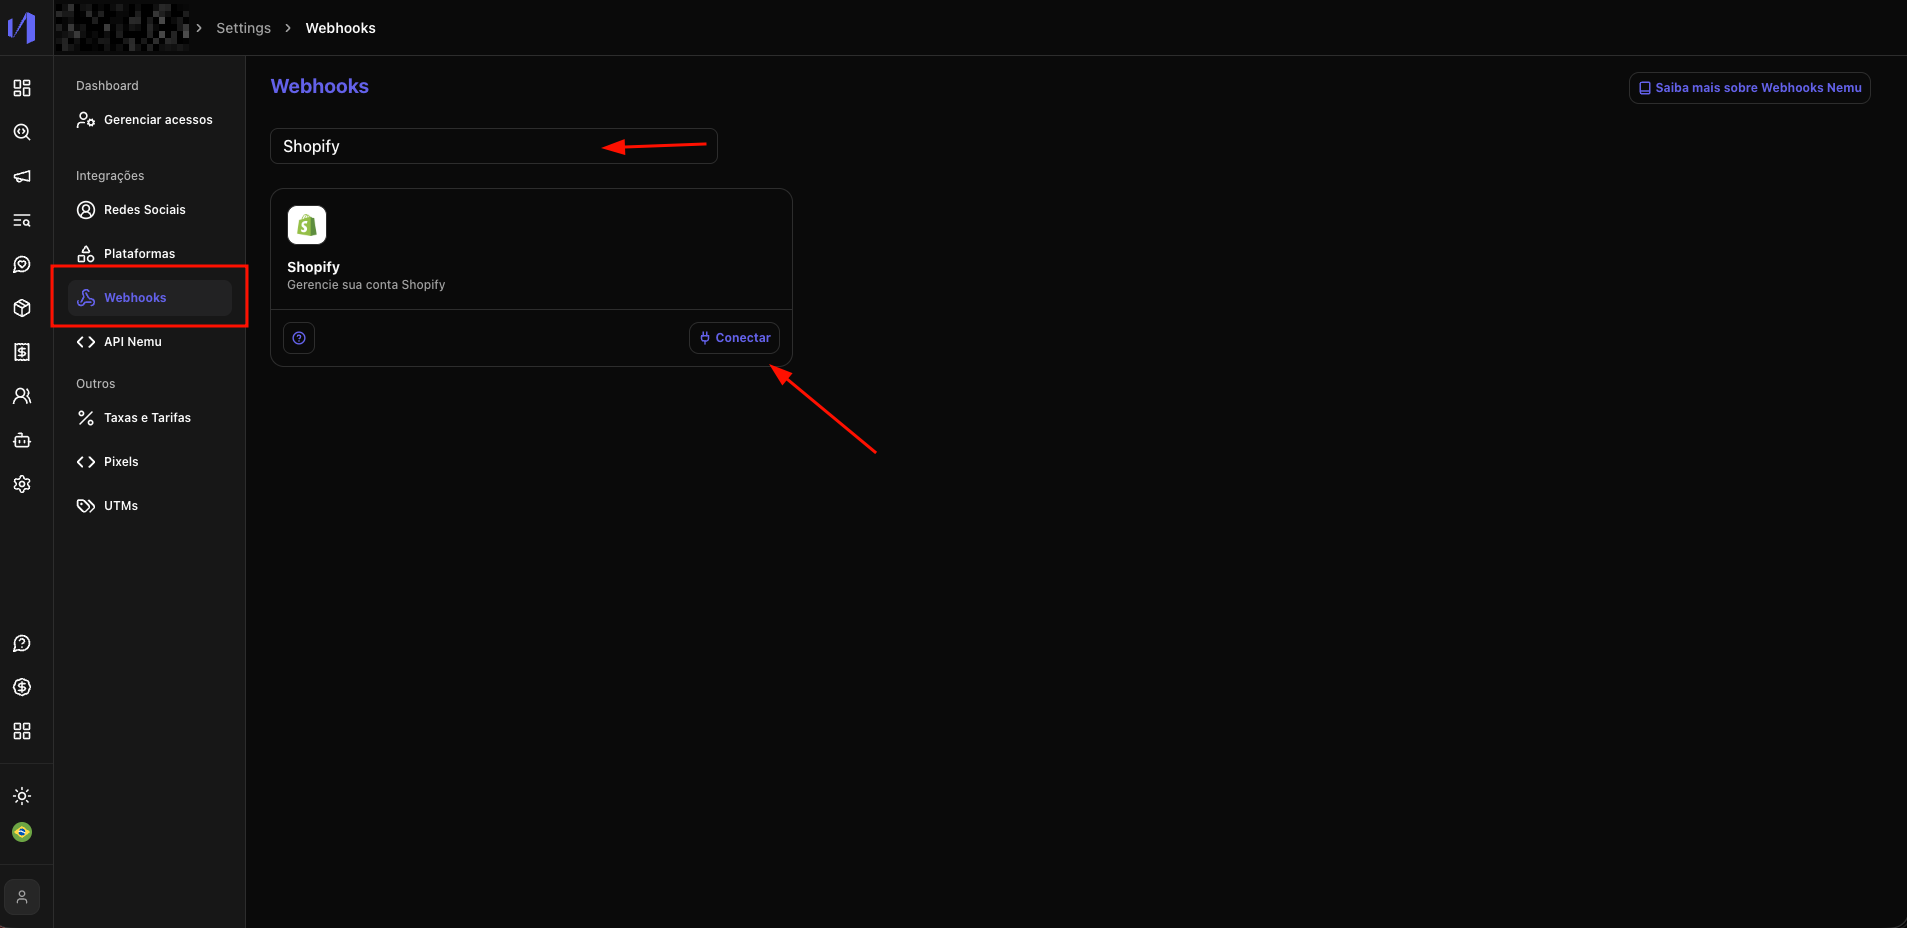
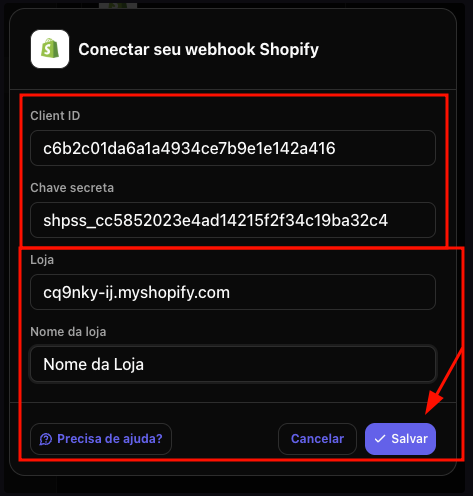
- In Nemu, go to Settings > Webhooks, search for Shopify and click on Connect
- Paste the Client ID and Client Secret in their respective fields
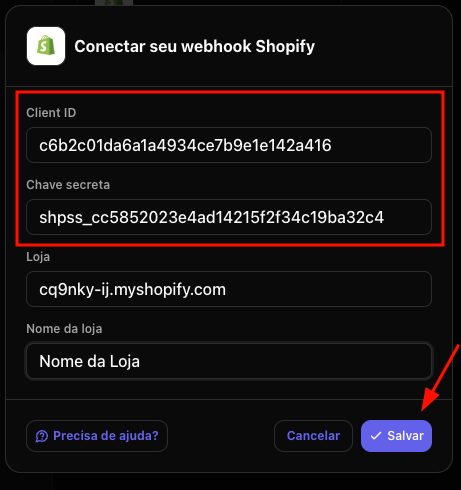
- Fill in the Store details and click on Save
Setting Up Custom Pixel on Shopify
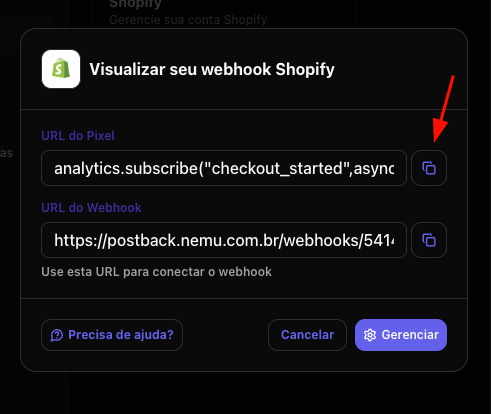
- Copy the Pixel URL, we will use this in step 7 of this section to set up the Custom Pixel on Shopify.
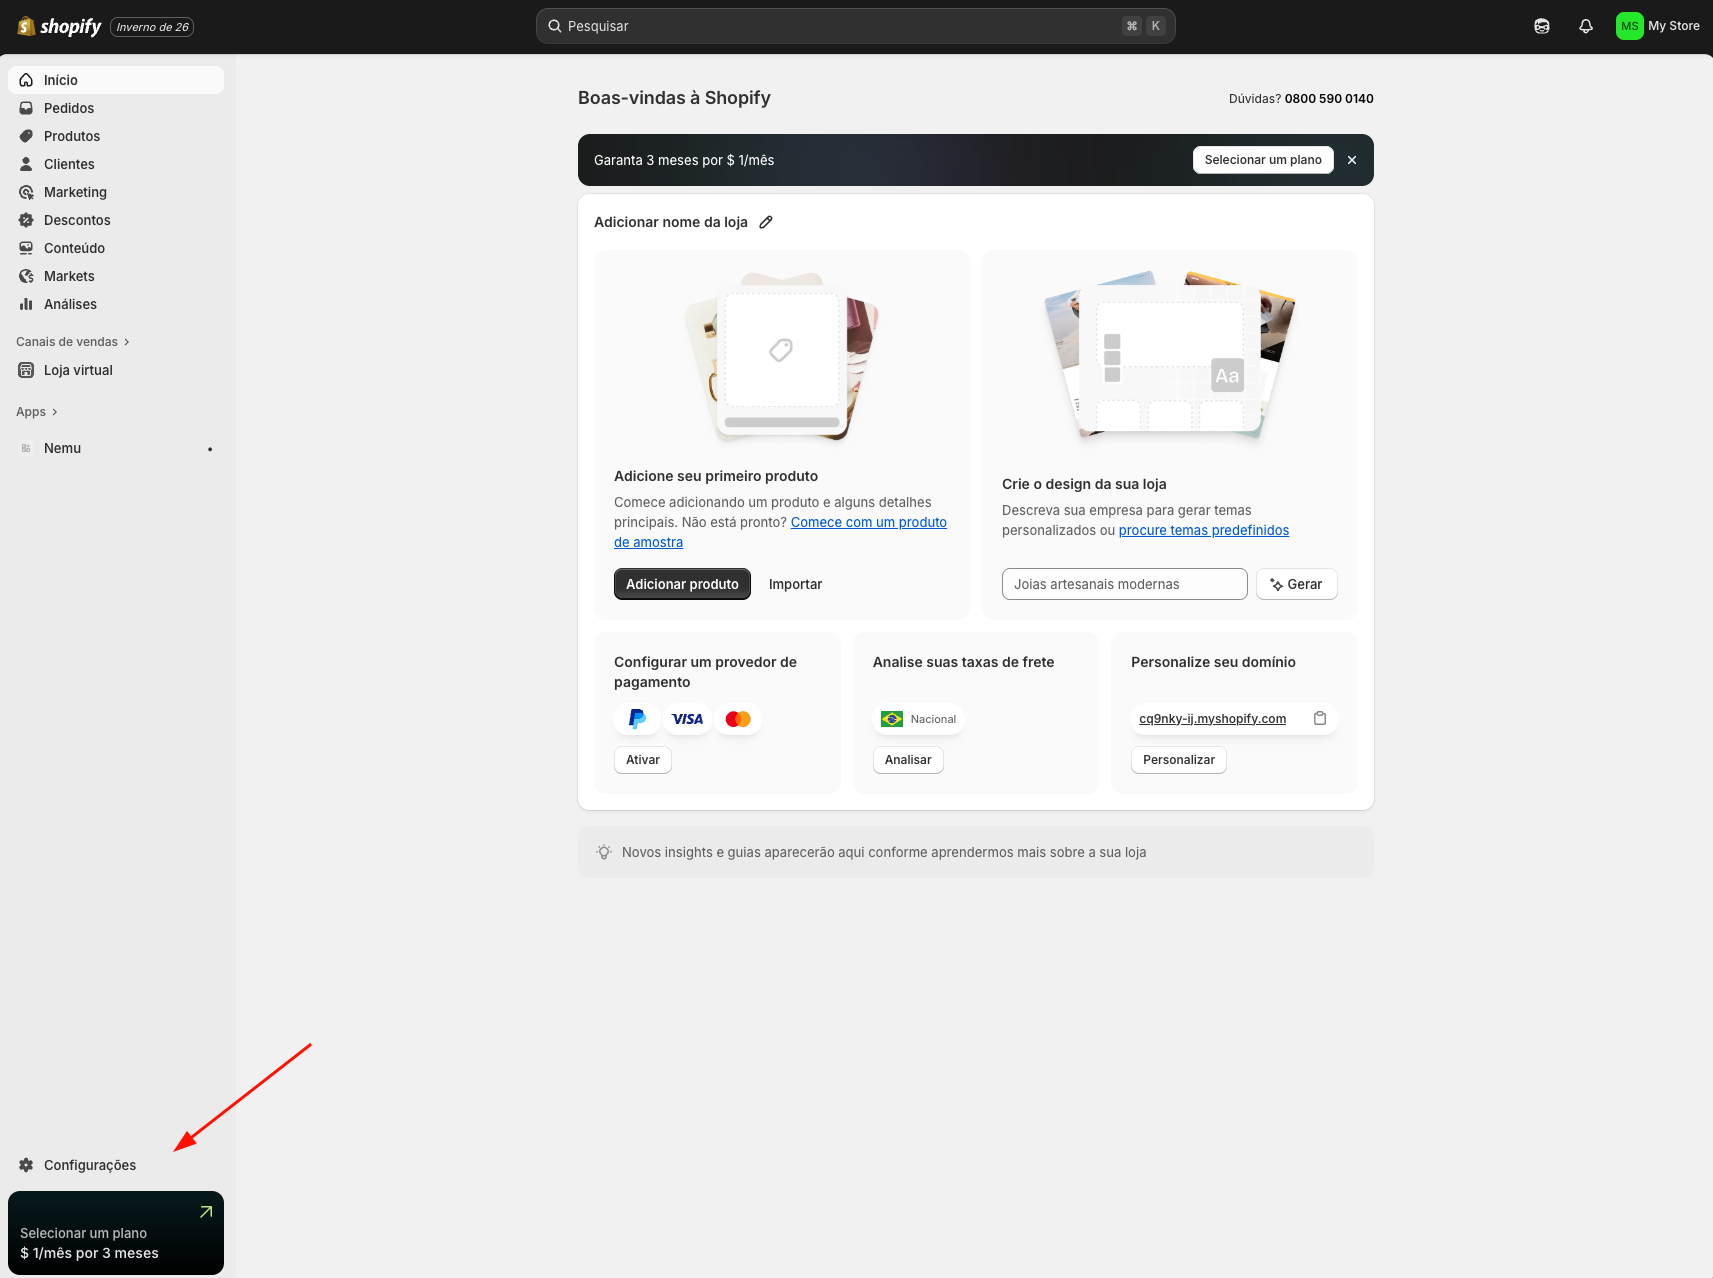
- In the sidebar, click on Settings
- A new page will open, click on Customer events

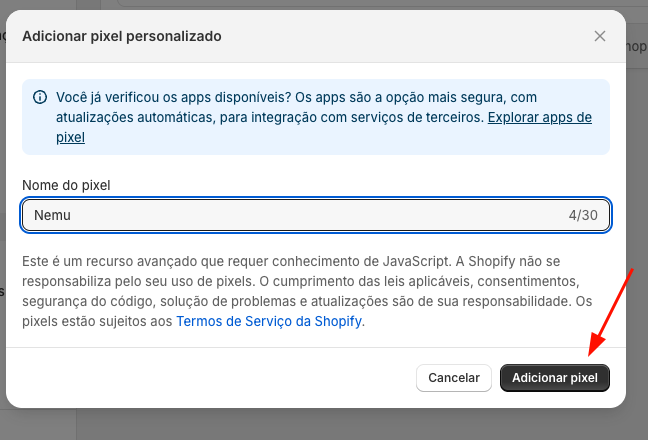
- Click on the Custom Pixels tab and click on Add custom pixel
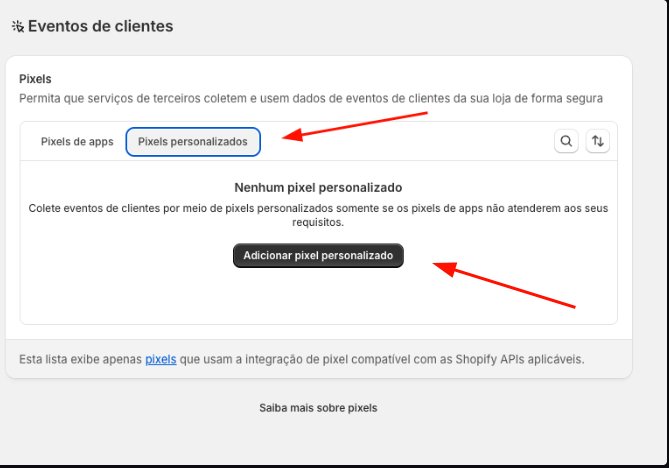
- Define a name for the Pixel and click on Add pixel
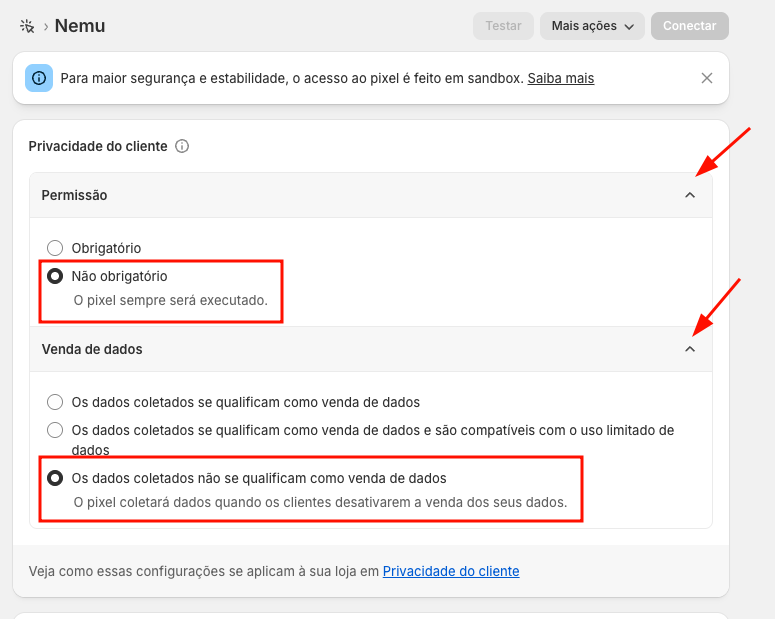
- Expand the Customer Privacy section and configure:
- Consent: Not required
- Data sale select: The data collected does not qualify as data sale
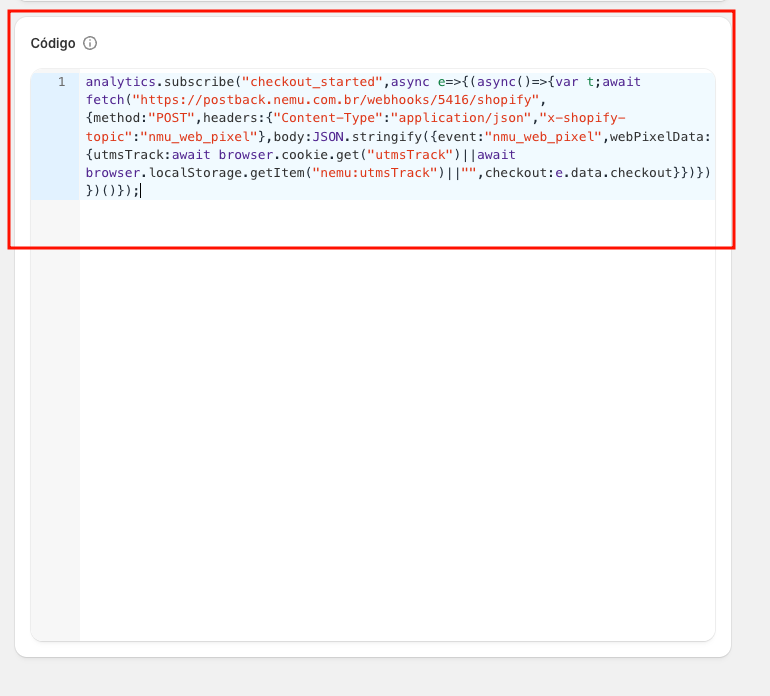
- Paste the code copied in step 1
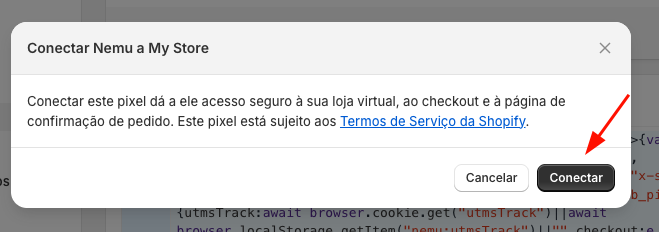
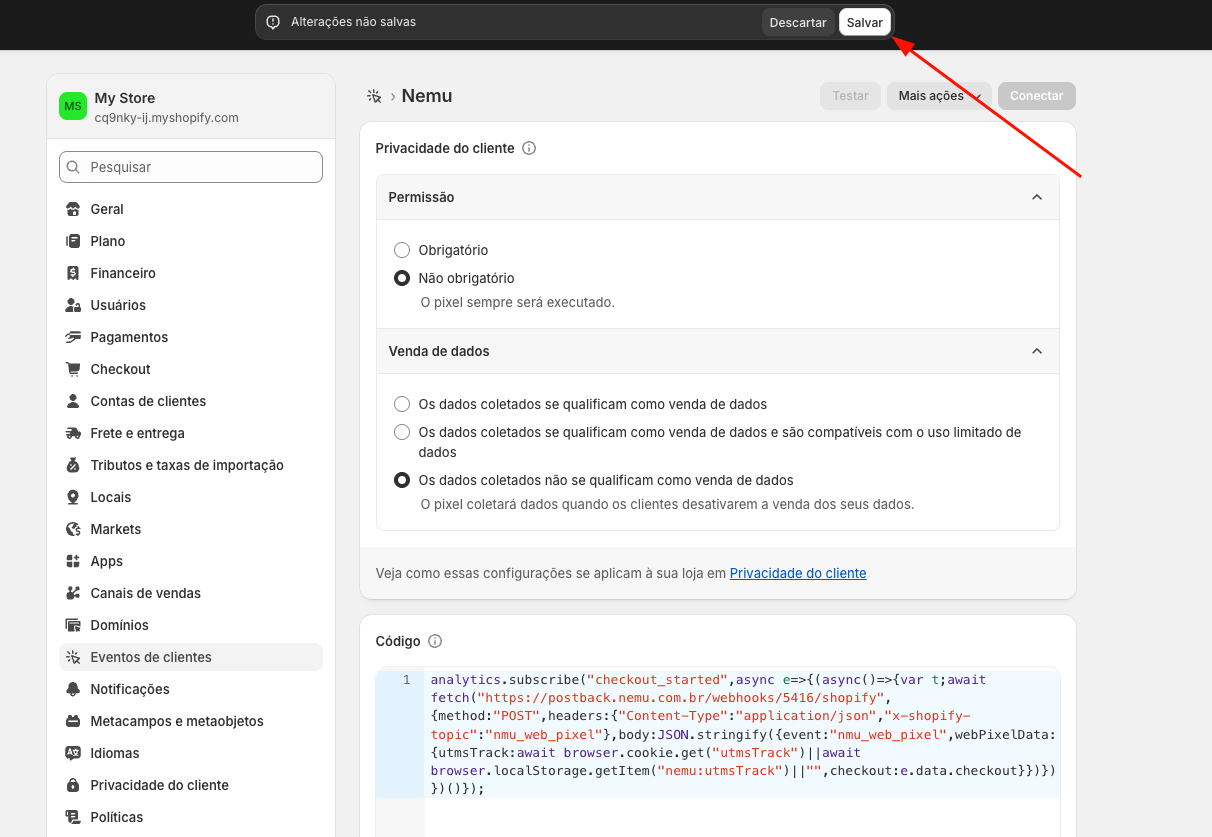
- At the top of the page, after pasting the code, the Save button will appear, then click on Connect
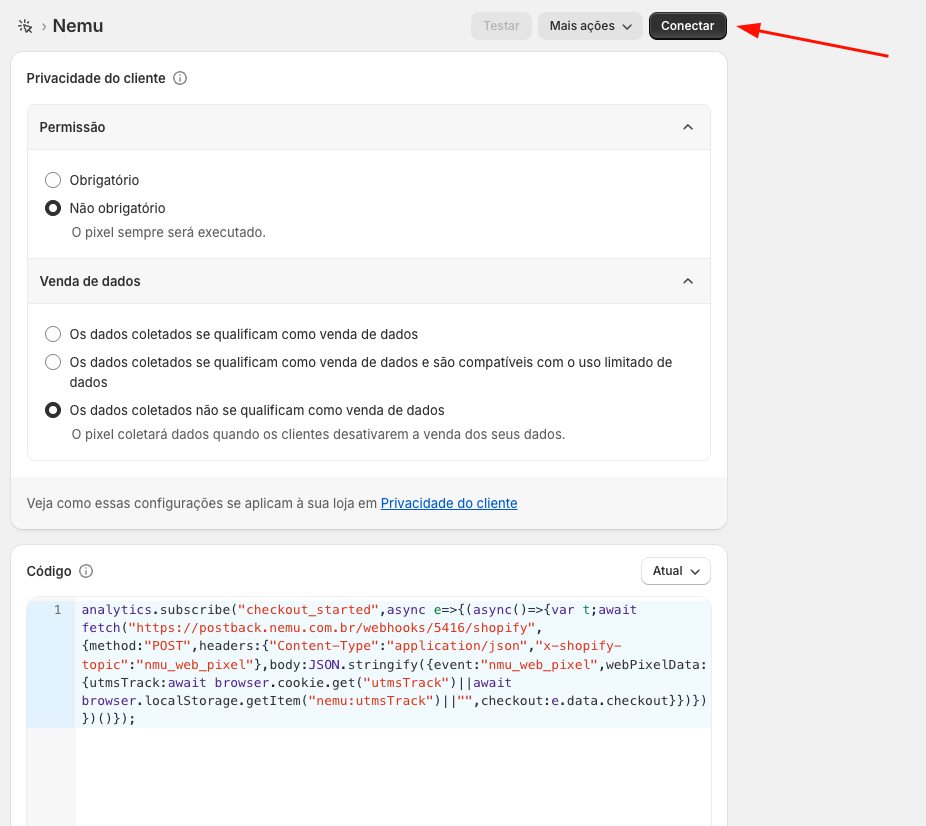
- Confirm again by clicking on Connect