This problem is common for Shopify or Magazord stores, but may occur in other integrations. In this scenario, the ads that use Google Merchant products will not have UTMs defined in the Nemu standard:
{lpurl}?utm_source=google&utm_medium=cpc_{adgroupid}&utm_campaign={campaignid}&utm_content={creative}&utm_term={keyword}
But rather a pattern defined by the integration itself. For Shopify, the UTMs will look like this:
utm_source=google&utm_medium=product_sync&utm_campaign=sag_organic&utm_content=sag_organic
For Magazord, the pattern used is:
utm_source=google&utm_medium=ads&utm_campaign=product-name
This way, sales in Nemu will mark with this integration-defined UTM pattern, making it impossible to identify from which campaign the sale occurred. To solve this problem, just follow the steps below:
To perform this configuration, you will need:
Admin login to Google Merchant of the store to be configured
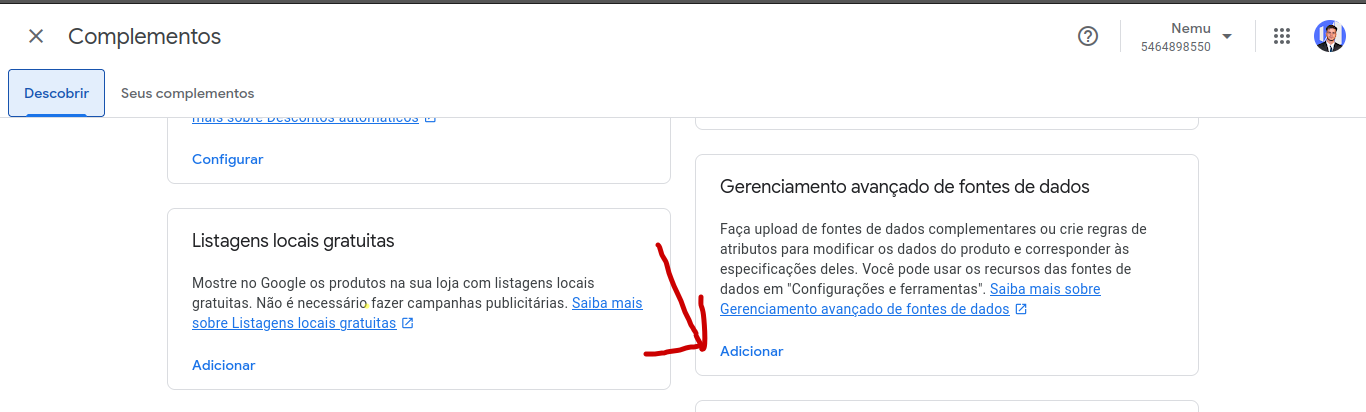
1. Step: Enable advanced data source management
To do this, check in settings -> addons if you have the addon “advanced data source management” or “Advanced data source management.” If the addon is already installed, it will be available in the “your addons” tab.
 Done, click on “Access advanced data source management”:
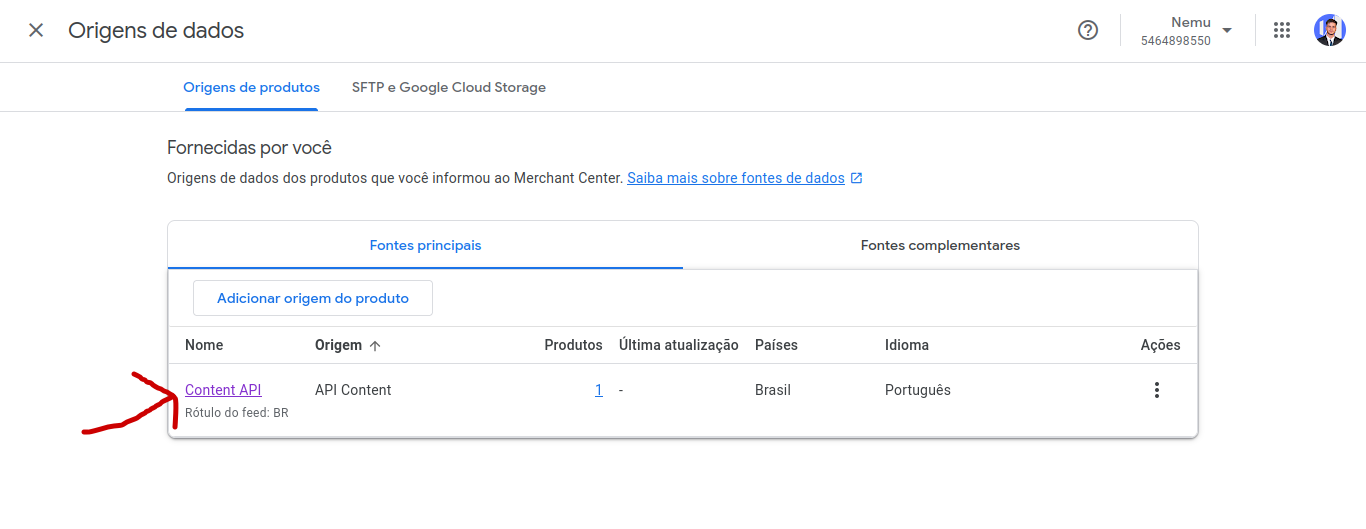
2. Step: Add rule for removing UTMs from the link
When accessing advanced data source management, click on the data source of your integration:
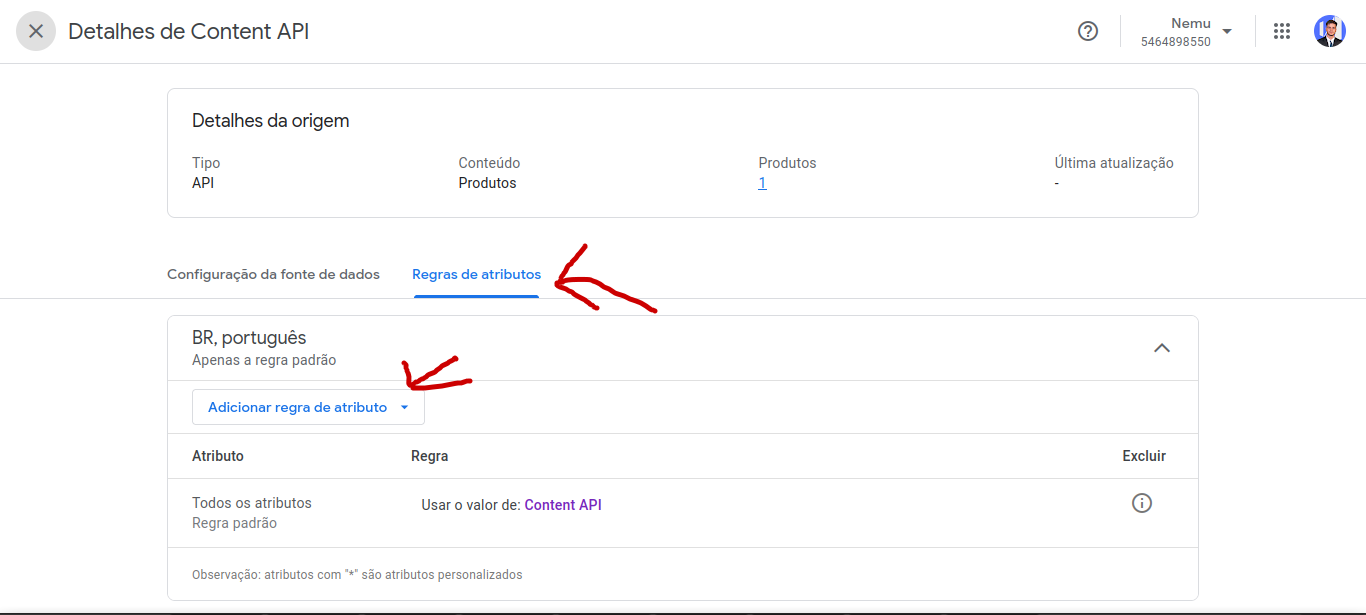
 Click on the “attribute rules” tab and “add attribute rule”.
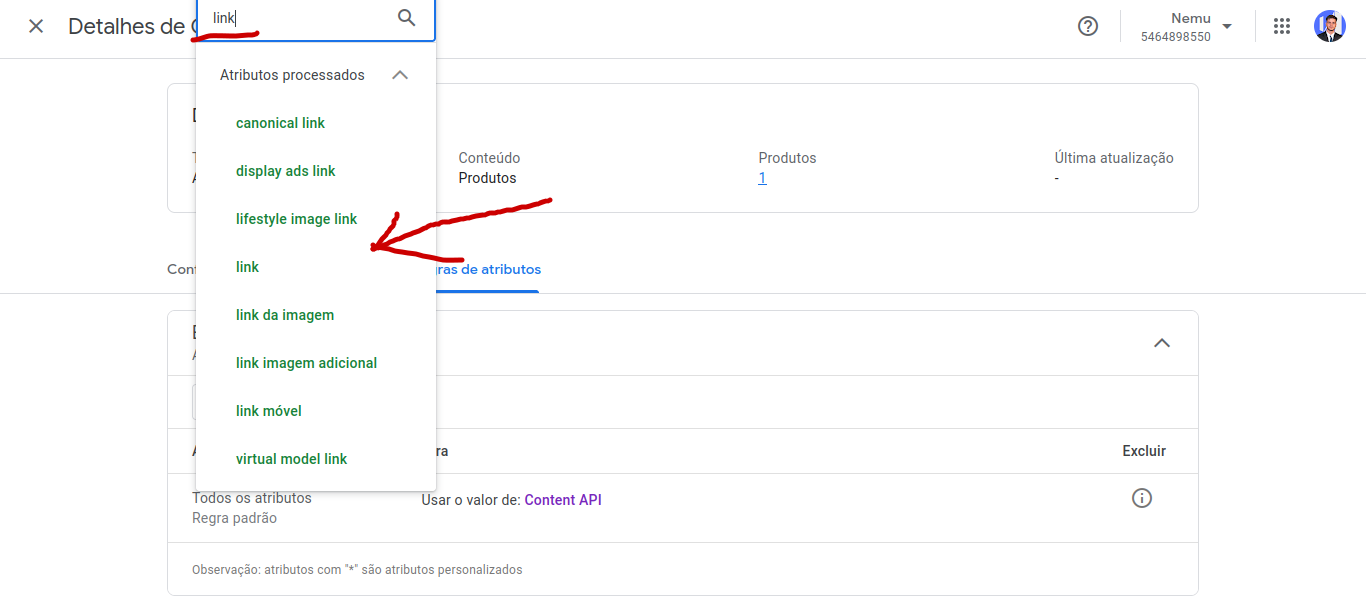
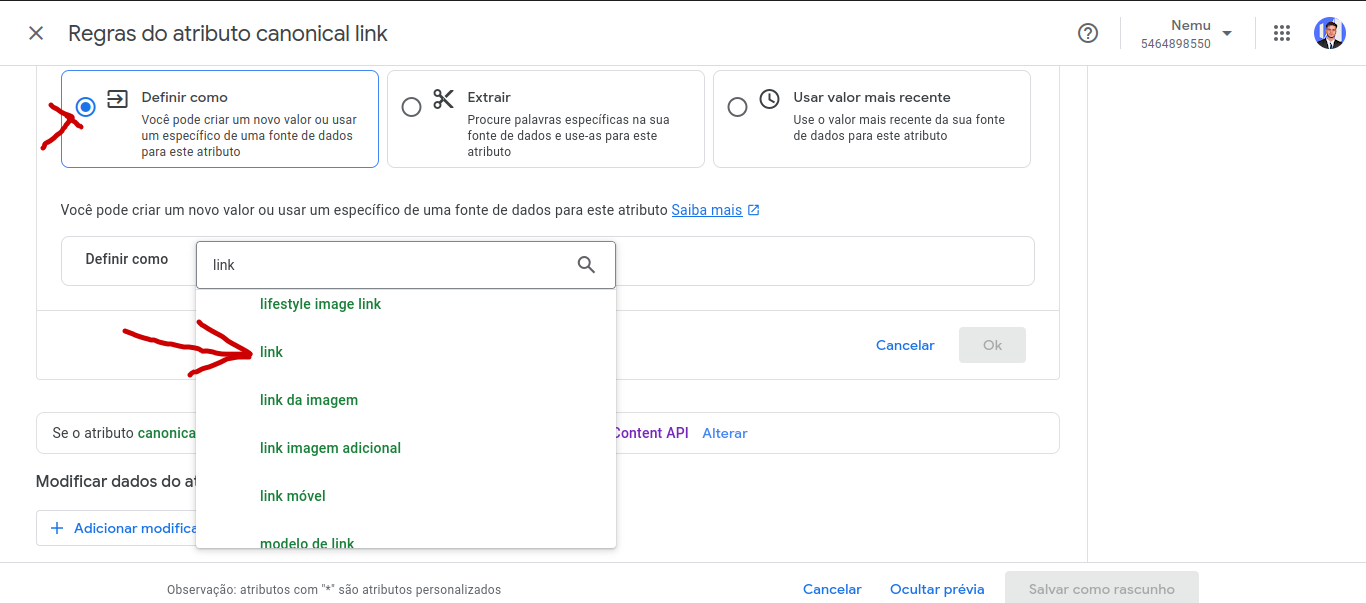
 Search for the “link” option in the search field and select the option that contains only the word “link”.
 On the next page, select the option “Set as” and in the selection box select “link” from “Content API” and finally click “OK”.
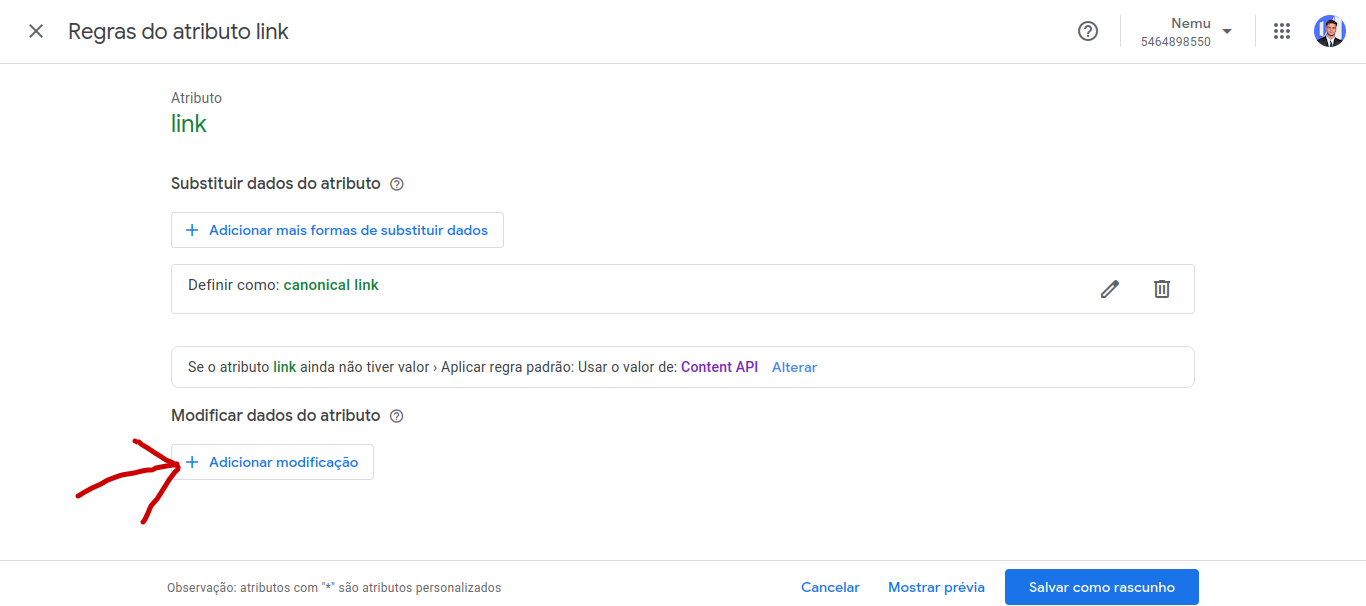
 Click on “add modification”.
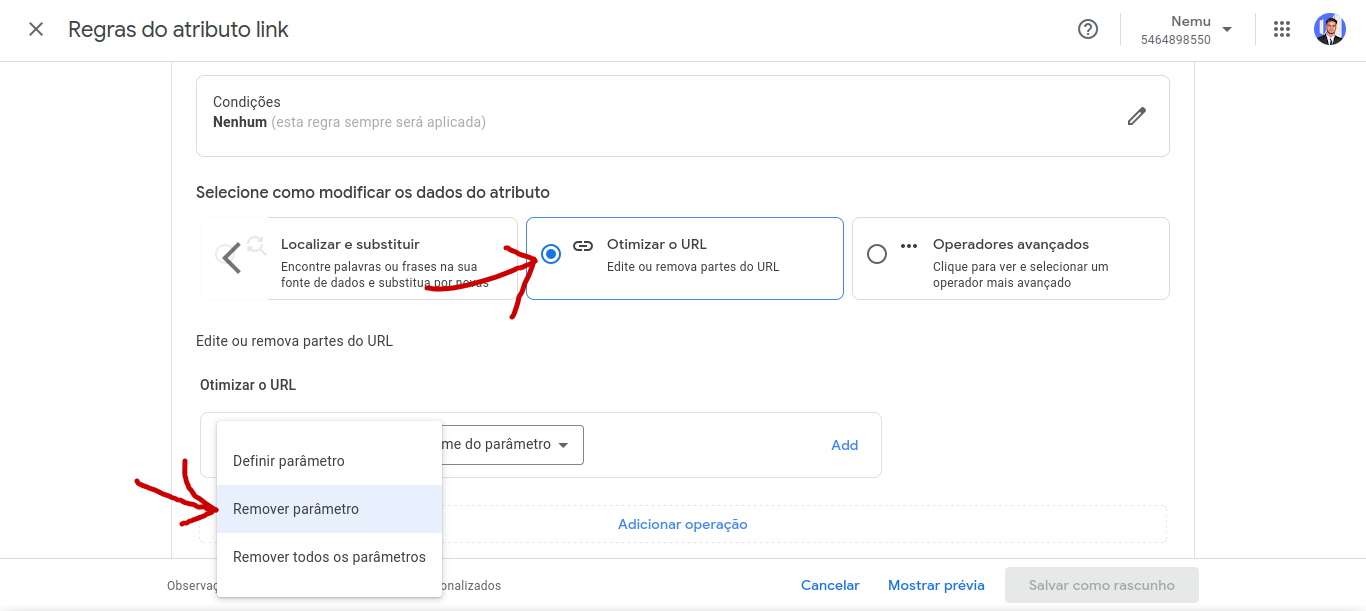
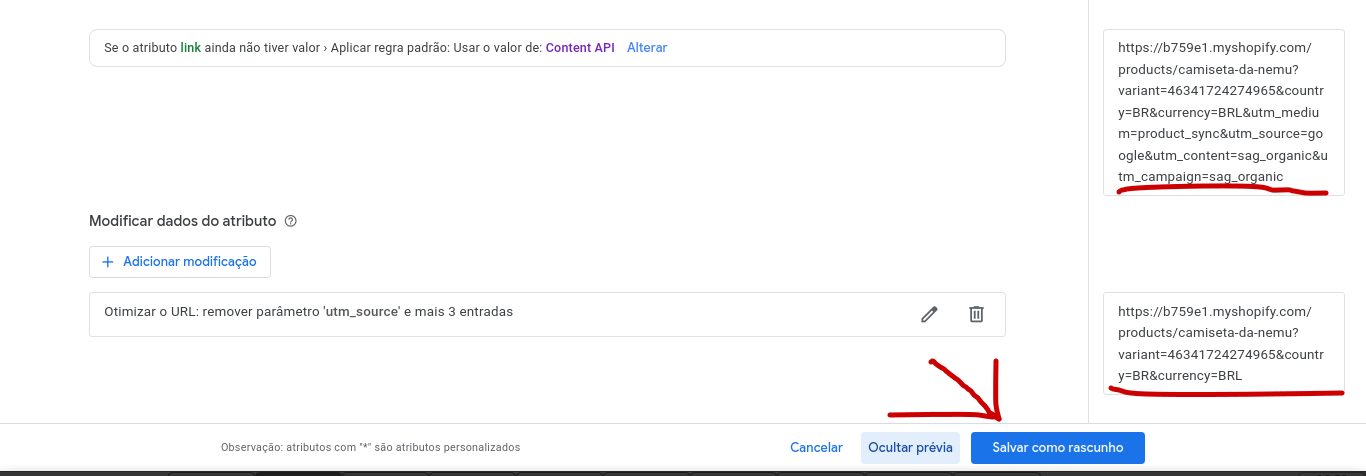
 Search for “URL optimize”, we will use the parameter removal feature. Just select it as shown in the image. We will add a removal for each UTM, that is:
 utm_source, utm_medium, utm_content and utm_campaign.
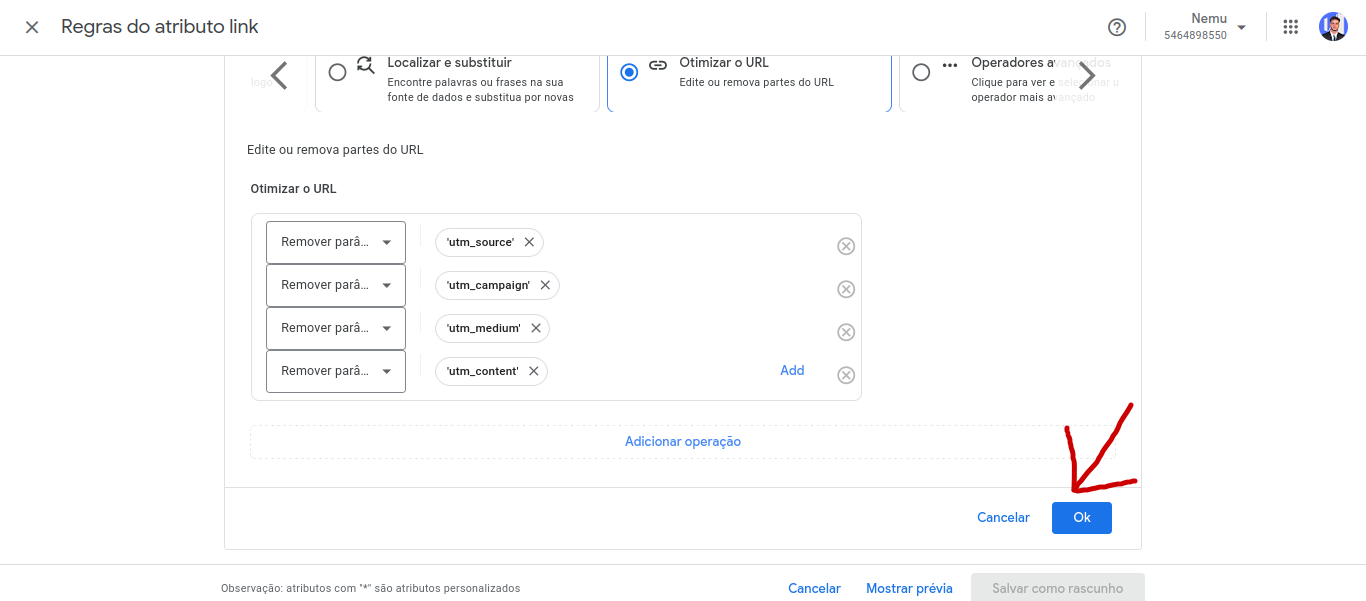
 Adding all parameters, the configuration should be as follows. After review, just click “ok”.
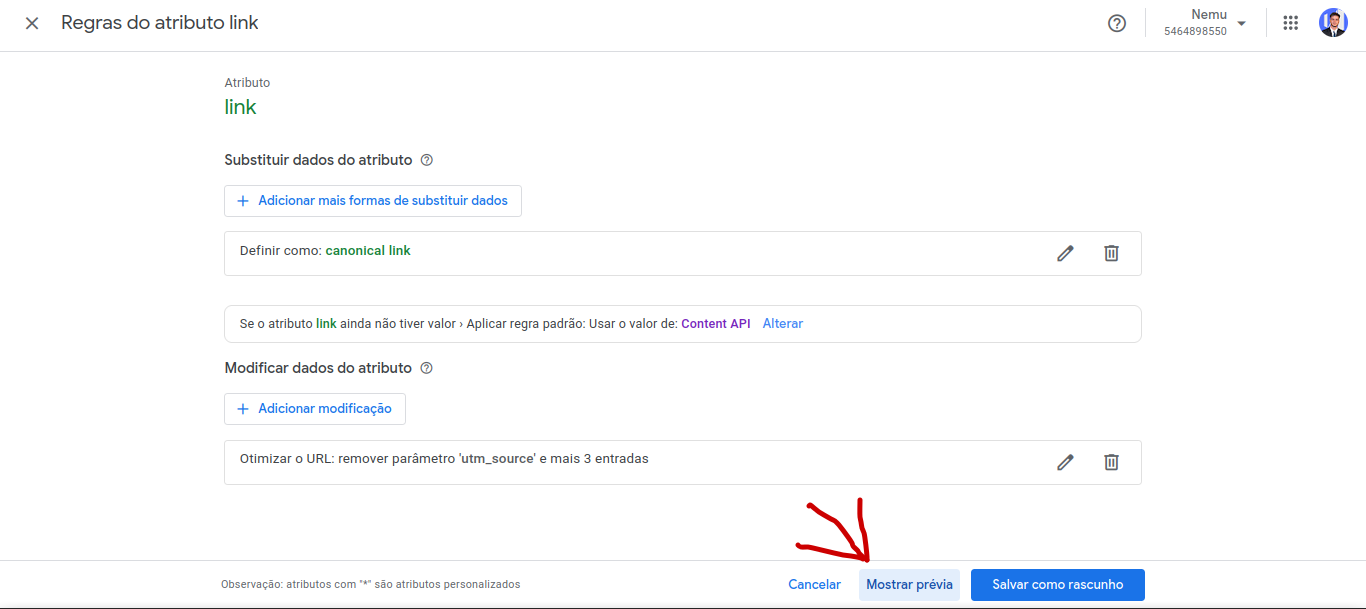
 You can check the preview of how the final product link will look by clicking “show preview”. Click and visualize how the final URL will look. Note that the UTMs shown in the first link have been removed after applying the rule. After confirmation, click “Save as draft”.
3. Step: Editing the canonical link
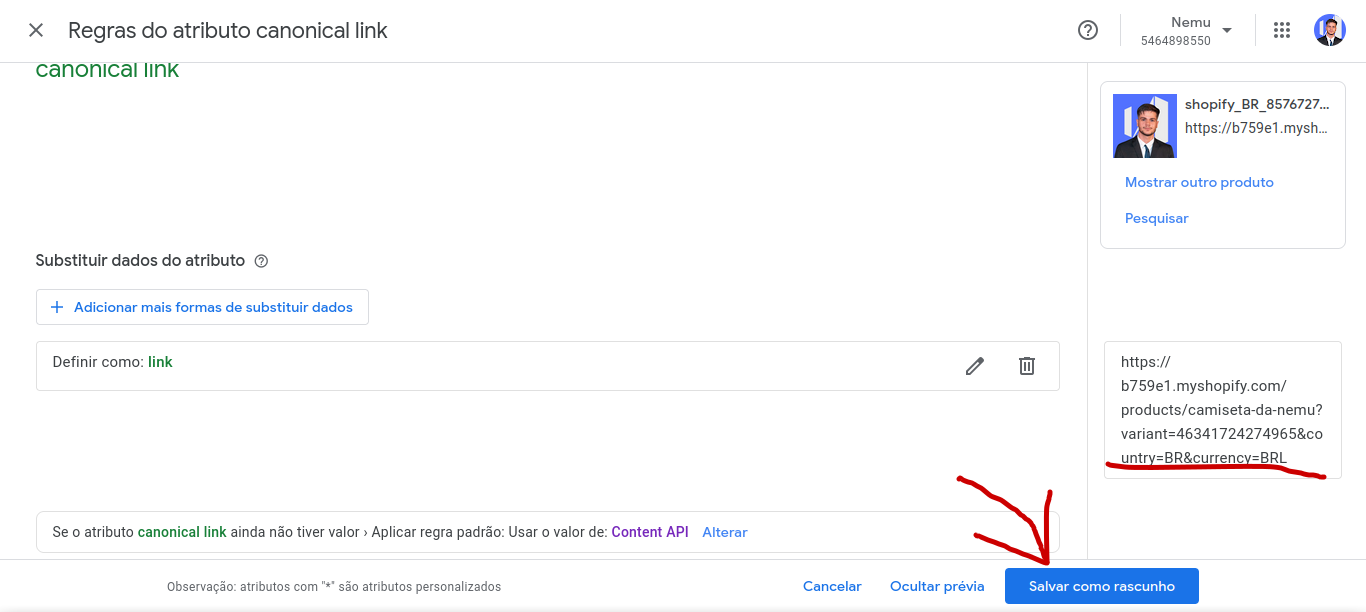
Back to the “attribute rules” screen, click on “set as” and select the “link” option from the “processed attributes” category. It cannot be from “Content API”, because in this way we will be using the link that we already defined in the previous rule.
 Done, we can confirm in “preview” that the final link has no UTMs. After this confirmation, just click “Save as draft”.
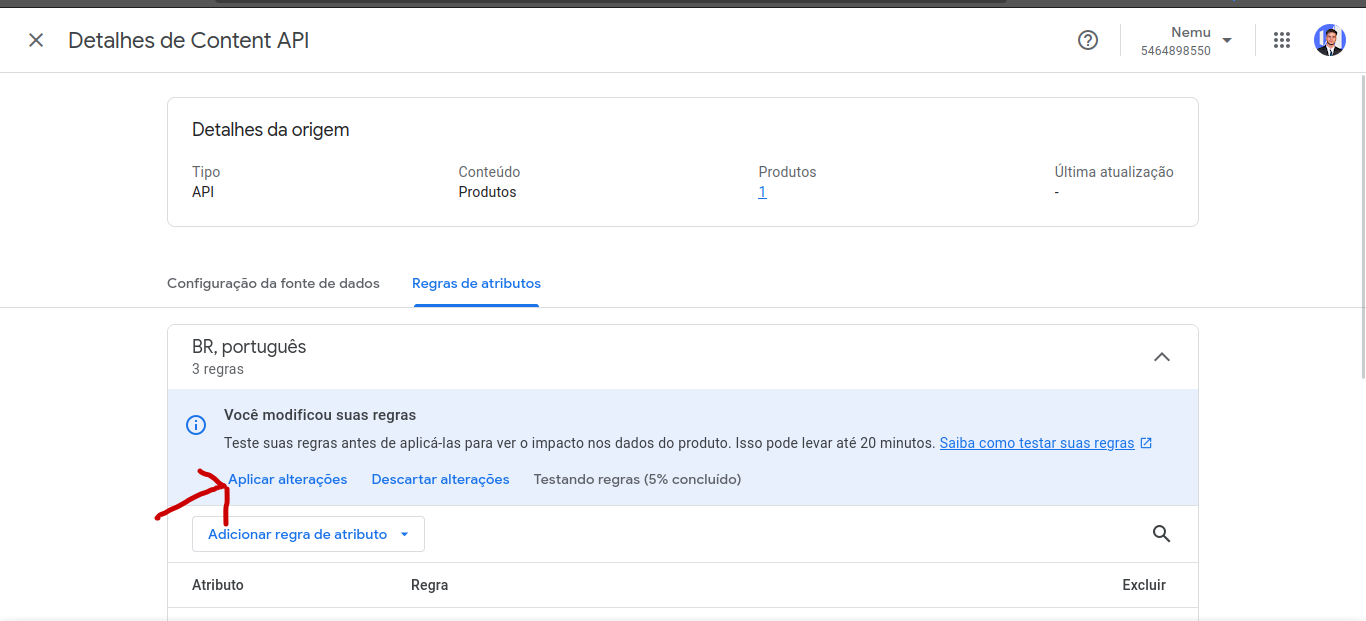
4. Step: Test and apply the rules
It is essential to wait for the Google Merchant test results to proceed
with applying the rules, as incorrect configurations may cause
Google Merchant products to be automatically deactivated.
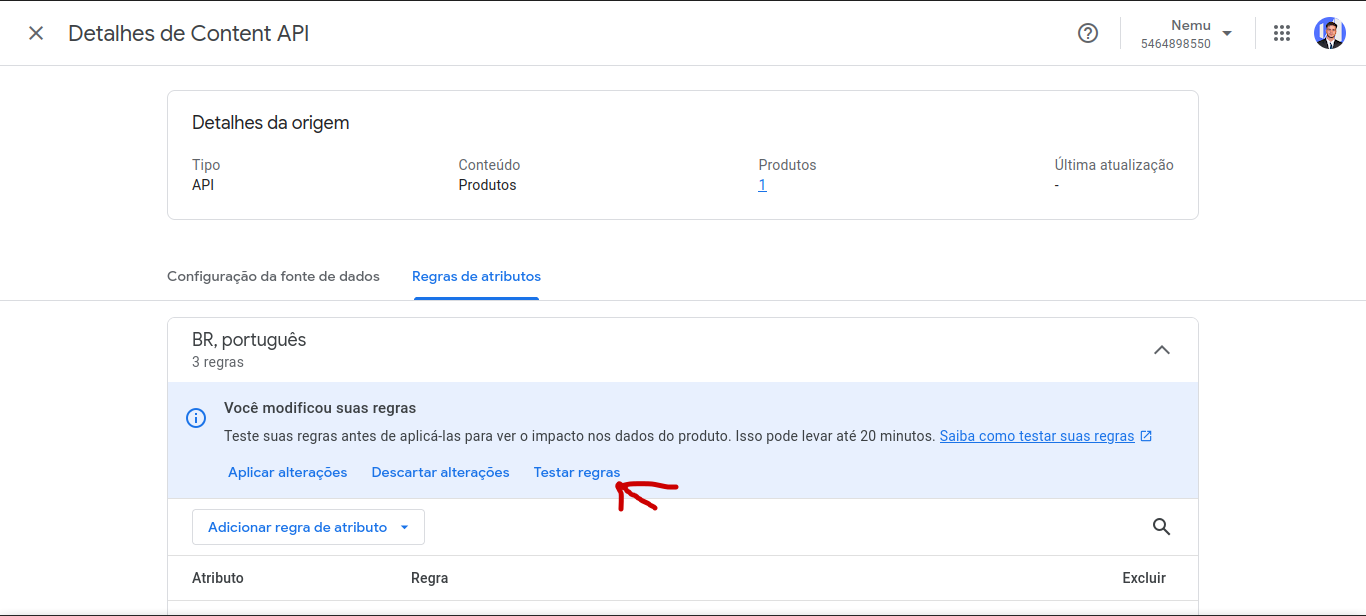 After Google Merchant validates all changes as correct, you can apply the changes. If Google reports errors for 1 or more products, contact our support before proceeding with the application.
 Done the configurations correctly, the next sales from ads aimed at Google Merchant will mark 100% in your Nemu campaign dashboard.