Integrating Nemu Pixel on Shopify
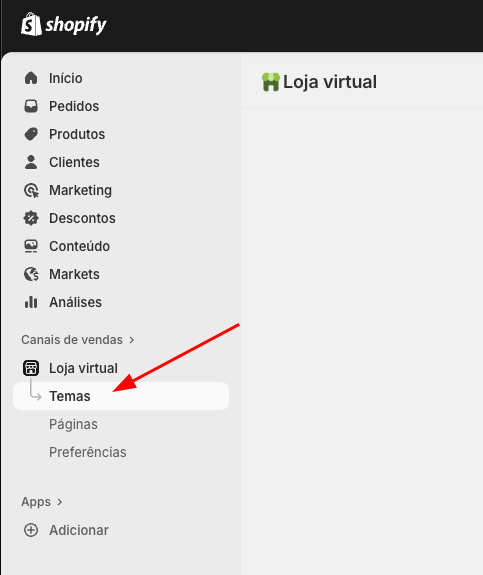
- In the Shopify panel, click on Sales channels in the sidebar, then click on Themes
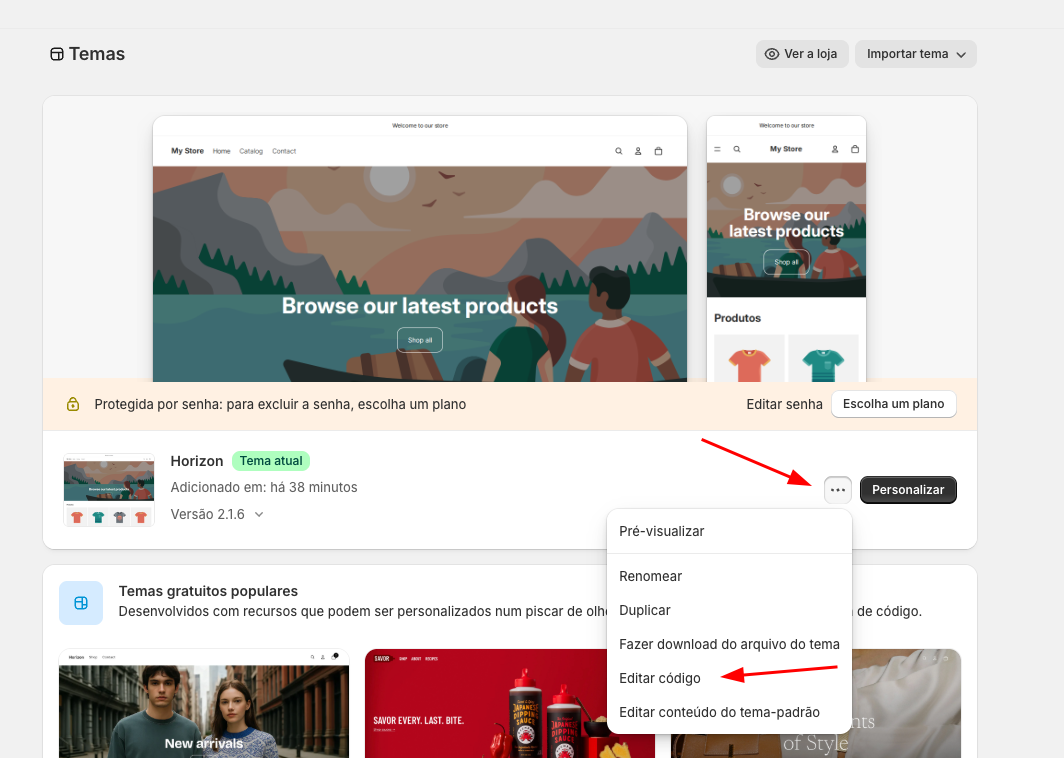
- In your Current Theme, click the button and then click on Edit code
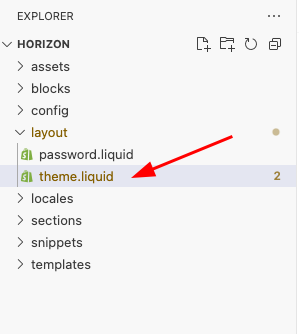
- Open the layout folder and select the theme.liquid file
- Paste the code copied in the previous onboarding step inside the
<head>tag and click Save

Setting Up Webhooks
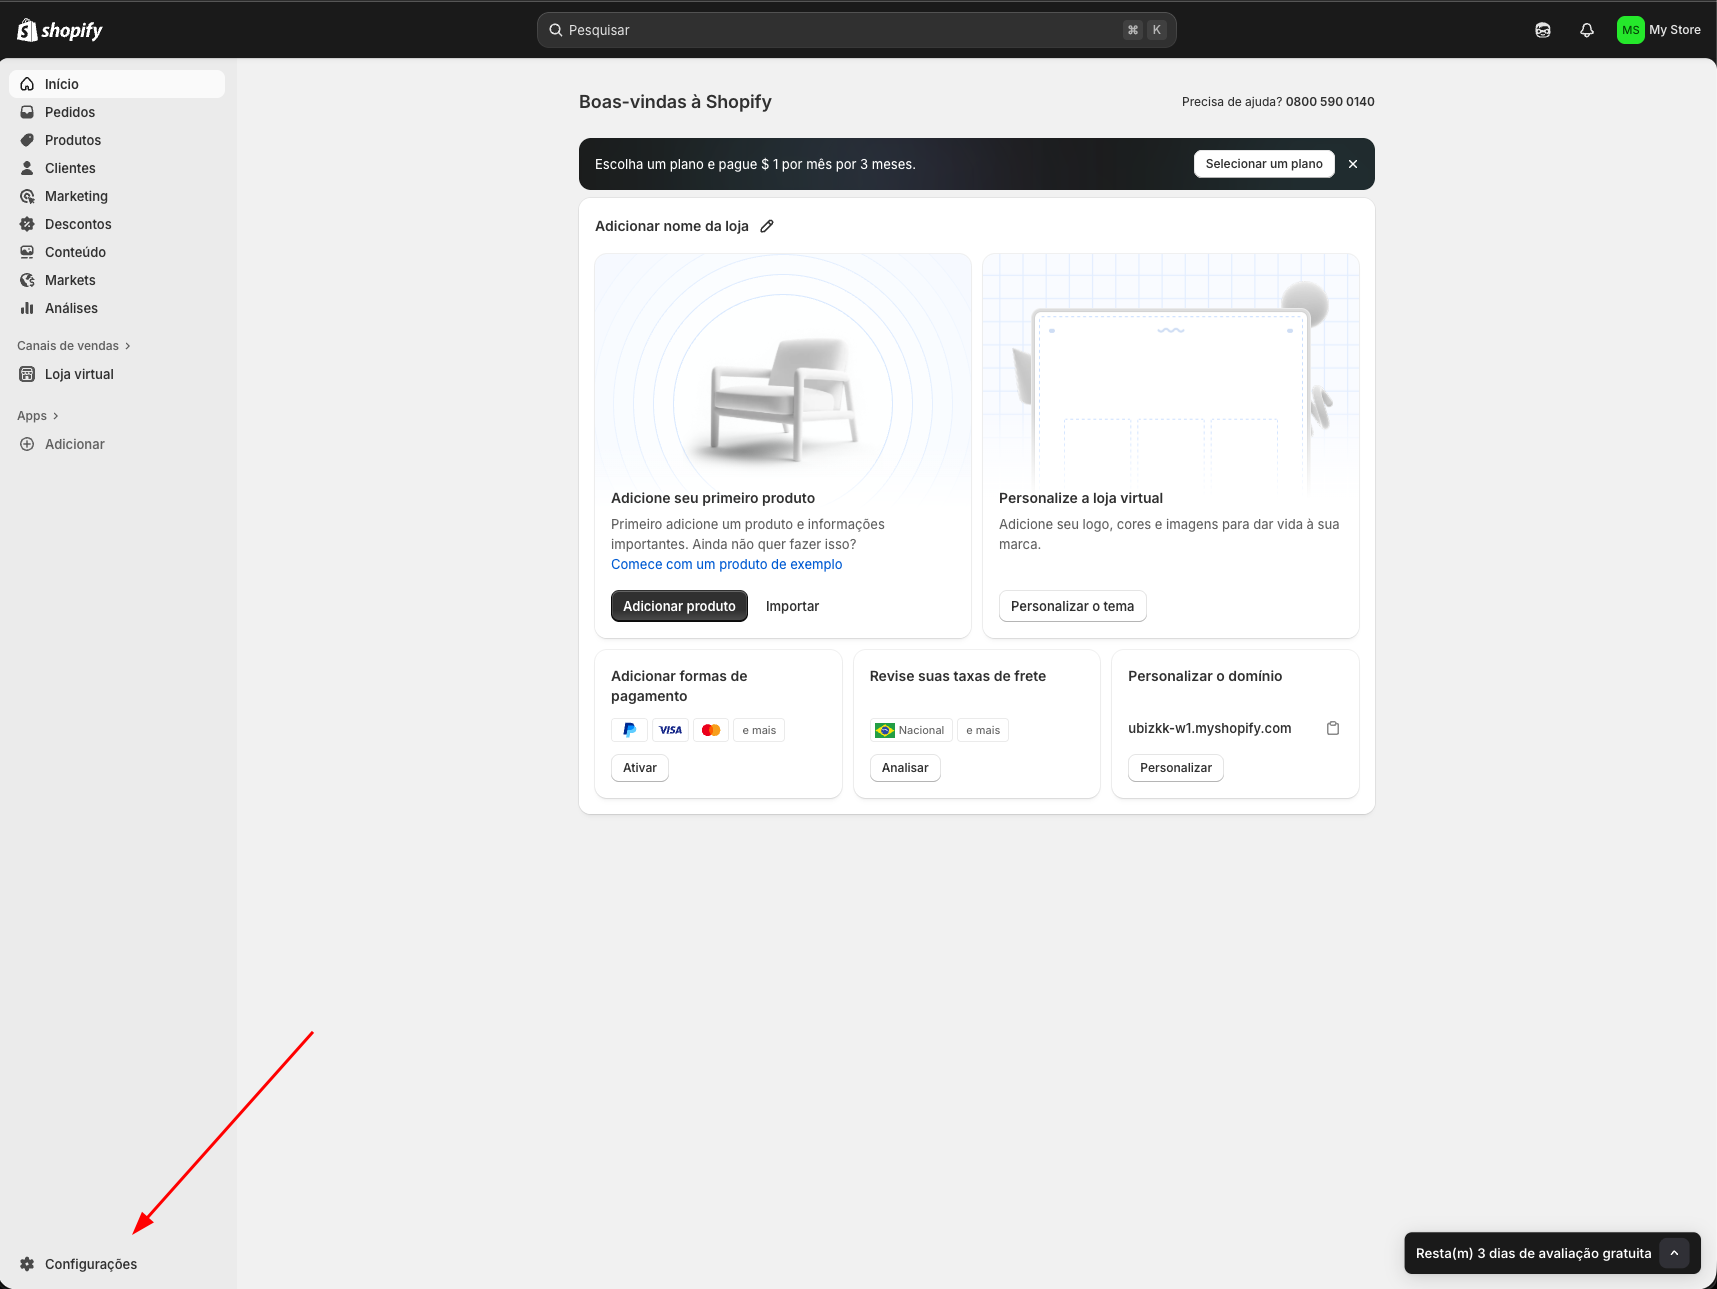
- In the Shopify panel, click on Settings in the sidebar
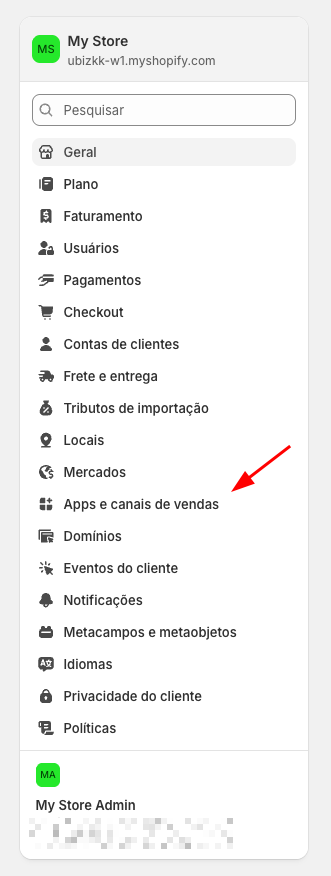
- Click on Apps and sales channels
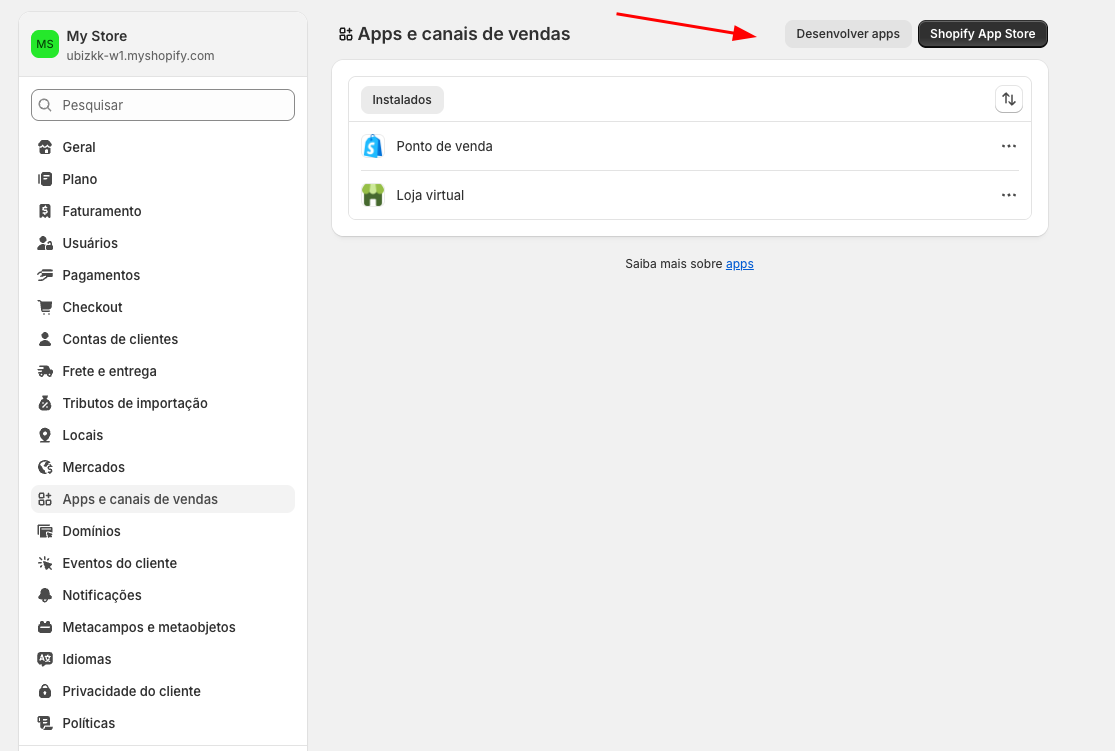
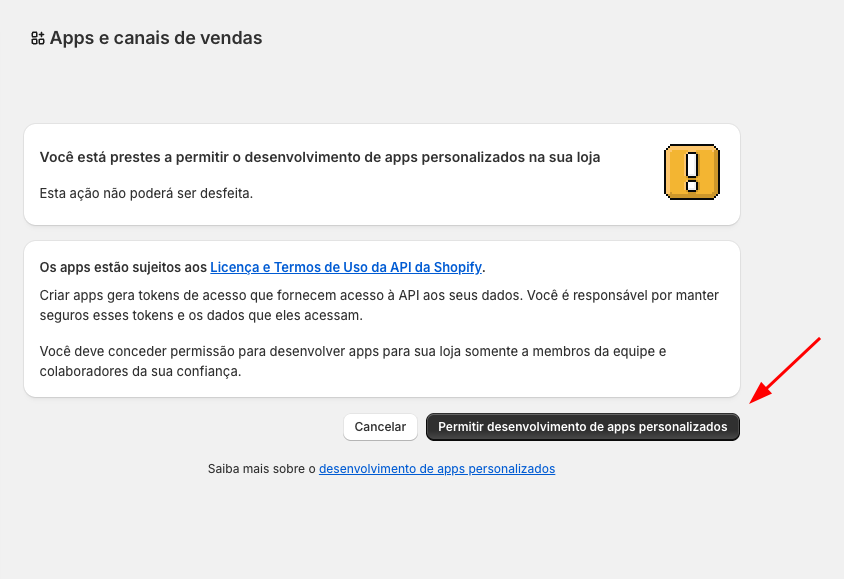
- Click on the Develop apps button
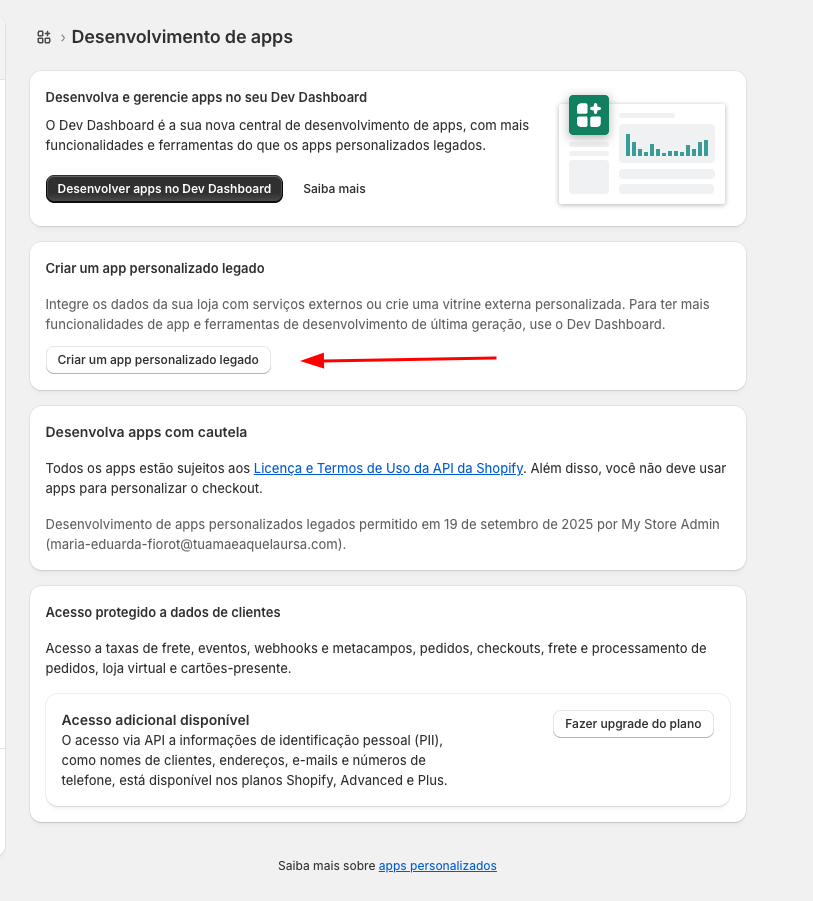
- Click on Allow legacy custom app development
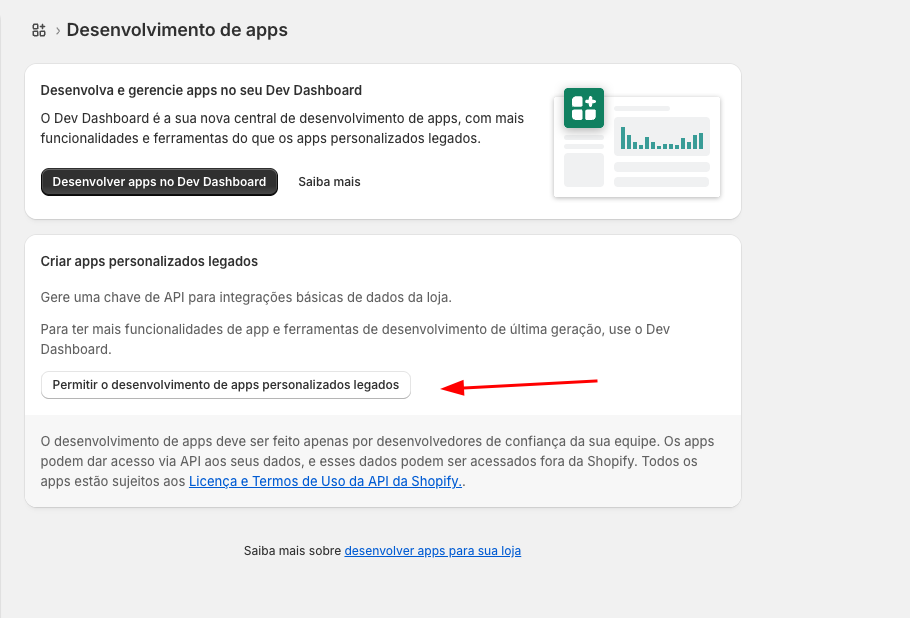
- Click on Allow custom app development
- Click on Create a legacy custom app
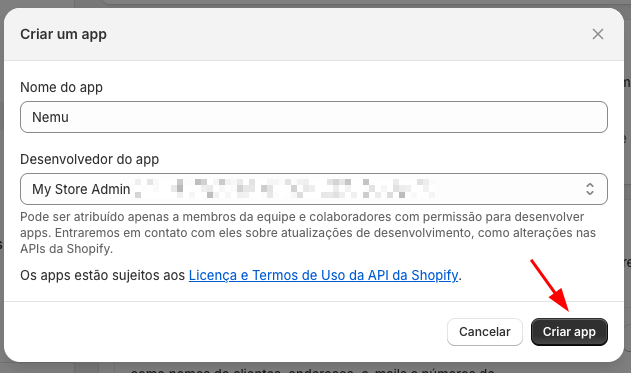
- Define a name for your app and click on Create app
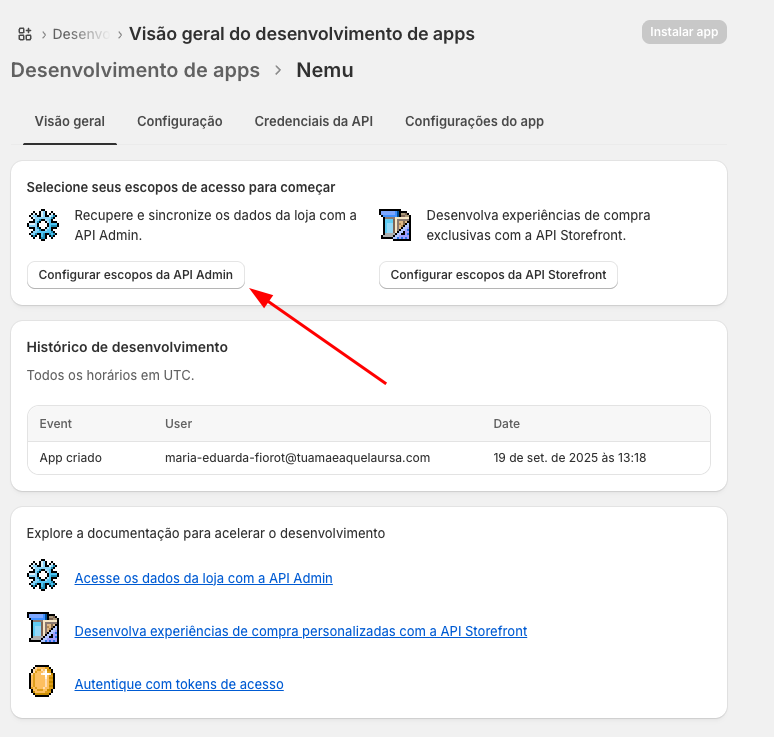
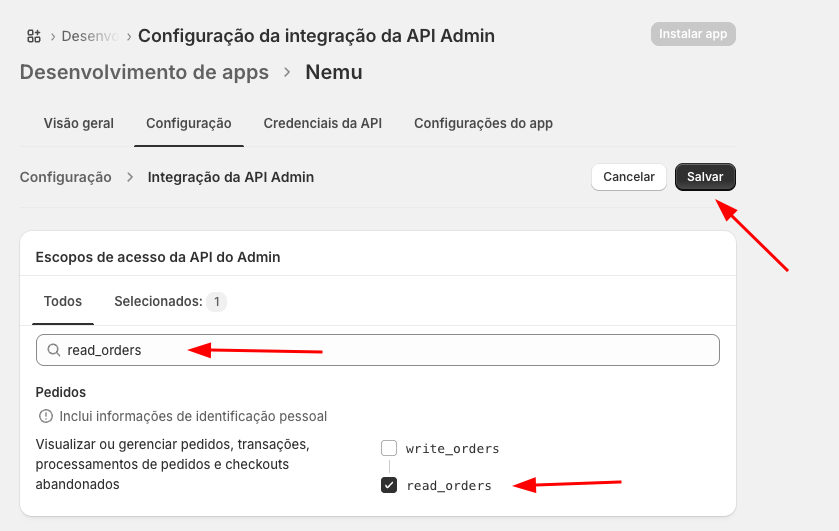
- In the Overview tab, click on Configure Admin API scopes
- Search for
read_orders, check only this option and click on Save
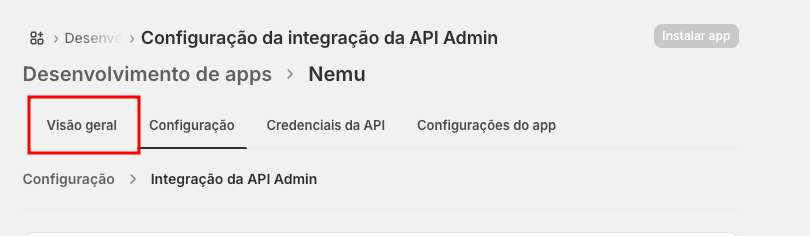
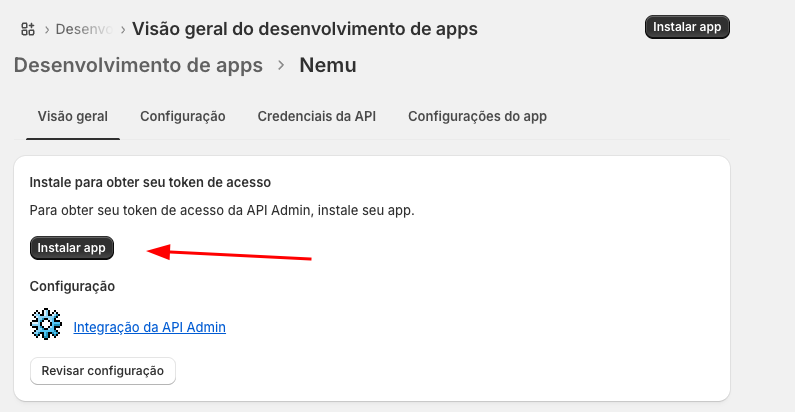
- Go back to the Overview tab
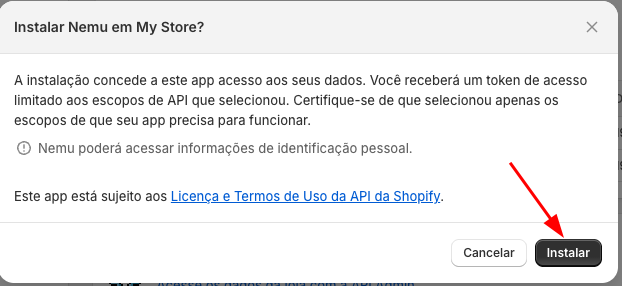
- Click on Install app
- Click on Install again to confirm
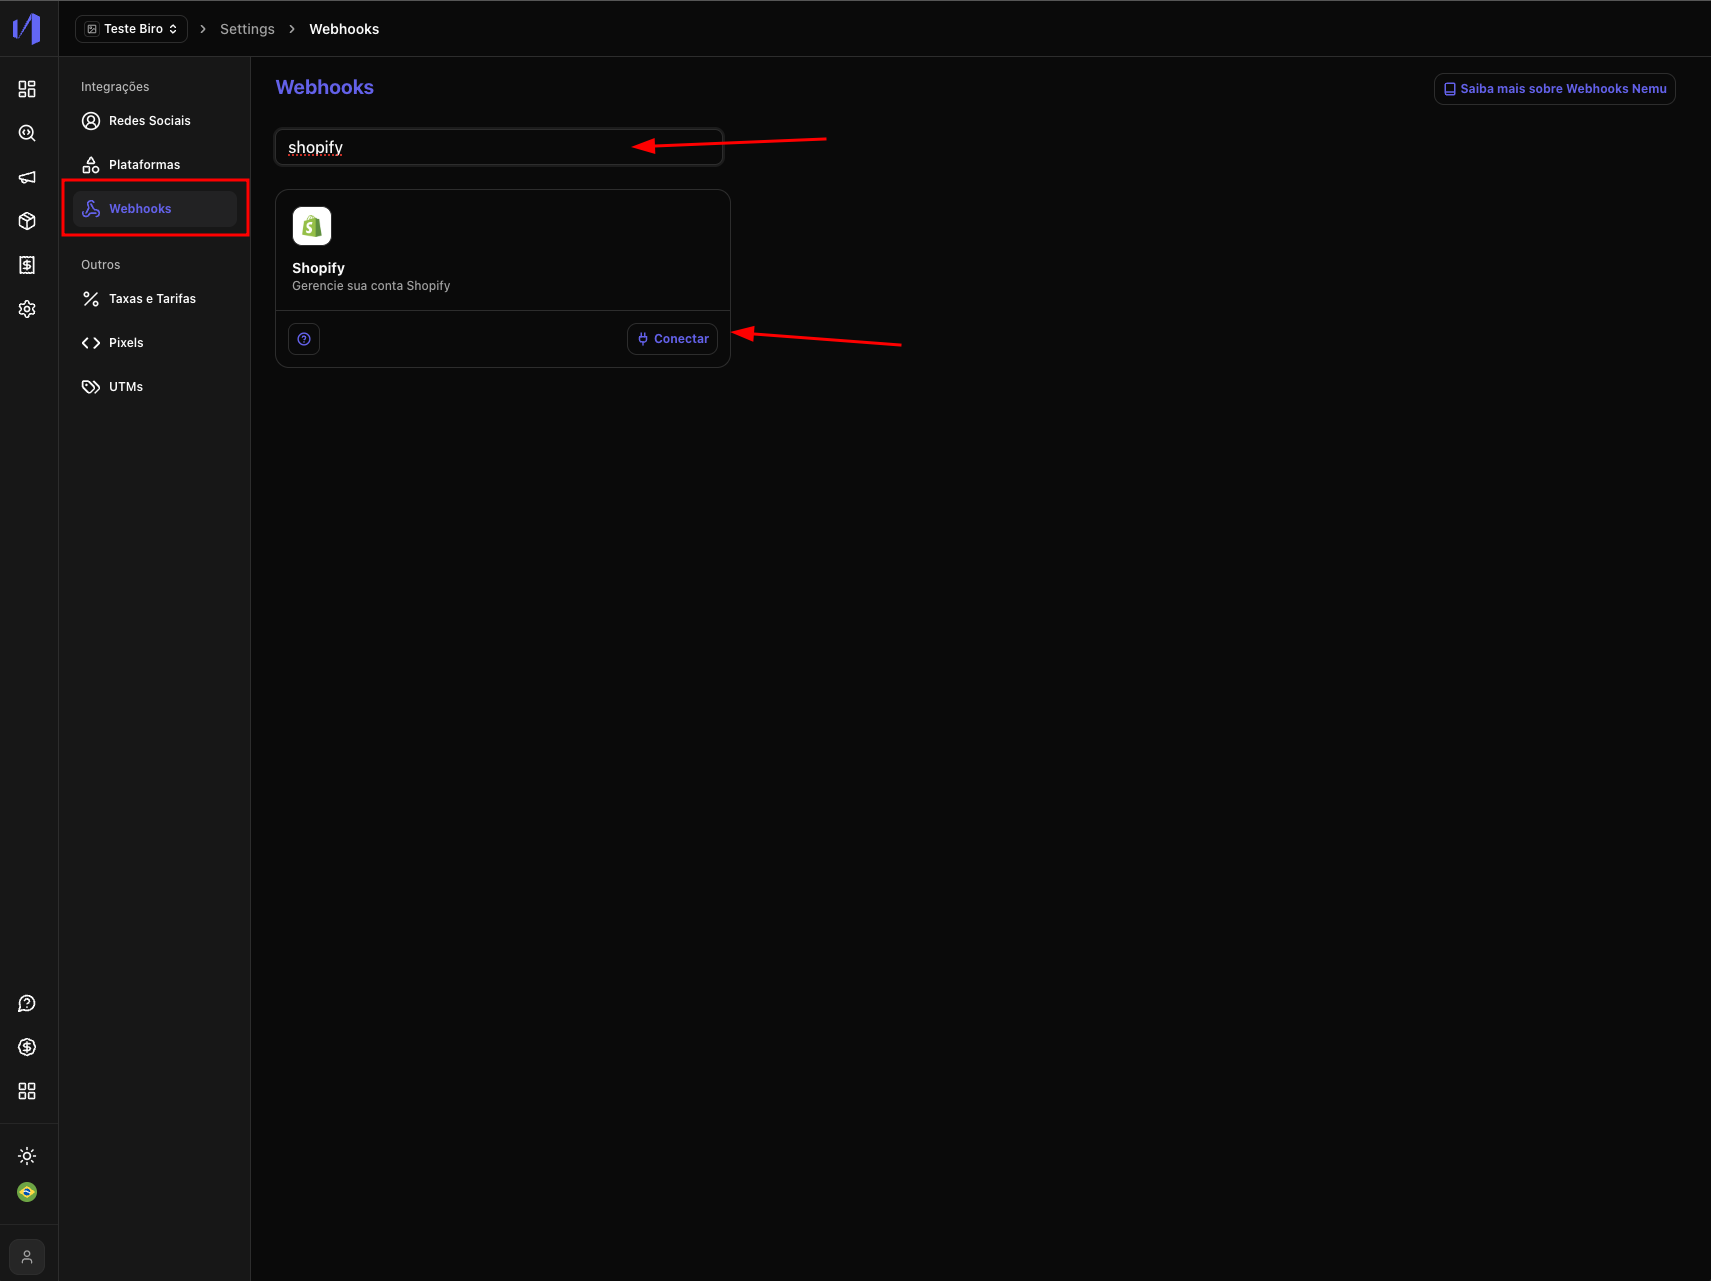
- In Nemu, go to Settings > Webhooks, search for Shopify and click on Connect
Copy the credentials and paste them into the respective Webhook fields on the Nemu platform.
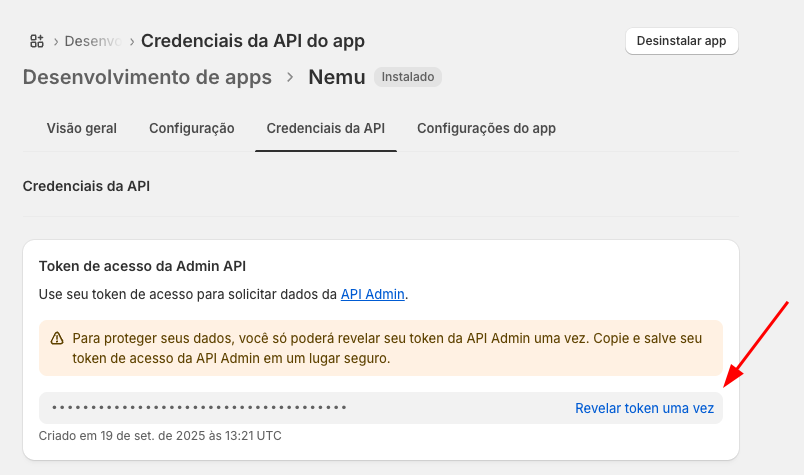
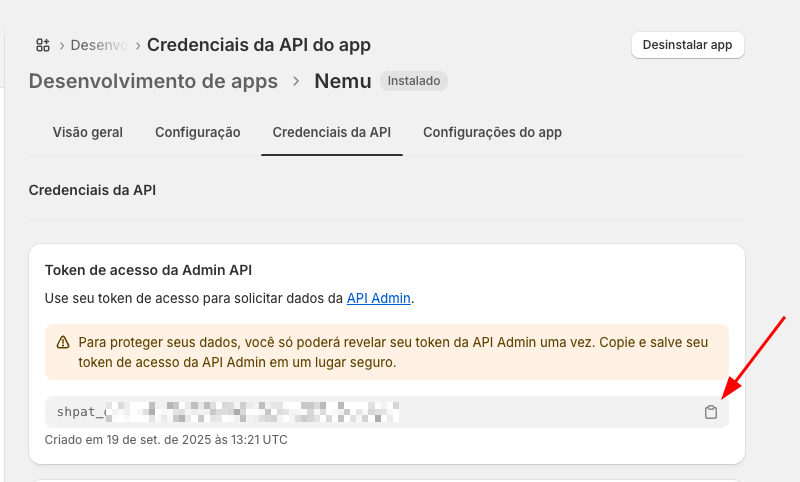
- Click on Reveal token once and then on the Copy button
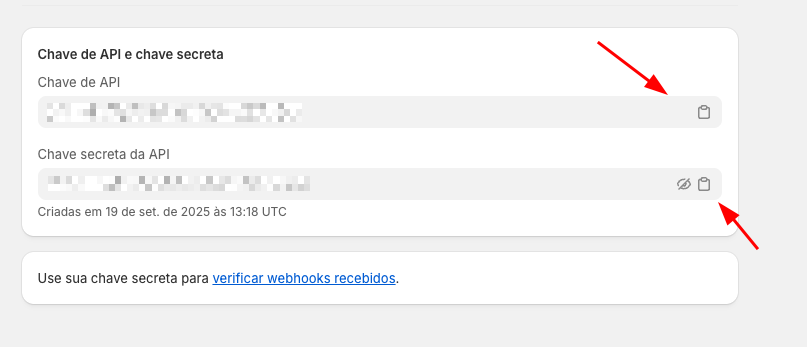
- On the same page, copy the API Key and Secret Key
- Paste the copied credentials in Nemu

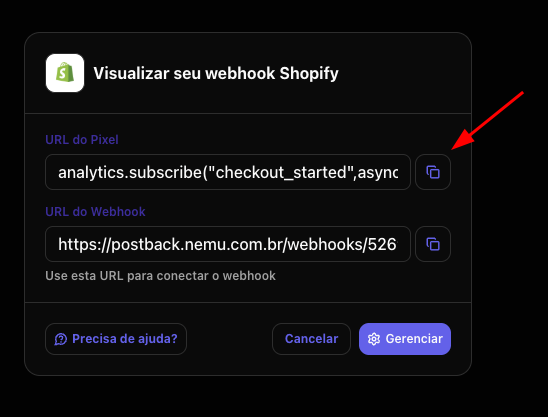
- Copy the Custom Pixel generated by the Webhook
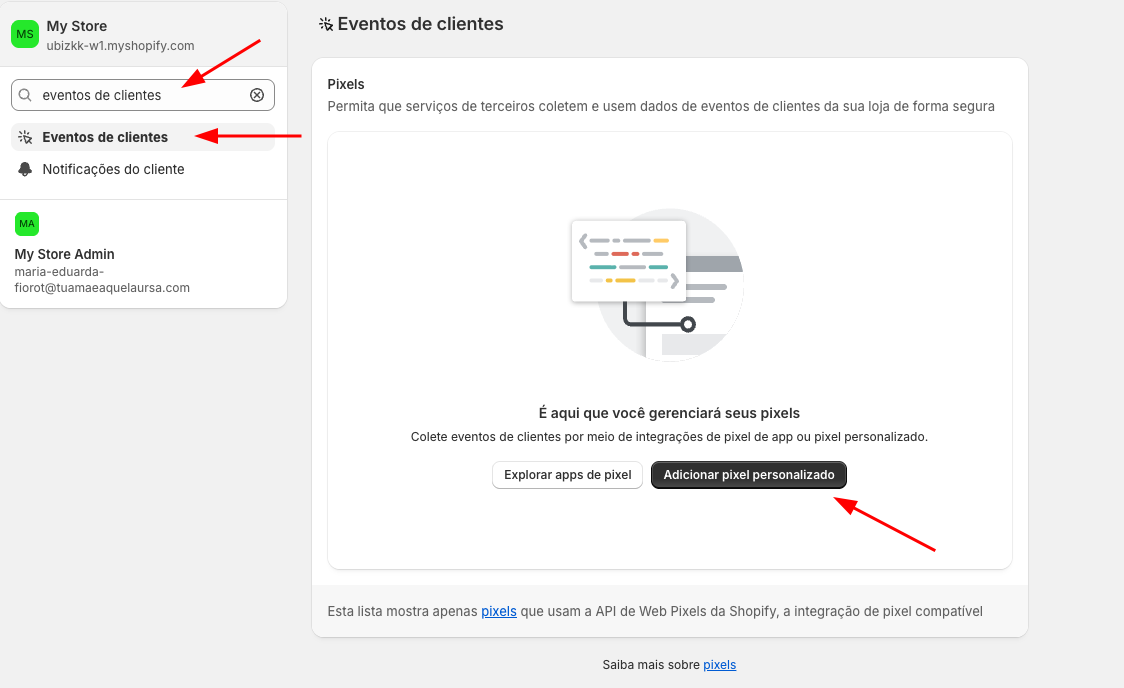
- In Shopify, search for Customer events and click on Add custom pixel
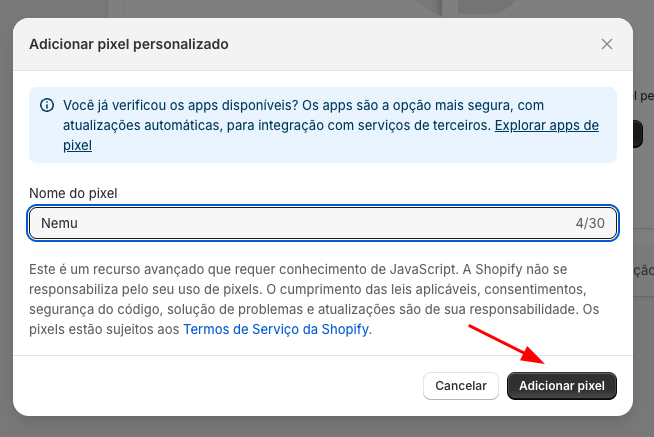
- Define a name for the Pixel and click on Add pixel
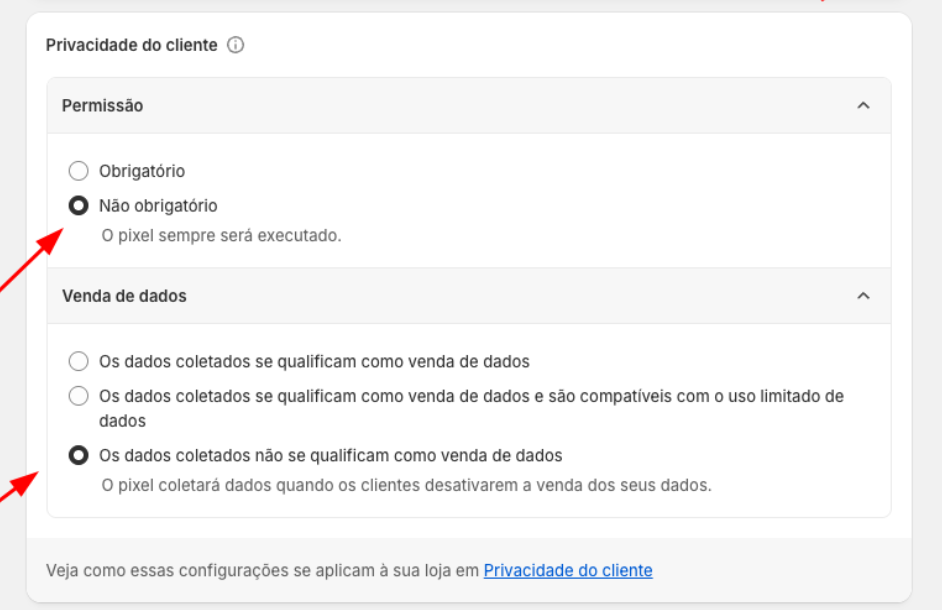
- In the Customer Privacy section, configure:
- Consent: Not required
- Data sale select: The data collected does not qualify as data sale
- Paste the code copied in step 17 and click on Save
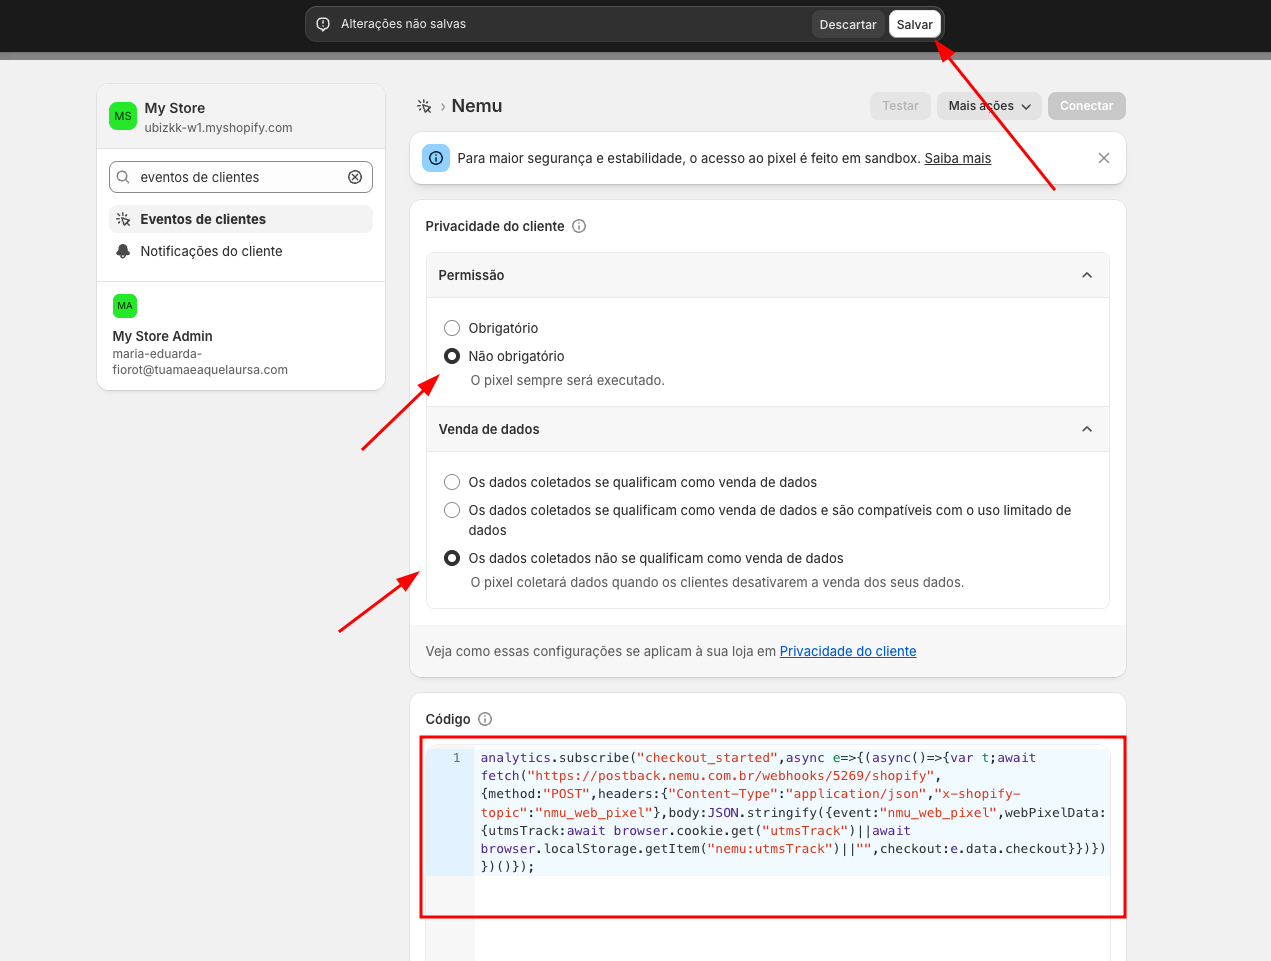
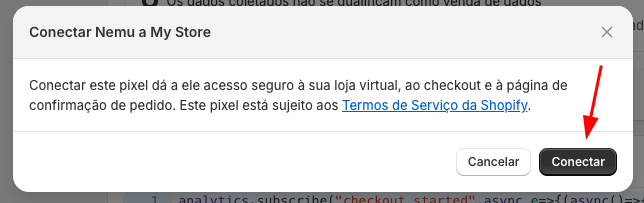
- Click on Connect at the top of the page and confirm again by clicking on Connect