Generating an Integration Key
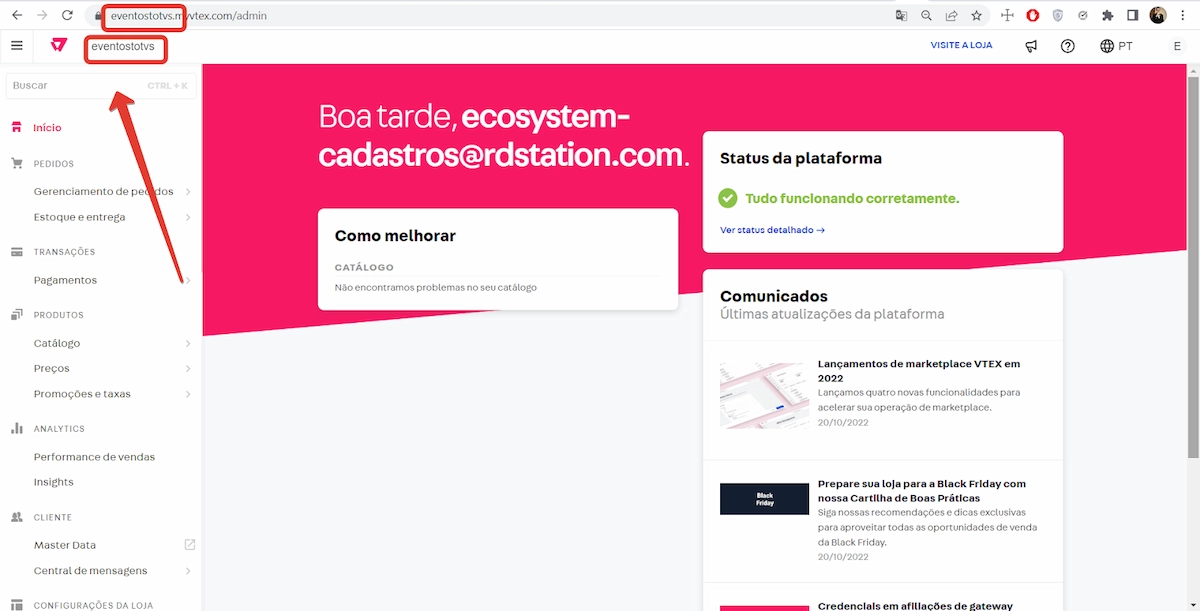
- Log in to your VTEX account.
The account name is part of your URL. You can also find it in the top left corner, next to the VTEX logo.
-
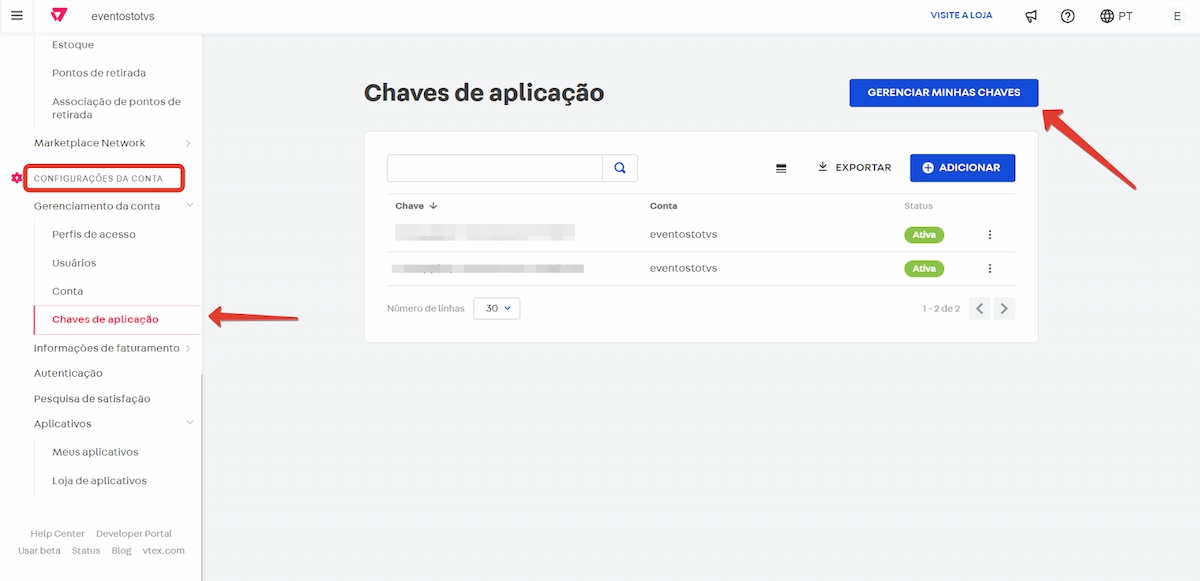
In the sidebar, click on ACCOUNT CONFIGURATION > Account Management > Application Keys.
-
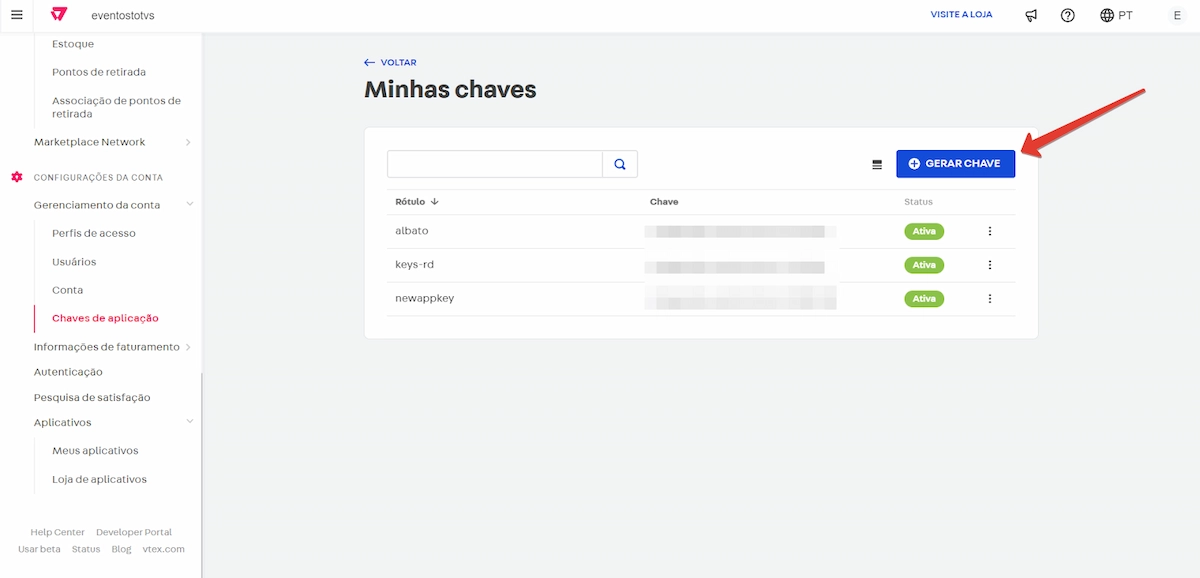
Click on the Manage My Keys button in the top right corner.
- Then click on “Generate Key”.
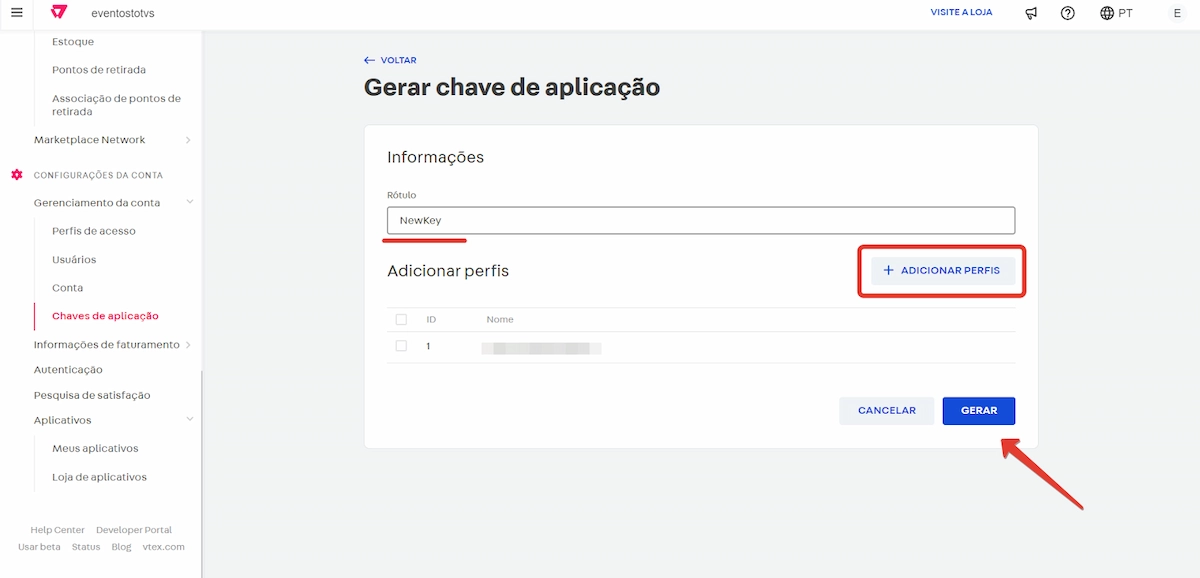
- Define a name (Label) for the key and add the users who will be able to use this key, then click on “Generate”.
- After that, your Application Key and Application Token will be displayed.
The Application Token will be displayed only once. Make sure to copy it and store it in a safe place.
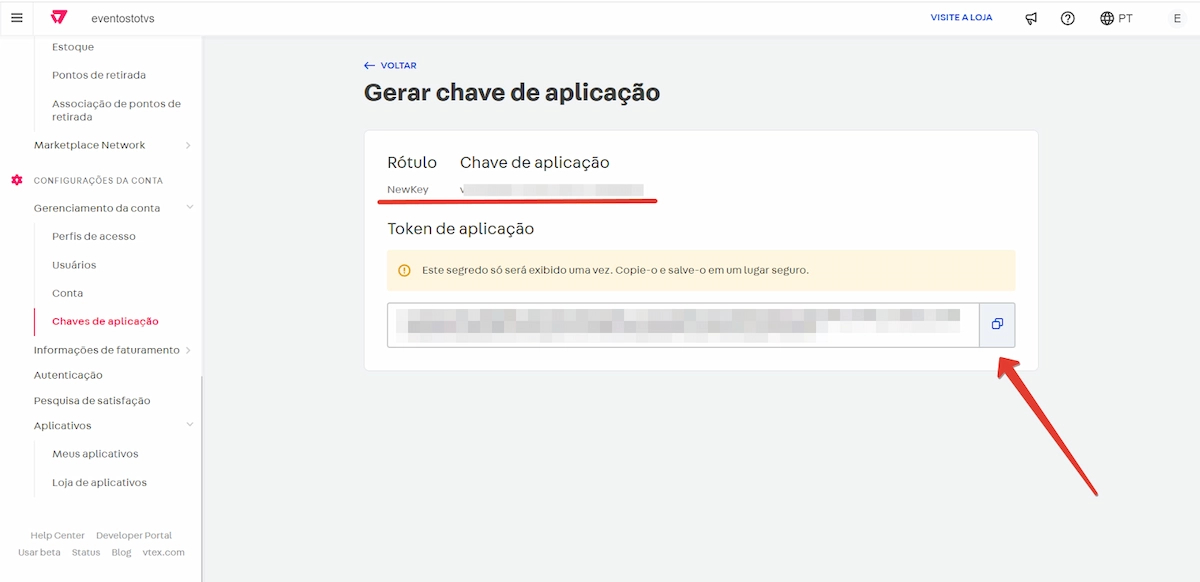
Copy and save the Application Key, Account Name, and Token in a safe place. This information will be required for the integration with Nemu.
Connecting VTEX to Nemu Dashboard
Now that you have generated the credentials in the VTEX panel, follow the steps below to integrate with the Nemu dashboard.
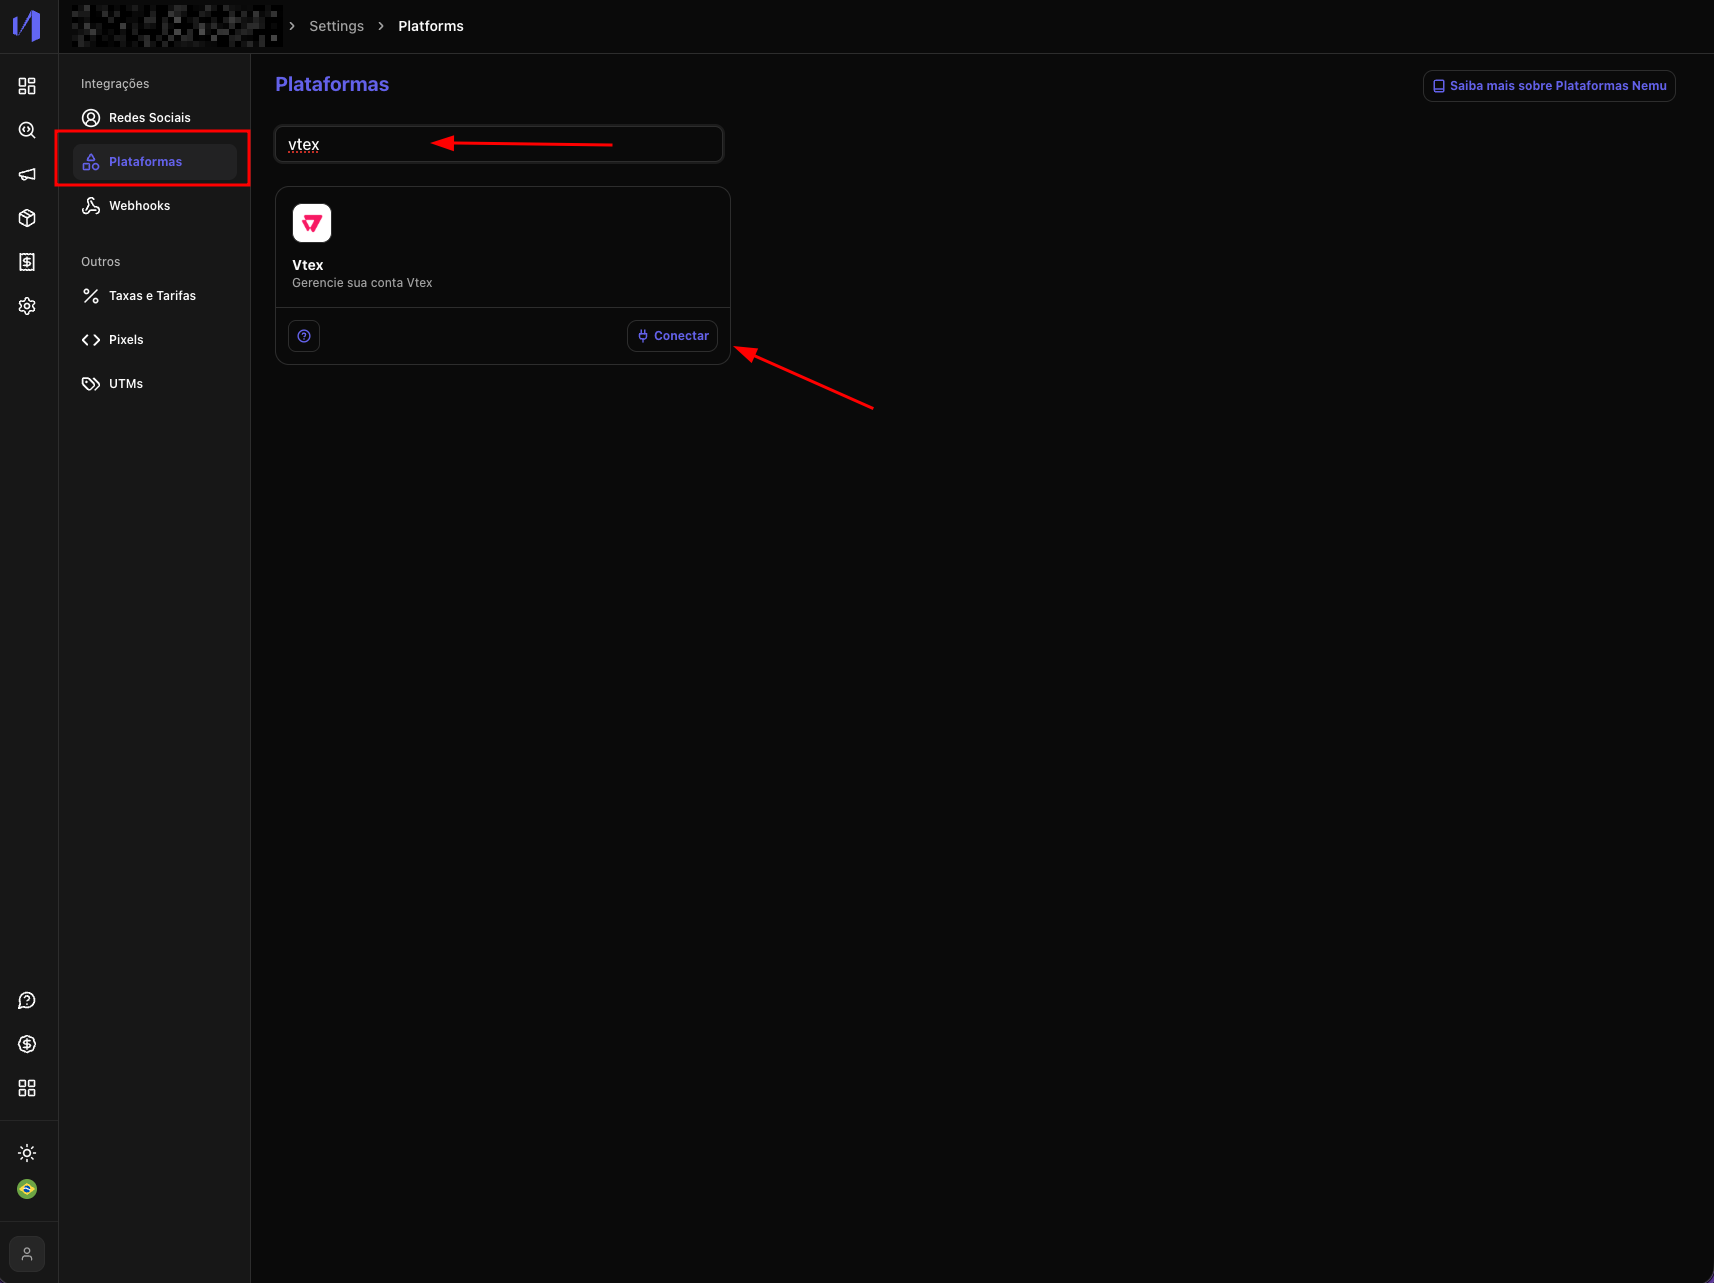
- In the Nemu panel, go to Settings > Platforms.
- Search for VTEX and click on Connect.
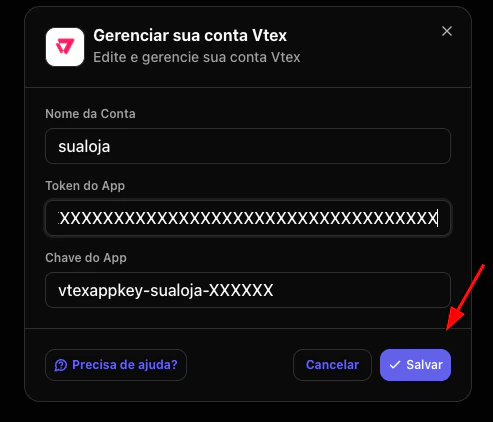
- Fill in the connection information.
Enter the Account Name, Application Key, and Token generated in VTEX and click on “Save”.
Installing the Pixel on VTEX
After connecting VTEX to the Nemu Dashboard, you need to install the Nemu pixel on your VTEX store. Follow the instructions below and pay special attention to the important warnings.
Important Considerations
- Loading Speed: The Nemu pixel is loaded asynchronously, which means it doesn’t interfere with site loading. It doesn’t block page rendering and doesn’t impact store performance.
- LGPD and Apple Users: The Nemu pixel is LGPD compliant. For specific questions about Apple users, check our security and privacy policy.
Installation Requirements
The Nemu pixel must be installed following these mandatory rules:
- ✅ Always in the
<head> tag of all pages
- ✅ Present on all store pages (not just the home page)
- ✅ Included in checkout (checkout head)
- ✅ Installation via Custom Script (not via GTM)
Do not install the pixel via Google Tag Manager (GTM). The integration
will not work properly if installed via GTM. Always use Custom Script.
If your store uses Trinio, the filename where the Custom Script should be
inserted may vary from client to client. Contact your Trinio partner to get
the exact filename that needs to be edited.
Installing the Pixel on Checkout
In addition to installing the pixel on the store pages, it is mandatory to install this script on the VTEX checkout. Without this step, conversion events will not be captured correctly.
- Check whether your store has the VTEX Checkout UI Custom app installed. If it does not, install it via the VTEX App Store or manually according to the documentation.
- Go to
https://accountname.myvtex.com/admin/vtex-checkout-ui-custom, replacing accountname with your VTEX account name.
- Open the JavaScript tab and locate the Custom JavaScript field.

- Paste the script below into the editor:
(function () {
  var TRACKING_ID = "0000000000";
  var SCRIPT_URL =
    "https://trackings.nemu.com.br/trackings/" + TRACKING_ID + "/script.js";

  if (document.querySelector('script[data-tracking-id="' + TRACKING_ID + '"]'))
    return;

  var script = document.createElement("script");
  script.src = SCRIPT_URL;
  script.async = true;
  script.setAttribute("data-tracking-id", TRACKING_ID);
  script.crossOrigin = "anonymous";

  document.head.appendChild(script);
})();
Replace 0000000000 with your Nemu Tracking ID, which can be found in the
Nemu dashboard under Settings > Pixels.
- Click “Publish” to apply the changes to the checkout.
Required Permissions on VTEX Account
For the integration to work correctly, it is essential that the VTEX user used to generate the credentials has the appropriate permissions.
- Check user access
You will need to verify with the client which account is being used to create the integration credentials. The user must have specific permissions to consume API endpoints.
During validation, we observed that several endpoints are returning errors due to lack of permission.
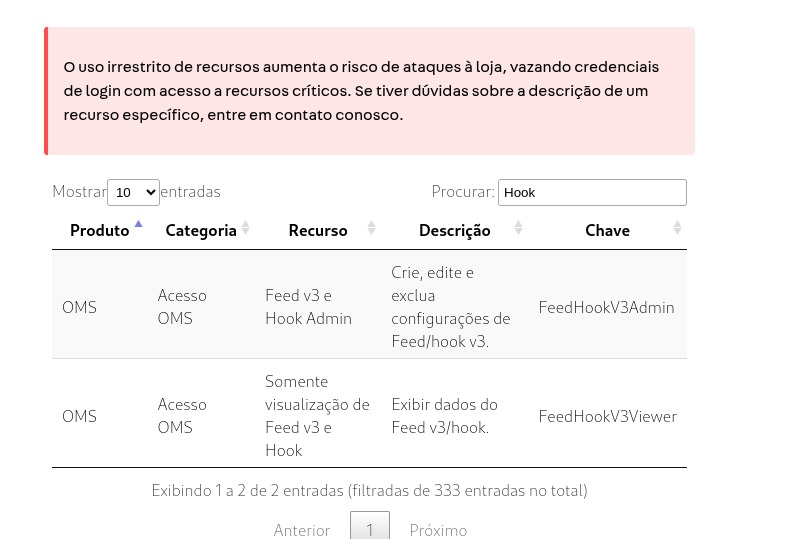
- Required permissions
Make sure the VTEX user has access to the following resources:
View orderFeed v3 and Hook AdminFeed v3 and Hook view onlyList Orders
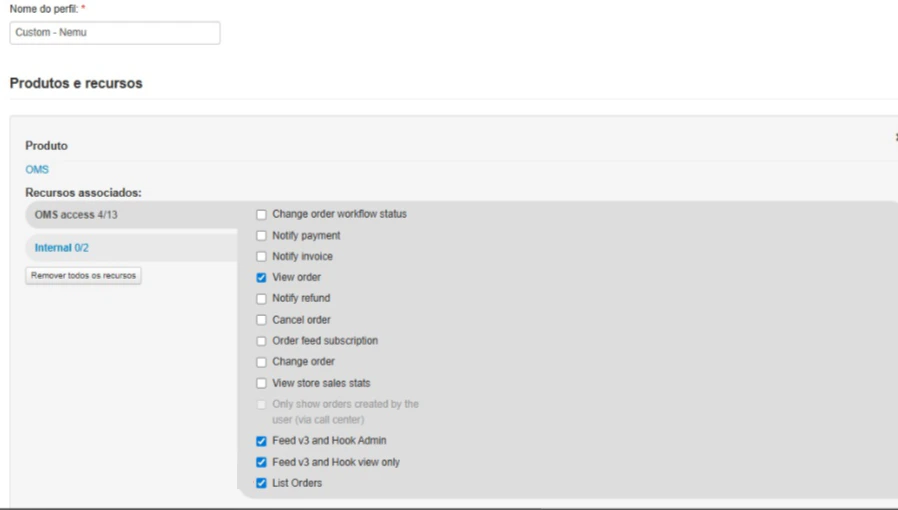 These permissions are necessary for reading and managing data integrated via API.
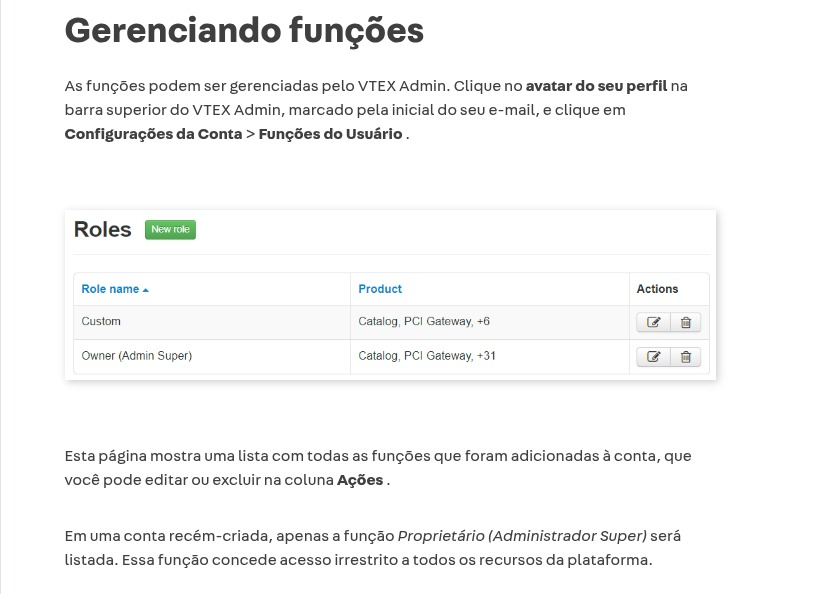
How to Manage Permissions on VTEX
Without these permissions, the integration will not be able to access the
necessary data, even with the correct key and token.
You can adjust user permissions by following the official VTEX tutorials