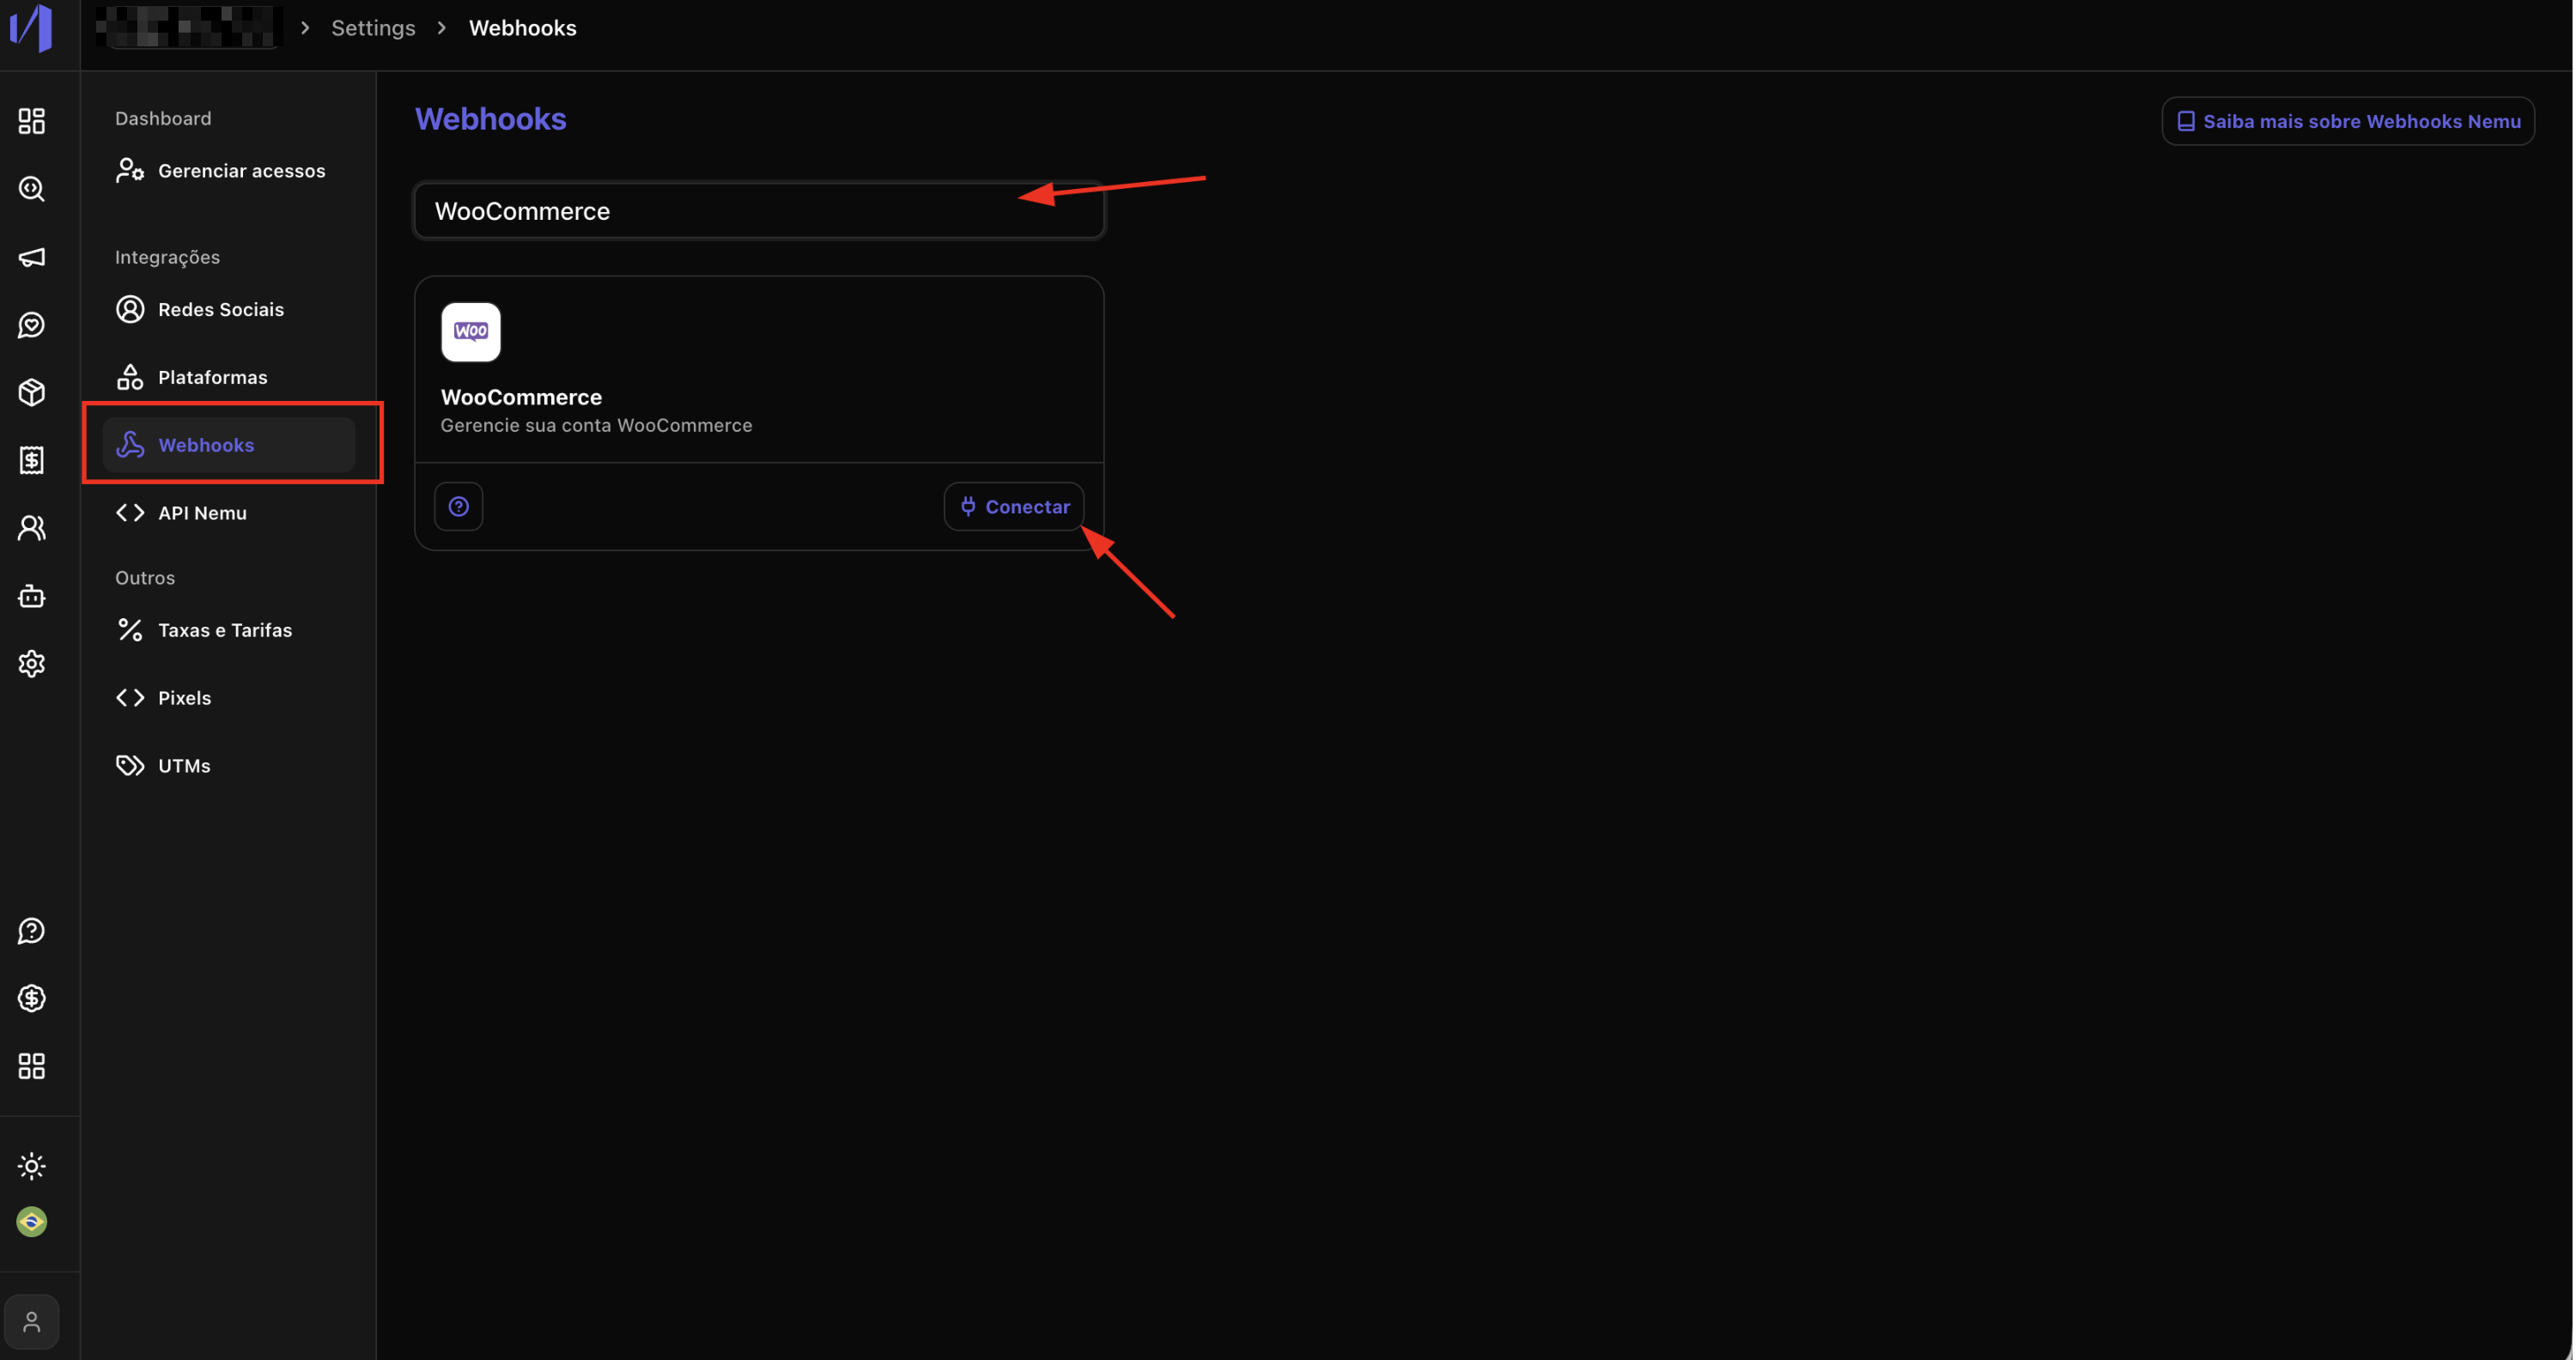
Setting Up Webhooks in Nemu Dashboard
- In the Nemu panel, go to Settings > Webhooks.
- Search for WooCommerce and click on Connect.
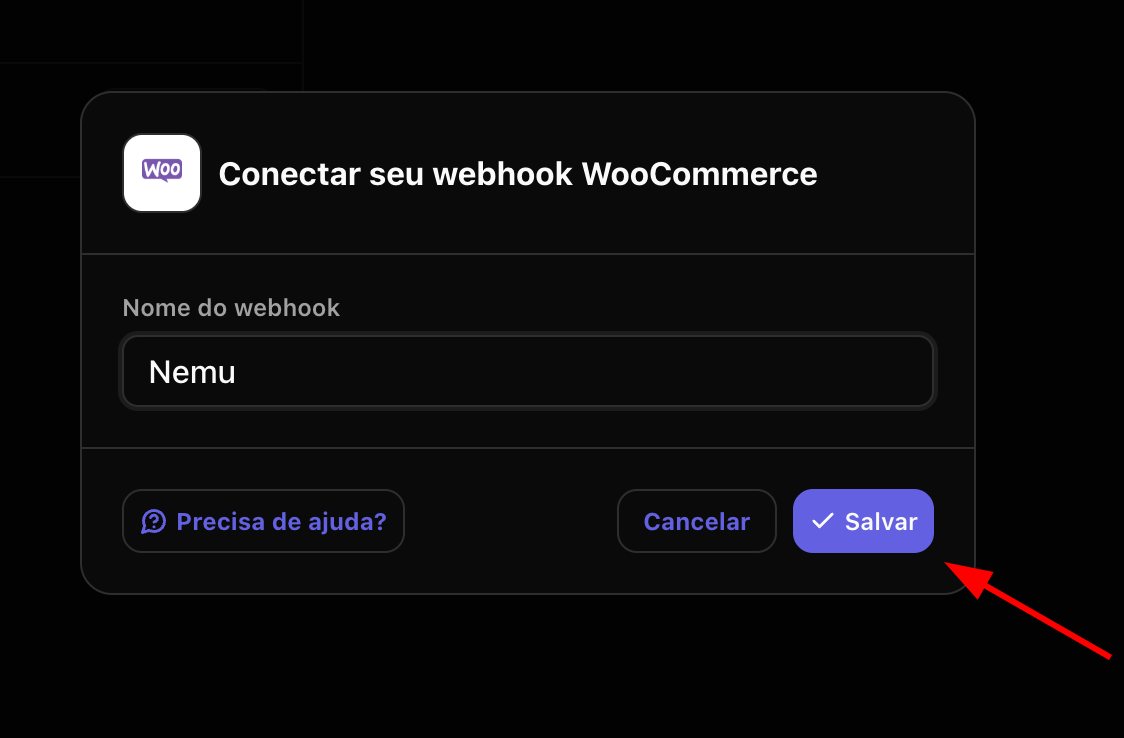
- Define a name for the webhook and click on Save.
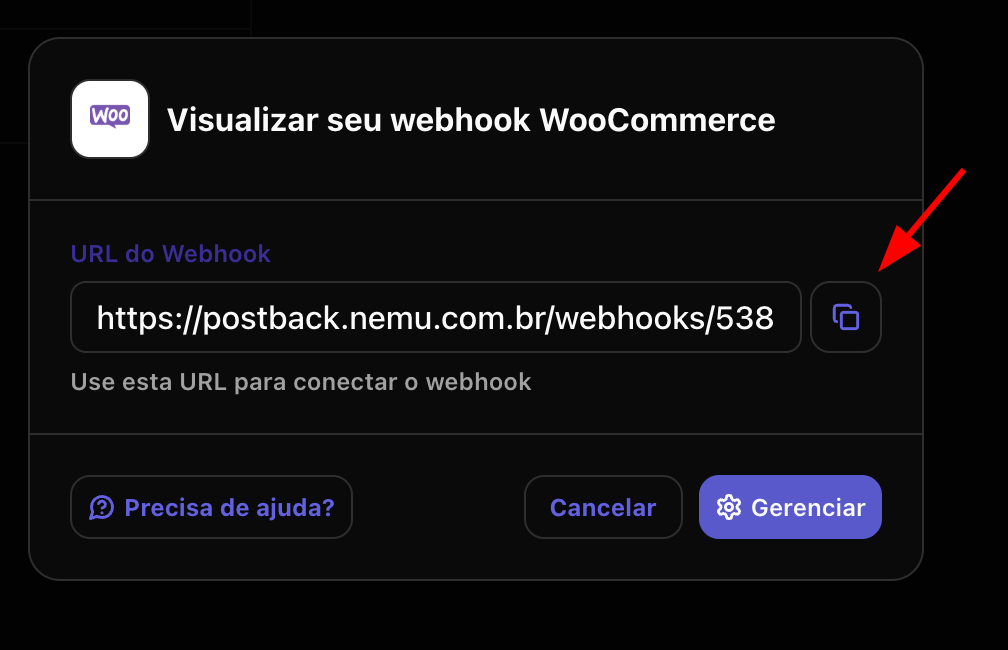
- Click the button to copy the webhook URL generated by Nemu.
Setting Up Webhooks in WooCommerce
To ensure orders are tracked correctly, you need to create two webhooks in WooCommerce:
- One for the “Order Created” event
- Another for the “Order Updated” event
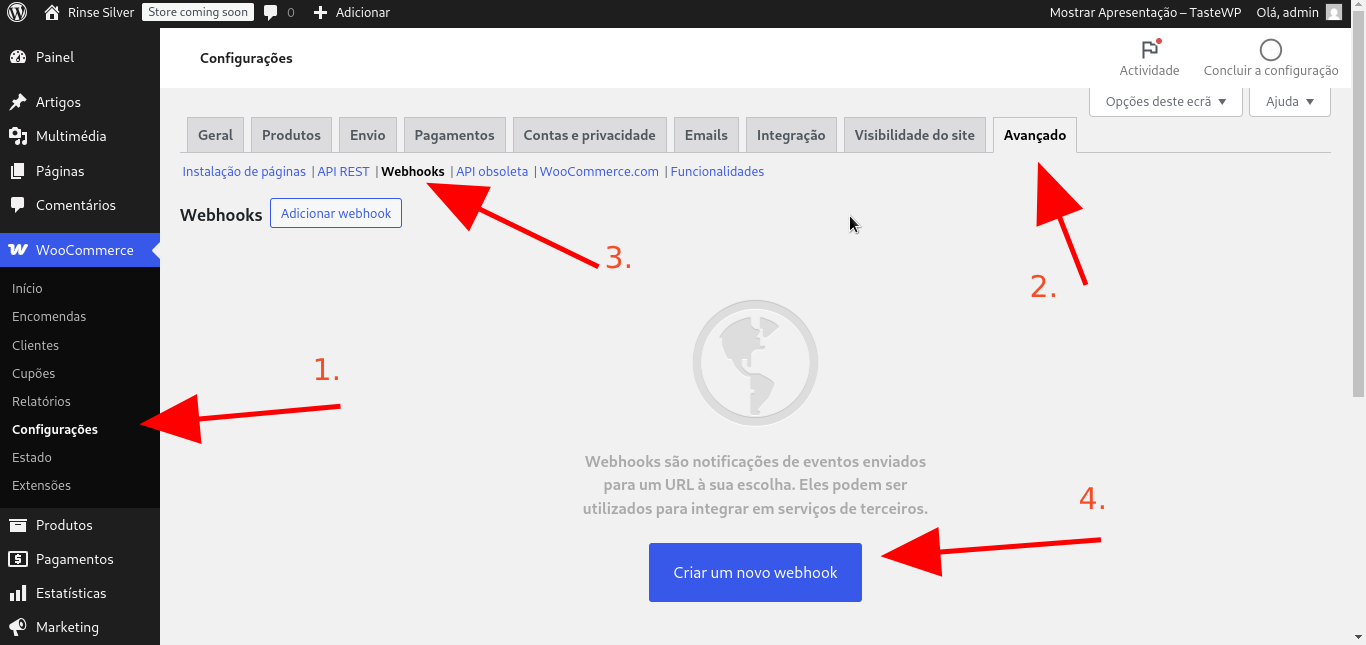
- Access the WordPress panel and go to WooCommerce > Settings.
- Click on the Advanced tab and then on Webhooks.
- Click on Add Webhook.
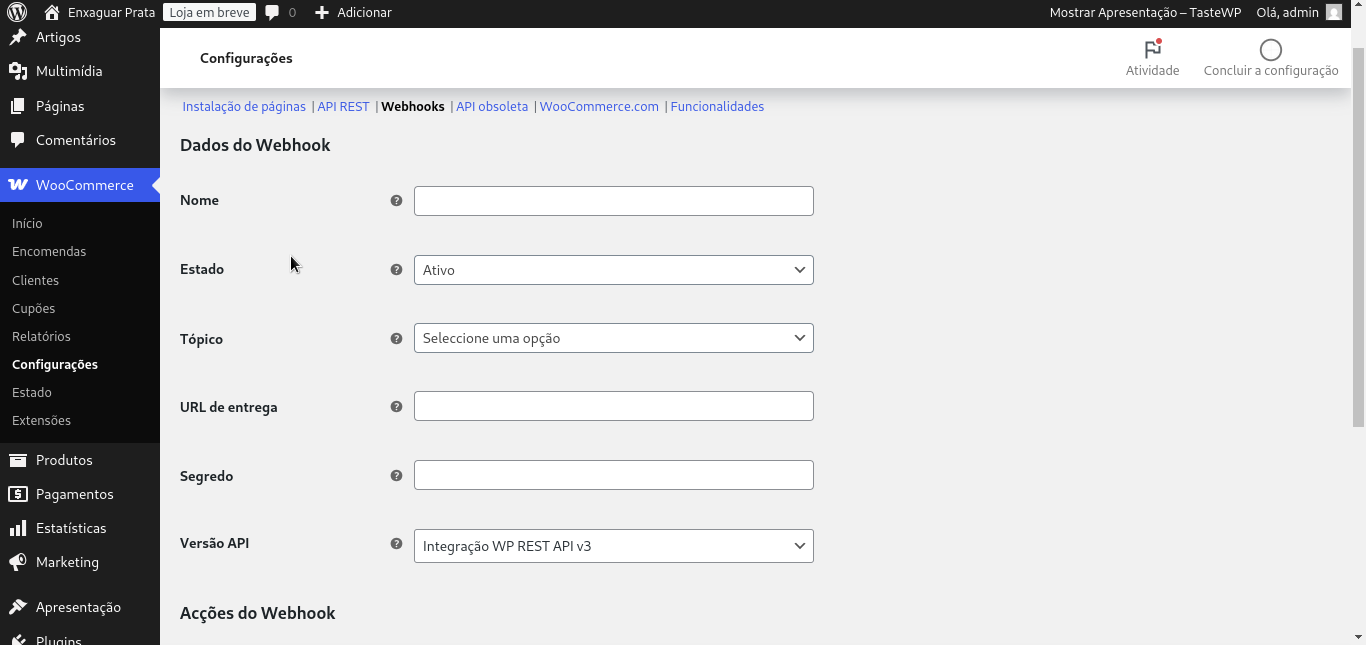
- Fill in the Name field for the integration.
- In the WooCommerce panel, paste the connection URL copied in the previous step in the Delivery URL field.
- Select the corresponding event:
- For the first webhook, select “Order Created”
- For the second webhook, select “Order Updated”
- Mark the status as “Active”.
- Click on Save Webhook to finalize the configuration.
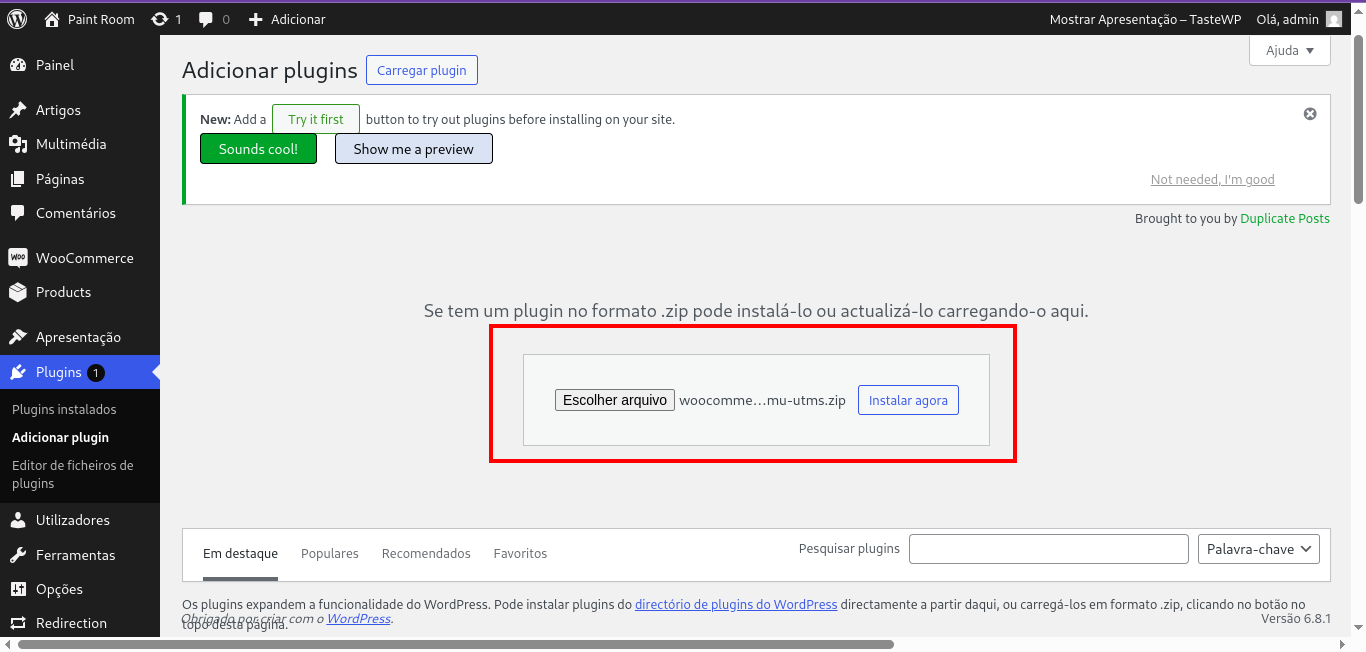
Installing the UTMs plugin for WooCommerce
- Download the plugin by clicking here
This file is in
.zip format, ready to be imported into the WordPress panel.- Access the WordPress panel
- Log in to the administrative panel of your WordPress site.
- Go to Plugins → Add New.
- Click on the “Upload plugin” button at the top of the page.

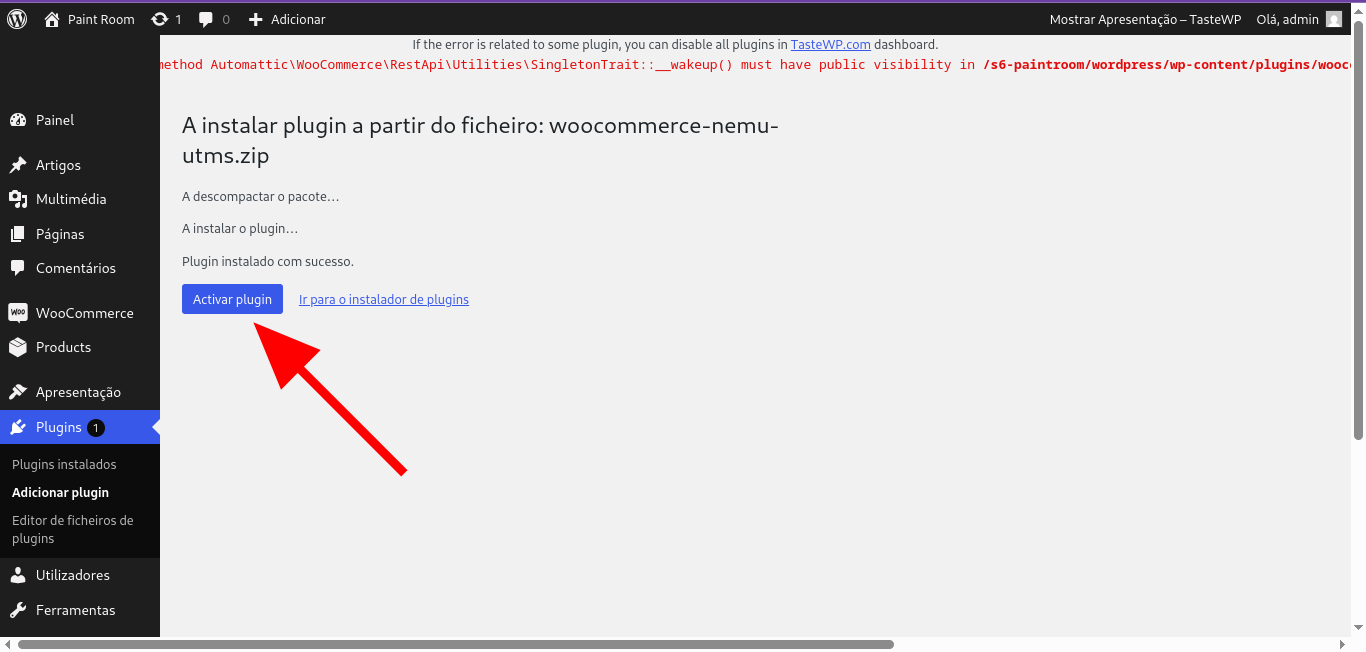
- Import and activate the plugin
- Click on “Choose file” and select the
.zipfile you downloaded. - Click on “Install now”.
- After installation, click on “Activate plugin”.